How Do You Wire a Fuel Gauge in 7 Easy Steps
Many vehicle owners find wiring a fuel gauge to be a bit intimidating, especially if you’re not familiar with automotive electronics. You’re not alone—this can seem tricky at first, but with the right guidance, it’s completely doable.
If you’re looking to get accurate fuel readings and avoid those frustrating guesswork moments, wiring your fuel gauge is a great place to start.
To wire a fuel gauge in 7 easy steps, start by gathering the necessary tools and materials, including a compatible gauge, wiring supplies, and testing devices.
Identify the correct terminals on your gauge and sender, then connect the sender wire to the ‘S’ terminal and verify it’s grounded properly.
Power the gauge from a switched 12V source, secure all connections, and use a multimeter to test the system’s functionality.
Complete the process by calibrating the gauge for accurate readings, and if you keep going, you’ll master every step.
Key Takeaways
- Identify and connect the sender wire to the gauge’s “S” terminal securely.
- Then, connect the fuel gauge’s power to a switched 12V ignition source.
- Ground the gauge to an unpainted metal surface for proper operation.
- Use appropriate gauge wiring and make sure to insulate all connections with heat shrink or electrical tape.
- Finally, test the system with a multimeter, and then calibrate by filling the tank to verify the readings are accurate.
Gather Tools and Materials for Fuel Gauge Wiring
Before beginning your fuel gauge installation, you need to gather all the necessary tools and materials. Proper wiring is vital for a secure and reliable connection.
Start with a compatible, high-quality fuel gauge designed for your vehicle’s specifications. If your tank lacks a sender unit, obtain one suited for your setup.
Prepare insulated electrical wire, preferably 16 or 18 gauge, suitable for automotive wiring, to guarantee durability. Gather wiring tools like wire strippers, crimp connectors, and soldering equipment for secure connections.
Also, have a multimeter on hand to test connections, along with electrical tape, heat shrink tubing, a screwdriver, and a wrench set for installation and testing.
Having these tools and materials ready makes your wiring process smoother and helps prevent issues later.
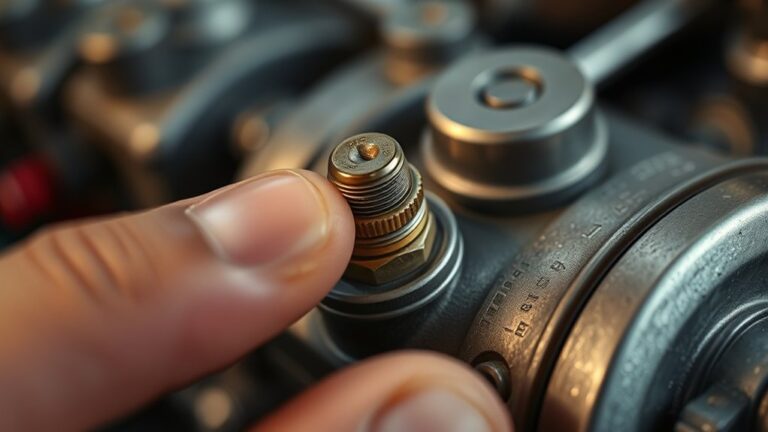
Identify Fuel Gauge and Sender Terminals
Start by checking the terminals on your fuel gauge and sender unit. Look for markings, shapes, or color codes that show what each terminal does.
The gauge’s terminals usually include IGN (“+”), GND, and S (“Sender”). The sender has two terminals for signal and ground.
Correctly identifying these ensures you connect everything properly. This way, you’ll get accurate fuel readings without any hassle.
Terminal Markings and Shapes
To wire your fuel gauge correctly, it’s important to recognize its terminals accurately. They are usually marked or shaped to help you tell their functions apart.
Terminal markings can include labels, color codes, or distinctive shapes, making identification easier. Many gauges have three terminals labeled “IGN” (+), “GND,” and “S” (Sender), often with specific shapes or engraved symbols.
Inside the fuel tank, sender units also have distinct signal and ground terminals. These are often marked or shaped differently to avoid confusion. Proper markings help prevent wiring mistakes and ensure correct installation.
Use the table below to identify terminal markings and shapes:
| Terminal | Markings / Shapes |
|---|---|
| Ignition (+) | Labeled “IGN” or marked with a plus sign (+) |
| Ground | Labeled “GND” or with a ground symbol |
| Sender | Marked “S” or shaped distinctly for sender connection |
Gauge Terminal Functions
Understanding the functions of the gauge terminals is key to wiring things correctly. The gauge terminals mainly include three connections: IGN (“+”), GND, and S (“Sender”).
The IGN terminal gets power from your vehicle’s electrical system, which powers the gauge. The GND terminal needs to be connected to a grounded metal surface to complete the circuit. The sender terminal receives the signal from the fuel level sender inside the tank.
Properly identifying these terminals ensures that power flows correctly and the sender’s signal is accurately transmitted. If you misidentify or miswire them, the gauge might not work right or could get damaged.
Double-checking each terminal’s function helps you wire the fuel gauge properly. This guarantees reliable readings and safe operation of your system.
Sender Terminal Identification
Identifying the sender terminals on your fuel gauge and sender unit is essential for wiring everything correctly. The fuel gauge usually has three terminals labeled IGN (“+”), GND, and S (“Sender”). The sender unit inside the tank typically has two terminals: one for the signal and one for ground.
Proper identification often depends on markings, shapes, or color codes on both the gauge and sender. To connect the sender, remember these key points:
- The sender terminal on the gauge connects to the sender unit in the tank, which varies resistance based on fuel level.
- The IGN terminal should connect to a 12V switched power source.
- The GND terminal connects to a chassis ground, completing the circuit.
Getting these sender terminals right is crucial for accurate fuel level readings.
Learn Wiring Diagrams and Safety Tips
Before connecting your fuel gauge, it’s important to get familiar with wiring diagrams specific to your vehicle model. These diagrams show how power, ground, and sender wires should be routed, helping you avoid incorrect connections.
Use the diagram to clearly identify terminals on both the gauge and sender unit. Here’s a quick reference to guide you through the process:
| Step | Action |
|---|---|
| 1 | Confirm terminal labels on the fuel gauge and sender. |
| 2 | Follow the wiring diagram for proper routing. |
| 3 | Connect power to a switched 12V source. |
| 4 | Ground the gauge to clean, unpainted metal. |
| 5 | Test connections with a multimeter to ensure safety. |
Learning your wiring diagram helps you install everything safely and correctly, reducing the risk of damage or malfunctions.
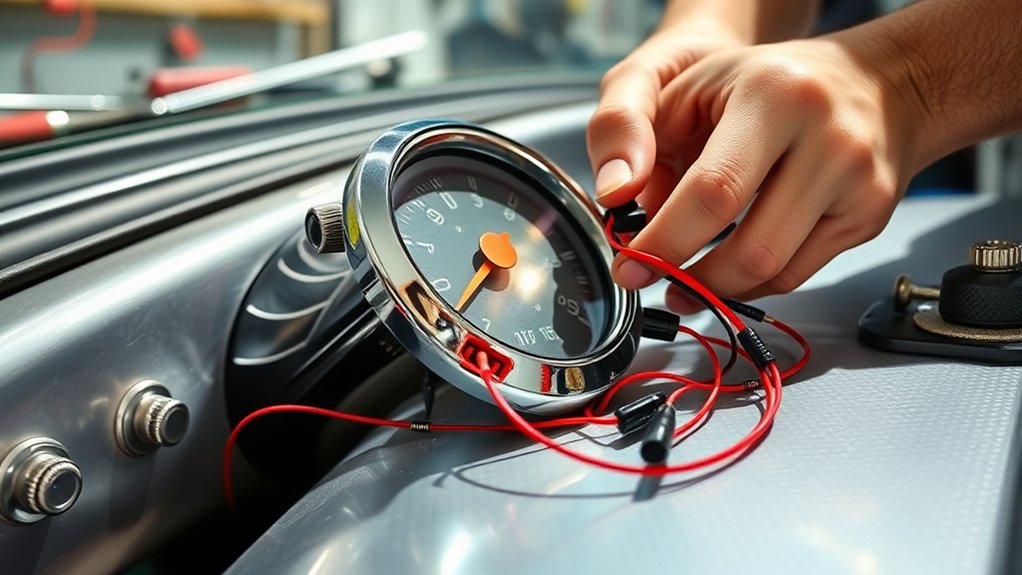
Connect Sender and Fuel Gauge Wires Correctly
Connecting the sender wire from your fuel tank’s sender unit to the “S” terminal on the fuel gauge is simple, but it’s important to do it right. Proper wiring ensures accurate readings and safe operation.
First, find the “S” or “Sender” terminal on the gauge and securely connect the sender wire. Make sure there are no loose or exposed connections. Use the correct gauge wire (18-22 AWG) for reliable signal transmission.
Securely connect the sender wire to the “S” terminal using 18-22 AWG wire for reliable signal transmission.
Check that the sender wire is grounded properly at the tank’s grounding point or through the sender unit to complete the circuit. Before final assembly, test the wiring continuity with a multimeter for accuracy.
Ensure all connections are secure and insulated to prevent short circuits. Using the proper gauge wire helps maintain signal integrity, and testing with a multimeter verifies the wiring is correct before finishing up.
Power the Fuel Gauge and Establish Ground Connections
Have you confirmed that your fuel gauge receives power from a reliable source? Connect the power wire to a 12V ignition-switched source, so the gauge only works when the vehicle is on.
For the ground wire, attach it to a clean, bare metal surface or the negative terminal of the battery. Using a star washer or multiple grounding points can improve conductivity and reduce resistance.
Avoid grounding the gauge to painted or rusted surfaces, as this can cause poor electrical contact. Make sure all ground connections are secure, tight, and free of corrosion.
Proper grounding helps ensure accurate fuel level readings and reliable operation of your fuel gauge system.
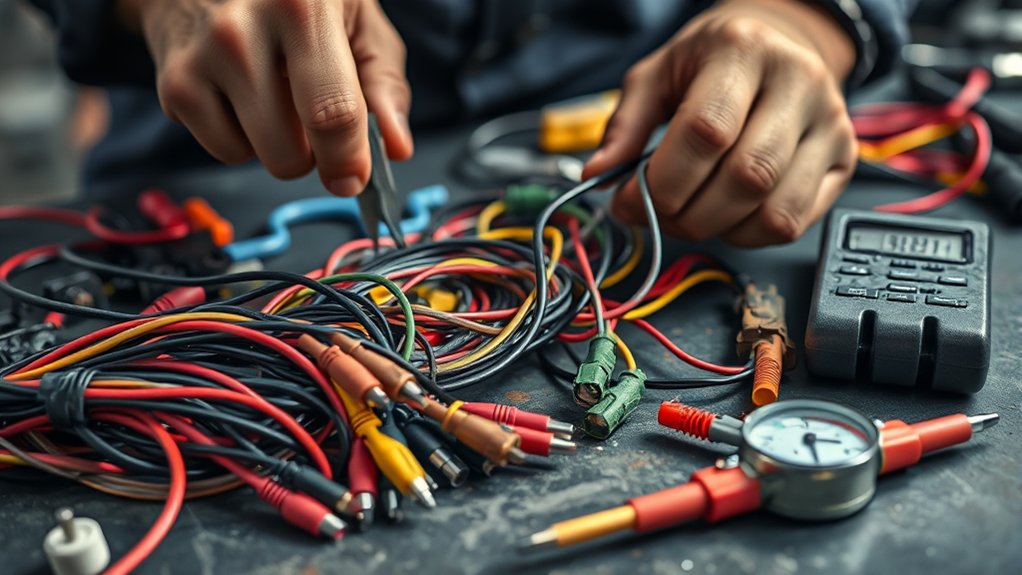
Test and Calibrate Your Fuel Gauge System
To guarantee your fuel gauge provides accurate readings, start by testing the system with a multimeter. Measure the voltage at the fuel sender and gauge terminals during testing to ensure proper signal flow.
Fill the tank to known levels like ⅓, ⅔, and full, and record the corresponding voltage readings from the gauge. This data helps with effective fuel gauge calibration.
Create an interpolation table in your software that links specific voltage readings to actual fuel levels, ensuring precision. Adjust the calibration settings based on your recorded data to improve accuracy.
Verify the system’s response by checking if the gauge needle or display correctly reflects changing fuel levels during testing. Proper calibration guarantees reliable fuel level readings, saving you from guesswork.
Troubleshoot Wiring and Calibration Issues
When troubleshooting wiring and calibration issues with your fuel gauge, start by inspecting all connections for looseness, corrosion, or damage—especially at the sender and gauge terminals. Make sure the ground wire is solid, clean, and attached to a bare metal surface to prevent false readings.
Check the wiring between the tank sender and gauge for continuity using a multimeter. Verify that proper voltage is reaching the gauge. If the fuel levels seem off, compare the sender’s resistance readings with the manufacturer’s specs to spot any malfunctions.
If needed, recalibrate the gauge by filling the tank to known levels and recording changes in voltage or resistance. Update the calibration table accordingly. Proper wiring, a solid ground, and accurate calibration are key for reliable fuel level readings.
Frequently Asked Questions
How Do You Wire up a Fuel Gauge?
You wire up a fuel gauge by connecting its power wire to a 12V ignition source. Then, attach the ground wire to a clean, bare metal surface.
Next, connect the sender wire from the fuel tank to the gauge’s “S” or “Sender” terminal. Make sure all connections are tight, insulated, and away from heat or moving parts.
Before testing, double-check that everything is properly connected. This will help ensure accurate readings and prevent any issues.
How Many Wires Does a Fuel Gauge Have?
A fuel gauge usually has two or three wires. One wire provides power, typically connected to the ignition switch.
Another wire connects to the fuel sender inside the tank to read the fuel level. Some gauges have a third wire for illumination, so you can see the gauge at night.
Wires are often color-coded, which makes it easier to identify and connect each one correctly.
How to Wire an Auto Meter Fuel Gauge?
Wiring an Auto Meter fuel gauge is pretty simple and important for getting accurate readings. First, connect the power wire to a switched 12V ignition source. Make sure it only gets power when your vehicle is on.
Next, attach the ground wire to a clean metal surface or the chassis. Then, connect the sender wire to the signal terminal on the fuel tank sender unit.
Double-check all your connections to make sure they’re tight and secure. Finally, turn on your vehicle to test the gauge and make sure everything works properly.
How to Use a Wire Gauge Step by Step?
You use a wire gauge by first choosing the right size for your current load. Usually, 16 or 18 AWG works well for fuel gauges.
Next, measure the existing wire with a wire gauge tool or chart to check its diameter.
Then, cut your wire to the needed length and strip off the insulation.
Compare the wire’s thickness to the gauge to make sure it matches.
Always pick a gauge that matches or exceeds what’s recommended for safety and proper current flow.
Conclusion
Think of wiring your fuel gauge like tuning a fine instrument—you want all the parts working together smoothly. I once helped a friend fix his boat’s gauge, and once the wiring was correct, it was like flipping a switch from darkness to clarity.
Just like a well-tuned instrument produces beautiful music, a correctly wired fuel gauge gives reliable readings. Take your time, follow the steps carefully, and you’ll ensure your vehicle runs smoothly with accurate fuel info each time.
By wiring your fuel gauge properly, you’re making sure it functions perfectly every time you check your fuel level. Proper wiring is key to avoiding false readings and keeping everything working as it should.