How Tight Should an Oil Filter Be?
Many car owners find it tricky to get their oil filters just right—tight enough to prevent leaks, but not so tight that they damage the filter or the engine. You’re not alone; this is a common worry when doing your own oil change. Getting the proper tightness is key to ensuring your engine stays healthy and leak-free.
When tightening your oil filter, you should turn it until the gasket just makes contact with the surface, then tighten it about 3/4 of a turn by hand. Avoid over-tightening to prevent damage and leaks, but make sure it’s snug enough to seal properly.
Using a torque wrench can help make certain you’re applying the correct amount of force. To learn more about the best practices for secure installation, keep exploring these tips.
Key Takeaways
– Hand tighten the filter until the gasket just touches the mounting surface.
Then, give it about 3/4 of a turn to make sure it’s snug.
If you have a torque wrench, use it to tighten the filter to the manufacturer’s recommended torque.
This helps you get the right tightness without going overboard.
Be careful not to over-tighten, as that can damage the gasket, cause deformation, or even strip the threads.
After installing, check for leaks.
If you see any, give the filter a slight re-tighten.
Why Proper Oil Filter Tightening Matters
Proper oil filter tightening is essential because it guarantees a secure seal that prevents oil leaks and keeps your engine running smoothly. When you tighten the oil filter properly, usually by hand tight, you ensure the gasket makes a proper seal without risking damage.
Most experts recommend about 3/4 turn after gasket contact to prevent leaks. Over-tightening can damage the gasket or threads, making future removal difficult and risking engine damage.
Using excessive force or tools can deform the filter or cause it to become stuck, leading to costly repairs. Regularly checking for leaks after installation confirms you’ve tightened the oil filter correctly.
How Tight Should You Tighten Your Oil Filter?
How tight you should tighten your oil filter is a common question among vehicle owners.
Generally, hand tightening the oil filter until it’s snug is enough—no need for a torque wrench. Most experts suggest turning the filter about three-quarters of a turn after the gasket touches the base to ensure a good seal.
Be careful not to over-tighten because that can damage the gasket or make it tough to remove later. Applying too much force isn’t necessary.
Before installing, putting a little oil on the gasket helps create a better seal with less tightening.
The main thing is to tighten the oil filter by hand consistently and then check for leaks afterward.
This way, you get a secure fit without risking damage to the seal or the filter itself.
How to Properly Tighten Your Oil Filter for a Good Seal
To properly tighten your oil filter, start by hand tightening it until the gasket touches the surface. Then, give it an extra three-quarters turn.
Applying a little clean oil to the gasket beforehand helps ensure a good seal and makes tightening easier. After installing, check for leaks and tighten slightly more if needed.
Just be careful not to over-tighten, as that can cause damage.
Hand Tightening Technique
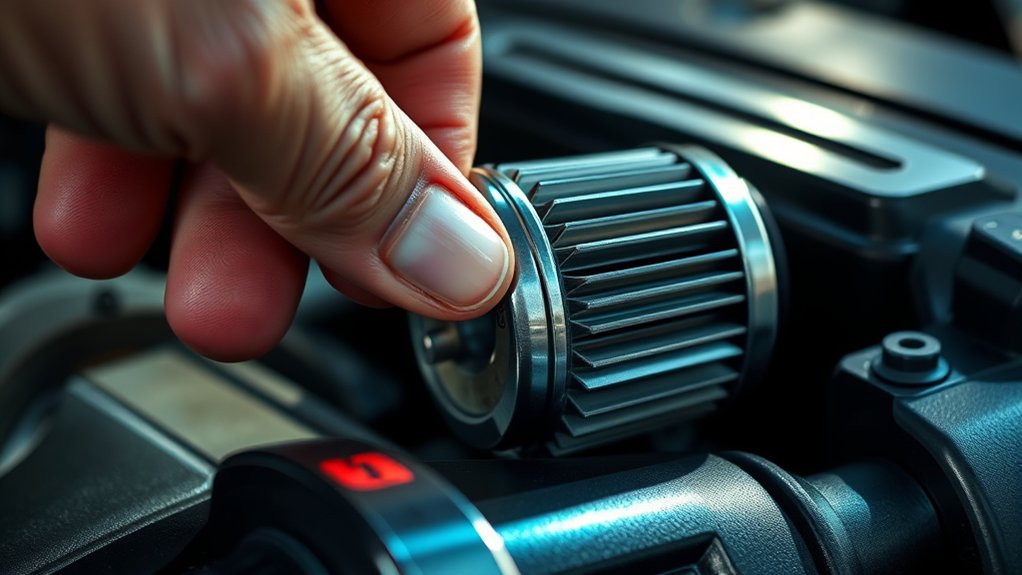
When tightening your oil filter by hand, start turning it until the gasket just touches the base of the mounting surface. This initial hand tightening makes sure the gasket contacts properly for a good seal.
Once you’ve made contact, give it an extra 3/4 of a turn to snug it up securely. Applying a little clean oil to the gasket beforehand helps improve the seal and reduces the chance of leaks.
Use your hand grip, or a cloth or sandpaper if greasy, to tighten the filter without overdoing it. The goal is to make the oil filter snug but not too tight so it’s easy to remove during your next oil change and still seals properly.
Proper Seal Confirmation
Ensuring a proper seal with your oil filter requires careful attention during installation. First, check that the O-ring is clean, undamaged, and properly seated, removing any old gasket to prevent leaks.
Lightly lubricate the new O-ring with fresh oil to help it slide smoothly and avoid twisting. Hand tighten the filter until the gasket contacts the mounting surface, then give it about 3/4 turn to ensure a snug fit.
Avoid using tools to tighten beyond hand-tightening, as over-tightening can damage the gasket or make removal difficult. After installation, start the engine and inspect for any signs of leaks.
If you notice oil seepage, tighten the filter slightly to achieve a proper seal, ensuring leak prevention and reliable performance.
Risks of Over-Tightening Your Oil Filter
Over-tightening your oil filter can damage or fail the gasket, which often leads to leaks.
It can also deform or crush the filter, making it tough to remove and risking damage to engine parts.
Using too much force might strip threads or harm the mounting surface, which can increase repair costs.
Gasket Damage Risks
Applying too much force when tightening your oil filter can quickly lead to gasket damage. Over-tightening causes the rubber gasket to deform, crush, or misalign, which can break the seal.
When this happens, oil can leak past the gasket, causing leaks on your engine or shop floor. Too much torque might also damage the filter housing or threads, making it hard to remove in the future.
To avoid this, hand tighten the oil filter until it’s snug—there’s no need to use excessive force. Here’s a quick look at the risks:
| Risk | Cause | Result |
|---|---|---|
| Gasket damage | Over-tightening | Leaks and seal failure |
| Deformed gasket | Excessive torque | Oil leaks |
| Difficult removal | Damaged threads | Stripped or stuck filter |
Proper tightening helps prevent gasket damage and keeps your engine sealed.
Difficult Removal Process
When you tighten an oil filter too much, it can become really hard to remove later, which can be frustrating and even cause damage.
Over-tightening makes the gasket difficult to remove and can increase the risk of damaging the filter or engine parts when you try to take it off.
Using excessive force to loosen an over-tightened filter might strip the threads or break the filter housing, leading to costly repairs.
Mechanics often find that over-tightened filters are tough to unscrew and might need special tools or risk damaging the engine.
To avoid this, just hand tighten the filter about one full turn after the gasket touches. This makes it easier to remove during your next oil change.
Engine Component Damage
Tightening your oil filter too much can cause serious damage to engine components. Make sure you don’t apply excessive force during your oil change, as over-tightening can deform or crack the gasket, leading to leaks.
Excessive pressure may also damage the filter’s threads or the engine’s mounting surface, which can be costly to repair. When you tighten beyond the recommended torque, removing the filter becomes difficult and risks damaging both the filter and engine parts.
Applying too much pressure can also compress the gasket excessively, reducing its sealing ability and causing leaks over time. Register to reply if you’re unsure about proper torque levels.
Properly tightening your oil filter ensures a secure seal without risking damage to essential engine components.
Removing and Replacing the Oil Filter Safely
Removing and replacing your oil filter safely is key to preventing leaks and keeping your engine running smoothly. Start by carefully taking off the old filter, making sure the old O-ring comes off completely so you don’t have any future leaks.
Removing the old filter completely prevents future leaks and keeps your engine running smoothly.
Use a clean cloth to wipe around the mounting surface, preparing it for the new filter. Before installing, put a small amount of fresh oil on the new O-ring to help create a good seal.
Hand tighten the new filter until the gasket just touches the mounting surface, then give it about a 3/4 turn to secure it firmly. After installing, start the engine and check for leaks to make sure everything is secure and installed correctly.
Properly replacing the filter helps prevent issues and keeps your engine running efficiently.
When to Use a Torque Wrench or Follow Manufacturer Specs
Using a torque wrench is essential only if your vehicle’s manufacturer specifies an exact torque value for the oil filter. If they do, follow that specification closely, usually found in the service manual. This guarantees a proper seal without risking damage or leaks.
If no torque is specified, a good rule of thumb is to hand-tighten the filter, then give it an additional 3/4 turn. This method typically provides enough tightness without overdoing it. Over-tightening can deform the gasket or damage threads, leading to leaks.
Regularly check your vehicle’s guidelines to confirm whether a specific torque setting is needed. When in doubt, using a torque wrench helps you achieve the right tightness, preventing future issues and ensuring a proper seal.
Frequently Asked Questions
How Tight Should You Put an Oil Filter On?
You should tighten the oil filter by hand until the gasket touches the surface. Then, give it about three-quarters of a turn.
Use firm but gentle pressure without tools to avoid over-tightening, which can damage the gasket or threads.
Most importantly, check for leaks after installation to make sure it’s snug enough. Remember, hand tightening is usually enough unless the manufacturer specifies a torque setting.
Is Hand Tight Enough for an Oil Filter?
Yes, hand tightening is enough for an oil filter. Think of it like sealing a treasure chest—you want it snug but not so tight you risk damaging it.
Tighten until the gasket contacts the base and give it a 3/4 turn. This ensures a proper seal without overdoing it.
Over-tightening can cause leaks or damage, so trust your hand for a secure fit. Remember to check for drips regularly.
What Kind of Oil Filter Does a Lexus RX 350 Take?
The Lexus RX 350 uses a spin-on oil filter, usually the Toyota 04152-YZZA1 or a compatible aftermarket filter that meets OEM specs.
Make sure the filter you choose fits the engine’s size, thread type, and filtration capacity. It’s always a good idea to double-check with your owner’s manual or dealer.
This helps confirm the exact model for your vehicle’s year and engine variant, ensuring proper fit and function.
How to Tell if an Oil Filter Is Too Loose?
Did you know that over 40% of engine failures are linked to oil leaks caused by loose filters?
To tell if your oil filter is too loose, check for oil leaks or puddles underneath your vehicle.
If you can easily turn it by hand or feel wobbling, that’s a sign it’s not tight enough.
Also, listen for hissing sounds or notice a drop in oil pressure, which means it probably needs tightening.
Conclusion
Just like a finely tuned instrument, your engine depends on the right tension to run smoothly. Tighten your oil filter properly—neither too loose nor too tight—and your engine will thank you.
Think of it like threading a needle; if it’s too tight, you might damage the filter or gasket. If it’s too loose, leaks can sneak in and cause problems.
When you’re unsure, always follow the manufacturer’s specifications. Properly tightened oil filters help keep your engine in top shape and prevent costly issues down the road.