How to Do and Adjust the New Fuel Pressure Regulator in 10 Easy Steps
Many car enthusiasts and DIY mechanics have faced the frustration of dealing with fuel pressure issues. If you’ve ever struggled to install or adjust a fuel pressure regulator, you’re not alone. Getting it right can seem tricky, but with a little guidance, it becomes much easier.
To install and adjust a new fuel pressure regulator, start by relieving the fuel system pressure. Then locate and remove the old regulator carefully. Install the new regulator, reconnect the fuel lines, and secure vacuum hoses in the correct ports.
Attach a fuel pressure gauge, start the engine, and adjust the regulator screw to reach the specified PSI range. Double-check all connections, guarantee proper vacuum line placement, and verify stable pressure.
If you want to master each step, keep going for detailed guidance.
Key Takeaways
- First, relieve the fuel system pressure and disconnect the vacuum line before removing the old regulator.
- Then, install the new fuel pressure regulator securely onto the fuel rail. Make sure all connections are clean and free of debris to prevent leaks.
- Next, connect the fuel pressure gauge to the test port. Turn the ignition on, but don’t start the engine yet.
- Adjust the regulator screw to reach the manufacturer’s specified fuel pressure, which is usually between 43 and 58 PSI.
- After that, reconnect the vacuum line. Start the engine and check the fuel pressure to make sure it stays stable during idle and when you increase RPMs.
What Is a Fuel Pressure Regulator and Why Is It Important?
Have you ever wondered how your engine keeps running smoothly and efficiently? The fuel pressure regulator is a key part of that process. It controls the fuel pressure between the fuel rail and the injectors, making sure the fuel delivery is just right.
In port fuel-injected engines, you’ll find it on the fuel rail. It adjusts pressure based on what the engine needs at any given moment. This adjustment is crucial for good engine performance, helping to prevent issues like misfires, poor throttle response, and excess emissions.
Using a fuel pressure gauge is a smart way to keep an eye on the pressure and ensure it stays correct. When the regulator isn’t working right or is misadjusted, fuel pressure can become too high or too low. This can hurt efficiency, fuel economy, and even the engine’s lifespan.
Monitoring fuel pressure helps prevent engine issues and extends its lifespan.
A properly functioning fuel pressure regulator keeps your fuel system running smoothly and helps your engine perform at its best.
What Tools and Safety Precautions Do You Need?
Before working on your vehicle’s fuel pressure regulator, gathering the right tools and safety precautions is essential. You’ll need a compatible fuel pressure gauge designed for Schrader valves or fuel lines to get accurate readings.
Wear safety glasses and nitrile gloves to protect against fuel spills and fumes. Always work in a well-ventilated area away from flames, sparks, or heat sources to prevent fire hazards.
Before disconnecting any lines, relieve the fuel system pressure to avoid leaks or spray. Gather essential hand tools, like wrenches and screwdrivers, beforehand for efficiency.
Here’s a quick overview:
| Tools | Safety Precautions | Additional Tips |
|---|---|---|
| Fuel pressure gauge | Wear safety glasses and gloves | Work in a well-ventilated area |
| Wrenches and screwdrivers | Relieve fuel system pressure | Keep away from open flames |
| Nitrile gloves | Prevent fuel spray and leaks | Use compatible tools for fittings |
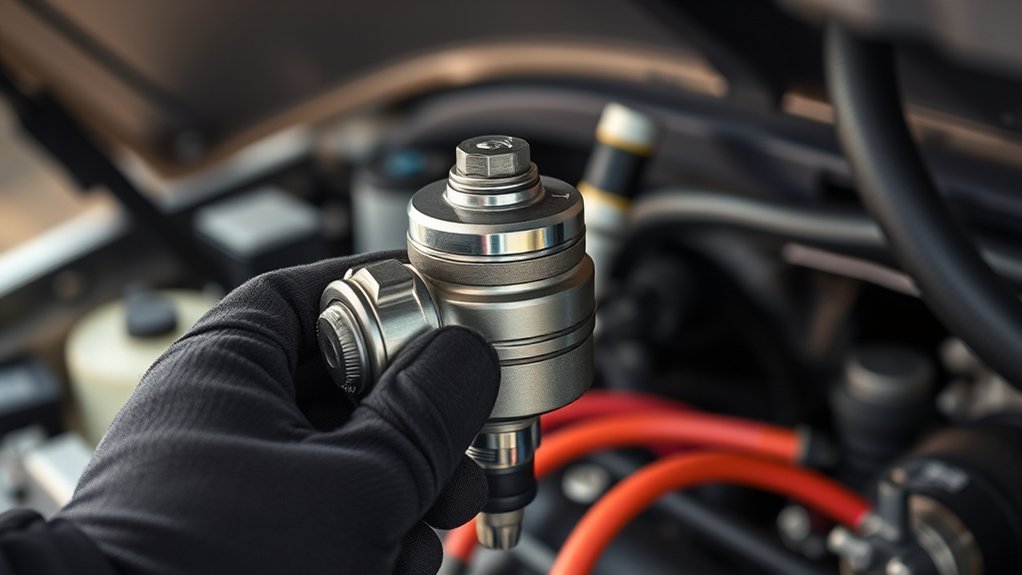
How Do You Find and Remove the Old Fuel Pressure Regulator?
To find and remove the old fuel pressure regulator, start by locating it on the fuel rail, which is usually near the fuel injectors or intake manifold.
Before removing it, relieve the fuel system pressure by removing the fuel pump fuse and running the engine until it stalls.
Next, disconnect the vacuum line from the regulator and cap it to prevent vacuum leaks.
Use wrenches to carefully loosen and disconnect the fuel line fittings attached to the regulator.
Once the fuel lines and vacuum line are removed, gently remove the regulator from its mounting position.
Inspect the area for debris or damage before installing the new regulator.
This process guarantees a safe and effective removal of the old fuel pressure regulator.
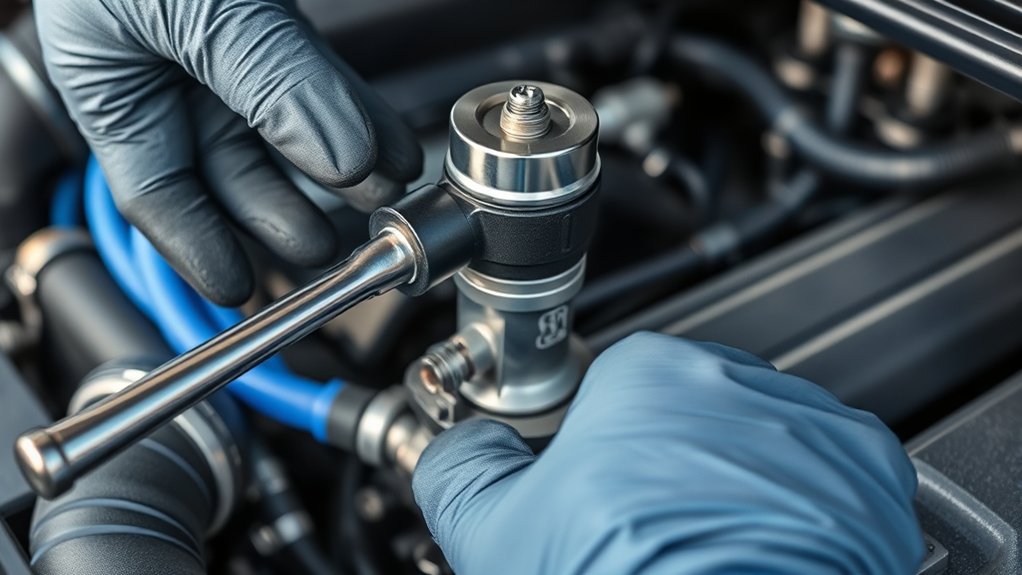
How Do You Properly Install Your New Fuel Pressure Regulator?
Start by positioning the new fuel pressure regulator onto its mounting bracket, making sure the seals are properly seated. This ensures a secure fit and prevents leaks. Carefully install the regulator, aligning all fittings correctly to avoid any misalignment that could affect pressure regulation.
Reconnect the fuel lines and vacuum hose securely, tightening fittings to manufacturer specifications to prevent fuel leaks. When installing the fuel pressure regulator, focus on ensuring all connections are tight and properly sealed to maintain consistent pressure within the fuel system.
Once installed, connect a fuel pressure gauge to the test port to verify correct pressure levels. Proper installation of the fuel pressure regulator is essential for maintaining ideal fuel pressure and ensuring your fuel system operates efficiently and safely.
How Do You Connect and Set Up Your Fuel Pressure Gauge?
Start by choosing the right fuel pressure gauge that fits your vehicle’s fuel rail. Attach the gauge securely to the test port using the correct fittings, making sure all connections are tight.
Once connected, turn the ignition on without starting the engine to read the initial pressure. Then, run the engine to monitor the pressure and make any necessary adjustments.
Selecting the Right Gauge
Choosing the right fuel pressure gauge is essential for accurate testing, so verify it’s compatible with your vehicle’s fuel system. Make sure the gauge has the correct fittings or adapters to match your test port, usually a Schrader valve on the fuel rail.
Check that the connection is secure and leak-proof before proceeding. Once connected, you might need to calibrate the gauge following the manufacturer’s instructions to get precise readings.
Proper calibration helps you measure fuel pressure accurately and avoid errors during adjustments. A compatible, well-fitted gauge not only gives reliable data but also makes the testing process easier.
Selecting a quality gauge designed for your vehicle’s specs will give you confidence when verifying and adjusting your fuel pressure system.
Connecting to Fuel Line
Wondering how to connect your fuel pressure gauge correctly? First, find the test port on your fuel rail. Use the right fittings to connect the gauge securely to the fuel line, making sure it’s tight and leak-free.
Attach the gauge’s fitting to the test port, ensuring it’s snug to prevent fuel spray or pressure loss. If your setup has a pressure regulator, check that the fittings are compatible and sealed properly.
For models with a vacuum hose, connect it to the designated port on the pressure regulator to keep the pressure correct. Before starting the engine, double-check all connections to ensure they’re tight.
A secure connection gives you accurate readings and keeps everything safe during testing.
Reading and Adjusting
How do you properly read and set up your fuel pressure gauge to guarantee accurate measurements? First, connect the gauge to the test port on the fuel rail with the correct adapter. Make sure the engine is off and relieve system pressure to prevent fuel spray.
Next, turn the ignition on without starting the engine to pressurize the system and check the initial pressure reading. Start the engine and let it reach normal operating temperature. Then, observe the gauge for a steady pressure.
To adjust, turn the regulator screw while watching the pressure reading until it falls within the manufacturer’s specified range. Keep an eye on the gauge to avoid over-pressurizing or under-pressurizing the system.
How Do You Adjust Fuel Pressure to the Correct Setting?
To adjust the fuel pressure to the correct setting, start by disconnecting the vacuum hose from the fuel pressure regulator and capping it off to establish a static pressure baseline.
Next, start your engine and let it reach normal operating temperature, then watch the fuel pressure gauge. Turn the regulator’s screw clockwise to increase pressure or counter-clockwise to decrease it, aiming for the manufacturer’s specified range, usually 43-58 PSI.
Start your engine, let it warm up, then adjust the regulator screw for proper fuel pressure within 43-58 PSI.
Make sure the engine is warmed up before you start adjusting. Use a reliable fuel pressure gauge for accuracy.
Make small adjustments to avoid overshooting your target. Recheck the pressure after each change to ensure you’re on the right track.
Finally, confirm the pressure stays stable during both idle and when you increase RPMs.
How Do You Reconnect Vacuum Lines and Finalize the System?
Reconnect the vacuum line to the fuel pressure regulator’s vacuum port securely, making sure there are no cracks or leaks in the hose. Use a new clamp or tighten the existing one to prevent disconnection during engine operation.
Confirm that the vacuum line is attached to the correct port on the regulator, following your vehicle’s factory setup. Once reconnected, start the engine and observe the fuel pressure to guarantee it stays within the specified range with the vacuum line in place.
Inspect the vacuum line and connections for leaks or damage, replacing any hoses that are compromised. Properly reconnecting the vacuum line and securing the system helps maintain accurate fuel pressure and prevents leaks, ensuring your fuel pressure regulator functions correctly.
How Can You Troubleshoot Common Fuel Pressure Regulator Issues?
Diagnosing common fuel pressure regulator issues involves paying close attention to how your vehicle runs and how the fuel system behaves. If you notice the fuel pressure readings fluctuating, it might be a sign of a bad regulator diaphragm or a clogged fuel filter.
Pressure creep, where the pressure keeps rising after you’ve adjusted it, often points to restrictions in the return line or small orifices. If you smell raw fuel or find liquid in the vacuum hose, it could mean the diaphragm inside the regulator has ruptured.
Inconsistent fuel pressure during operation may be caused by a failing pump, leaks in the fuel lines, or a damaged regulator. When troubleshooting, check for leaks in the fuel lines or connections, restrictions in the return line, damage to the vacuum hose, internal damage to the regulator, or signs of pressure creep during testing.
Doing proper diagnostics will help you identify if there’s an internal issue with the fuel pressure regulator.
How Do You Maintain Optimal Fuel Pressure and Performance?
To keep your fuel system running smoothly, regularly check and adjust the fuel pressure based on your manufacturer’s specs. Using a quality gauge makes it easier to spot fluctuations early and keep performance consistent.
Make sure your vacuum line is intact and in good condition. Also, replace filters and pumps as needed to prevent pressure issues that could affect your engine’s performance.
Regular System Checks
Regular system checks are essential for maintaining ideal fuel pressure and ensuring your engine runs smoothly. Regularly inspect your fuel system for leaks, cracks, or damage to keep fuel pressure consistent.
Use a fuel pressure gauge to check that pressure stays within the manufacturer’s specified range during operation. It’s also important to replace the fuel filter at recommended intervals to prevent contaminants from affecting fuel pressure regulation.
Examine the vacuum line attached to the fuel pressure regulator for cracks, blockages, or leaks that could cause pressure fluctuations. Furthermore, monitor engine performance for signs like rough idling, poor acceleration, or black smoke, which may indicate issues with fuel pressure.
Staying vigilant helps you maintain optimal fuel system function and engine performance.
Proper Component Maintenance
Maintaining ideal fuel pressure and engine performance requires regular care of the fuel system components. Check the fuel pressure regulator and lines for leaks, cracks, or damage to keep pressure steady.
Keep the fuel system clean by replacing filters and using good quality fuel. This helps prevent contamination that could affect the regulator’s function.
Periodically test the fuel pressure with a reliable gauge and adjust it to match the manufacturer’s specs if needed.
Also, make sure vacuum lines connected to the regulator are free of obstructions or leaks, as they directly impact pressure regulation and engine response.
Staying proactive ensures the fuel pressure regulator works properly, supporting smooth engine operation and avoiding issues caused by faulty parts.
Accurate Pressure Adjustments
Adjusting the fuel pressure accurately ensures your engine runs smoothly and efficiently. Use a high-quality pressure gauge to get precise readings for this process.
Start by disconnecting the vacuum hose to set a static pressure. Then, adjust the regulator screw until the gauge shows a reading within the manufacturer’s specified range, usually between 43-58 PSI.
Make small, incremental adjustments and let the system stabilize before making further changes. Reconnect the vacuum hose afterward and check that the pressure stays steady during engine revs and temperature changes.
Consistent fuel pressure is key to optimal performance and helps prevent issues like fuel delivery fluctuations. Always verify your readings with a reliable, high-quality pressure gauge.
What Are the Most Common Questions About Fuel Pressure Regulators?
Many people have questions about fuel pressure regulators because understanding how they work is crucial for engine performance. A common concern is how to properly set and adjust fuel pressure to ensure the correct fuel pressure for your vehicle.
You might wonder about the symptoms of a faulty fuel pressure regulator, like rough idling or fuel leaks. Many ask what the correct fuel pressure range is for their specific fuel system, as it varies by vehicle.
Troubleshooting issues like pressure creep or fluctuating fuel pressure readings is also frequent. Furthermore, you may be curious about the differences between regulator types, such as bypass and blocking styles, and which is best for your application.
Knowing these details helps you maintain ideal engine performance.
Frequently Asked Questions
How to Properly Adjust a Fuel Pressure Regulator?
To properly adjust a fuel pressure regulator, start by disconnecting the vacuum line and capping it. Then, start your engine and let it warm up.
Turn the adjustment screw slowly—clockwise to increase pressure, counter-clockwise to decrease—while watching the gauge. Reconnect the vacuum line and confirm the pressure stays within specs.
Make small adjustments, rechecking after each one, until you get the correct fuel pressure.
How Do I Adjust the Pressure Regulator?
You turn the adjustment screw like a master chef seasoning a dish, making tiny, precise turns—just 1-2 PSI at a time. First, disconnect the vacuum line, then start your engine and let it warm up.
Use a screwdriver or hex key to turn the screw clockwise to boost pressure or counter-clockwise to dial it down. Reconnect the vacuum line and make sure the pressure stays within the factory specs.
What Psi Should a Fuel Pressure Regulator Be?
You should set your fuel pressure regulator between 43 and 58 PSI, depending on your vehicle and engine modifications.
For stock systems, check the manufacturer’s manual or label for the exact PSI.
If you have a high-performance engine, aim for around 58 PSI for peak fuel delivery.
Remember to disconnect the vacuum line when checking pressure to get an accurate static reading, ensuring your engine runs smoothly.
What Is the Proper Way to Adjust Engine Fuel Control Pressure?
You should start by disconnecting the vacuum line from the fuel pressure regulator and capping it to set static pressure.
Then, start your engine and let it warm up. Turn the adjustment screw clockwise to increase pressure or counter-clockwise to decrease it, aiming for the manufacturer’s specified range.
Reattach the vacuum line, and make small adjustments until your pressure remains steady within the recommended settings.
Conclusion
Think of adjusting your fuel pressure regulator like tuning a fine instrument. Small tweaks can make a big difference in how smoothly your engine runs.
With the right tools and steps, you can confidently take control of your vehicle’s fuel system. Just stay patient and methodical, and you’ll get it working perfectly.
Remember, a properly adjusted fuel pressure regulator guarantees your engine breathes easy and runs at its best. This keeps you confidently on the road ahead.