10 Steps to Reset Check Engine Light After Changing Spark Plugs
Many car owners find the check engine light stressful, especially after changing spark plugs. You’re not alone—this is a common issue, and it can be confusing figuring out how to reset it.
Luckily, there are simple steps you can follow to clear that warning and get back on the road.
After replacing your spark plugs, you can reset the check engine light by disconnecting the battery for about 15 minutes or using an OBD-II scanner to clear fault codes.
Make sure to inspect sensors and seal any leaks first. Then, reconnect everything, start your engine, and confirm the light is off.
If it stays on, other issues might exist. Keep exploring for detailed steps that can help you troubleshoot and properly reset your system.
Key Takeaways
- Disconnect the negative battery terminal and leave it off for about 15 minutes. This helps reset the vehicle’s ECU manually.
- Next, use an OBD-II scanner to read any trouble codes. After replacing the spark plugs, clear those codes to reset the check engine light.
- Make sure all sensors, like the MAF and oxygen sensors, are properly connected and secure. Loose connections can cause the light to stay on.
- Start your vehicle and see if the check engine light turns off. If it doesn’t, try turning the ignition on and off a few times.
- Finally, drive your car for about 10 to 15 minutes. This gives the system time to re-evaluate and confirm that everything’s working properly.
Why Does the Check Engine Light Come On After Spark Plug Replacement?

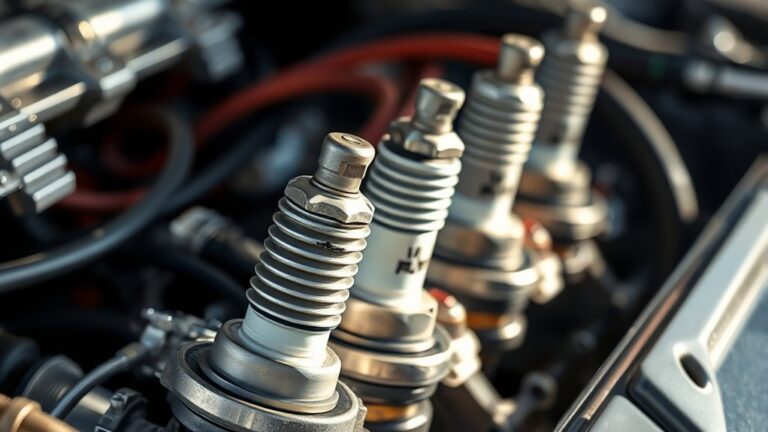
After replacing spark plugs, it’s common for the check engine light to come on. This often happens because of minor disturbances during the repair.
When you change the spark plugs, sensors like the MAF or oxygen sensors might get loose or disconnected. This can cause the engine to store trouble codes.
Replacing spark plugs can also change the air-fuel mixture readings, which might trigger the check engine light. Sometimes, the engine’s ECU needs a bit of time to recalibrate after the new plugs.
So, the light might stay on temporarily. To check if everything’s okay, you may need to reset the check engine light. Simple steps include turning the ignition on and off, disconnecting the battery, or clearing trouble codes.
Quick Steps to Prepare Your Vehicle for Resetting the Engine Light
Before resetting your engine light, gather the necessary tools and take safety precautions.
Make sure your vehicle is parked on a level surface and turned off.
Once you’re ready, you can safely disconnect the battery to reset the ECU.
Gather Necessary Tools
Gathering the right tools before starting the reset process is essential to ensure everything goes smoothly. First, make sure you have a basic set of tools like a socket wrench and safety gloves to handle any physical tasks safely.
If you plan to check codes afterward, locate and prepare a multimeter or OBD-II scanner. These tools help you read and clear error codes efficiently.
Also, gather cleaning supplies or sensor tools if you need to inspect or clean the MAF sensor or other components. Don’t forget a clean cloth or paper towels to wipe off dirt or debris from battery terminals or the engine area before reconnecting.
Having these tools ready will make the whole process smooth and hassle-free when resetting your check engine light.
Ensure Safety Precautions
Are you fully prepared to safely reset your check engine light? Before starting, make sure your vehicle is turned off and parked on a flat surface to prevent accidents.
Use insulated tools to disconnect the negative terminal of the battery. This protects you from electrical shorts. Wait at least 15 minutes after disconnecting the battery, allowing the vehicle’s computer to fully reset.
Before reconnecting, inspect the terminals and cables for corrosion or damage. Clean them if necessary to ensure a solid connection. Always wear safety gloves and eye protection to guard against sparks or contact with battery acid.
These precautions keep you safe and prevent damage to your vehicle’s electrical system. They make the reset process both efficient and secure.
How to Manually Reset the Check Engine Light by Disconnecting the Battery?
Disconnecting the battery is a simple way to manually reset the check engine light after changing your spark plugs.
First, use a wrench to carefully disconnect the negative terminal of your vehicle’s battery. Make sure it’s removed securely to prevent any electrical issues.
Leave the battery disconnected for about 15 minutes, giving your vehicle’s computer enough time to reset.
Reconnect the negative terminal tightly, ensuring it’s secure. To help the system reset, turn the ignition to the “on” position without starting the engine.
Then, start your vehicle and check if the check engine light has turned off. If it’s gone, you’ve successfully reset the light.
If it remains, further troubleshooting or scanning may be necessary.
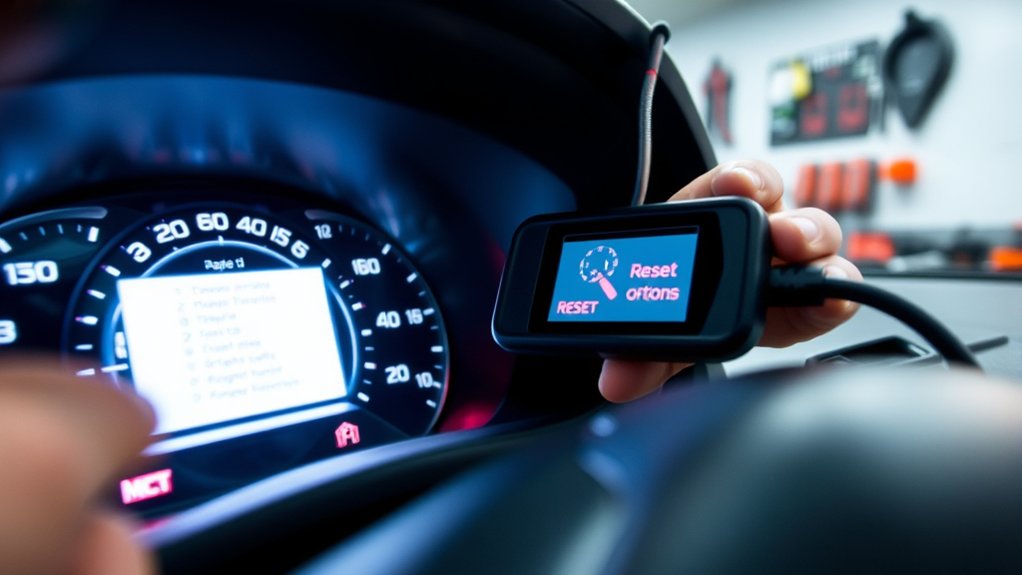
Using an OBD-II Scanner to Clear Fault Codes and Reset the Light
Using an OBD-II scanner is an easy way to clear fault codes and reset the check engine light after replacing your spark plugs.
First, plug the scanner into the port under your dashboard near the steering column. Turn the ignition to the “on” position without starting the engine.
Follow the scanner’s menu prompts to read any stored trouble codes related to the light. Once you’ve reviewed the codes, select the option to “clear” or “erase” them.
After clearing, unplug the scanner, turn off the ignition, and start your vehicle to see if the light has gone off. Drive a few miles to ensure no new codes appear and that the check engine light stays off.
This method quickly resets the system without manually disconnecting the battery.
How to Double-Check That the Engine Light Is Off After Reset
After resetting the check engine light, it’s important to make sure the reset actually worked. Start your vehicle and look at the dashboard; the light should be off.
Use an OBD-II scanner to double-check that no trouble codes are stored. This confirms that the reset was successful. Turn the ignition on and off a few times, watching the dashboard during each cycle.
The light should turn off after each cycle. Then, drive your car for at least 10-15 minutes under normal conditions so the computer can recheck everything.
Finally, start the engine and do a quick visual check of the dashboard before driving further. If the check engine light stays off during these steps, you’ve done it successfully.
If the light is still on, you might need to do some more troubleshooting.
Troubleshooting Persistent or Reappearing Check Engine Lights
If your check engine light keeps coming back, it’s a good idea to check sensors and intake leaks since these often cause persistent codes. Using an OBD-II scanner makes it simple to read and clear trouble codes to see if the problem is still there or if you need to dig deeper.
When issues keep popping up, a professional inspection can help find hidden mechanical or sensor problems that you might have missed. Sometimes, it’s just a matter of pinpointing the exact cause to get everything back on track.
Sensor and Intake Checks
When the check engine light keeps coming back even after changing your spark plugs, it’s important to check the sensor and intake system for underlying issues. Start by inspecting the Mass Airflow Sensor (MAF) for dirt or damage, and clean it with a specialized sensor cleaner to ensure accurate readings.
Next, check all vacuum hoses and intake clamps for looseness or cracks. Unmetered air leaks can trigger the light, so make sure everything is tight and in good condition. Also, examine the PCV valve for clogs or wear, since a faulty valve can cause intake problems and false codes.
Use an OBD-II scanner to see if any trouble codes still show up. Persistent codes indicate ongoing sensor or intake issues. Finally, tighten all intake connections to prevent air leaks that could cause a lean condition and turn on the check engine light.
Code Monitoring and Reset
Using an OBD-II scanner is essential for diagnosing and resetting the check engine light after replacing your spark plugs.
Start by connecting the scanner to your vehicle’s port and reading the trouble codes.
Make sure to clear all relevant codes, including sensor and intake system issues like P0174, P0171, and P1170.
After clearing, drive your vehicle for several miles so the ECU can re-evaluate sensor data and see if the light stays off.
If the check engine light comes back, re-scan to find any persistent or new trouble codes.
Keep an eye on the codes and your engine’s performance to confirm the reset was successful.
Regular checks help ensure no new issues develop and that your vehicle runs smoothly.
Professional Inspection Recommended
Persistent or reappearing check engine lights after replacing spark plugs often signal underlying issues that simple code clearing can’t fix. These problems might involve sensors, intake systems, or air-fuel mixture imbalances that need professional diagnosis.
A qualified mechanic can use advanced diagnostic tools to identify issues like vacuum leaks or faulty sensors, ensuring your engine runs properly. If codes such as P0174, P0171, or P1170 stick around, a detailed system check is essential for an accurate fix.
Seeking expert help helps avoid missing serious mechanical faults and guarantees the warning light is addressed correctly.
| Issue | Diagnostic Approach | Potential Fixes |
|---|---|---|
| Sensor Malfunction | Sensor testing with specialized tools | Replacing faulty sensors |
| Vacuum Leaks | Visual inspection and smoke testing | Sealing or replacing leaks |
| Air-Fuel Imbalance | Fuel system check and sensor calibration | Adjustments or component replacement |
Common Causes of Engine Light Issues Beyond Spark Plug Changes
While replacing spark plugs can fix certain engine issues, it’s important to remember that the check engine light can stay on due to other underlying problems.
Replacing spark plugs may not turn off the check engine light if other issues exist.
Sensors like the MAF or oxygen sensors might get disturbed during spark plug replacement, causing warning lights to stay on.
Vacuum leaks from cracked or loose intake hoses can also trigger the light, even if it’s not related to spark plugs.
Fuel system issues such as clogged injectors or a faulty pressure regulator may produce engine codes that keep the light on.
Additionally, dirty or faulty sensors, like those for intake air temperature, can cause persistent alerts.
Mechanical problems like a failing catalytic converter or exhaust leaks can activate the check engine light independently of your recent spark plug work.
Tips to Prevent Future Engine Light Triggers
To prevent future engine light triggers, regularly check and maintain sensors like the MAF and oxygen sensors to make sure they’re clean and working properly.
Sticking to high-quality fuel and avoiding engine overloads also helps keep your system running smoothly.
Additionally, inspect for leaks and make sure all connections are tight to avoid unnecessary warning lights.
Regular Sensor Checks
Regularly checking and maintaining your vehicle’s sensors is key to preventing the check engine light from popping up unexpectedly. Keep the Mass Airflow Sensor (MAF) clean so it can give accurate air intake readings.
Inspect for vacuum leaks or loose clamps, as these can mess with sensor data. Replacing the PCV valve periodically prevents oil buildup that might contaminate sensors.
Using high-quality fuel and fuel system cleaners like Lucas helps cut down on carbon deposits that can foul sensors and spark plugs.
Make sure to schedule routine diagnostic scans to catch any early signs of sensor problems.
Here’s a quick guide to sensor maintenance:
| Sensor | Maintenance Tip | Why It Matters |
|---|---|---|
| MAF Sensor | Regular cleaning | Ensures accurate airflow readings |
| PCV Valve | Replace periodically | Prevents oil contamination |
| Intake System | Check for leaks and loose clamps | Maintains proper sensor function |
Maintain Proper Fuel Quality
Maintaining proper fuel quality is key to preventing future engine warning lights. Use high-quality fuel with detergents to keep your fuel injectors and intake valves clean, which helps reduce sensor issues.
Regularly top off with fuel that contains system cleaners to prevent carbon buildup, as this can trigger warning lights. Avoid low-octane or contaminated fuel because they can cause misfires and sensor errors.
Make sure your fuel cap is tightly sealed after refueling to prevent evaporative emissions system triggers. Always buy fuel from reputable stations to avoid water or debris contamination that can harm your engine.
Consistently maintaining good fuel quality keeps your engine running smoothly and reduces the chances of warning lights appearing, saving you time and potential repair costs.
Avoid Overloading Engine
After changing your spark plugs, it’s important to avoid overloading your engine, as pushing it too hard can trigger warning lights and cause damage. Refrain from revving excessively or driving aggressively right after the repair.
Make sure all ignition components, like coils and wires, are properly connected and in good condition to keep your engine running smoothly. Use the correct fuel octane level and consider fuel additives to prevent knocking and reduce strain on the engine.
Keep an eye on engine temperature, especially when the engine is cold, and avoid heavy acceleration during startup. Regularly check your air-fuel mixture to ensure it’s balanced.
Doing so helps prevent engine overexertion, keeps warning lights off, and promotes longer-lasting spark plugs and engine health.
When to Seek Professional Help for Engine Light Problems
Even if you’ve replaced your spark plugs and performed basic resets, sometimes the check engine light points to a more serious problem that needs professional attention. If the light stays on despite your efforts, it’s a sign to see a mechanic.
You should also consider professional help if you notice the engine running rough, stalling, or showing decreased performance after changing the spark plugs.
If the warning light remains on after multiple resets or if you hear unusual noises, feel vibrations, or notice a drop in fuel efficiency, it’s time to get it checked out by an expert.
A qualified mechanic can use advanced diagnostic tools to read trouble codes accurately and pinpoint the underlying issues. Taking care of these problems early helps prevent further damage and keeps your vehicle running smoothly.
Final Tips for Maintaining Your Engine and Avoiding Error Codes
To keep your engine running smoothly and avoid unnecessary error codes, regular maintenance is key. Make sure to inspect and clean sensors like the MAF sensor regularly to prevent air-fuel mixture issues that can turn on warning lights.
Using high-quality fuel and considering fuel system cleaners such as Lucas can help reduce carbon deposits. These deposits can cause false error codes, so keeping the fuel system clean is a smart move.
Performing periodic “Italian Tune-Ups” by driving aggressively helps burn off engine deposits and keeps your performance sharp. After changing spark plugs, double-check that all intake clamps and hoses are secure and leak-free to prevent false alarms.
If error codes keep showing up, it’s a good idea to schedule professional diagnostics. Sometimes, ongoing issues involve sensors or other engine parts beyond just the spark plugs.
Staying consistent with maintenance will help keep your engine healthy and reduce the chances of error codes popping up unexpectedly.
Frequently Asked Questions
How to Reset Engine Light After Replacing Spark Plugs?
To reset the engine light after replacing spark plugs, start your vehicle and let it run for a few seconds, then turn it off. Repeat this process three times.
Alternatively, you can connect an OBD-II scanner, select “clear codes,” and erase the trouble codes. This is a quick and easy method.
You can also disconnect the negative terminal of your battery for about 15 minutes. After reconnecting, start your engine and drive normally. The light should turn off once the system recognizes the fix.
How Long Does It Take for the Check Engine Light to Clear After Changing Spark Plugs?
It usually takes a car’s computer just a blink of an eye—about 15 to 30 minutes of normal driving—for the check engine light to clear after changing spark plugs.
Sometimes, it might need multiple drive cycles or a longer drive to reset fully.
If it stays on, using an OBD-II scanner to clear codes manually offers a quick fix. Otherwise, further diagnostics might be needed.
Do I Need to Clear Codes After Replacing Spark Plugs?
You don’t always need to clear codes after replacing spark plugs unless the check engine light stays on. If it does, using an OBD-II scanner to clear the codes can help remove any leftover or false trouble codes.
Sometimes, the codes will clear on their own once the engine runs smoothly. Clearing the codes ensures you get an accurate diagnosis, especially if new issues come up or the light stays on.
How to Force Reset Check Engine Light?
To force reset your check engine light, turn your ignition on and off three times quickly, pausing briefly between each cycle.
Make sure the engine is off during each pause so the system can register the reset.
This process tricks your vehicle’s computer into clearing stored trouble codes.
If the light stays on after several tries, it’s a good idea to get a professional scan or do a manual reset to ensure everything’s properly cleared.
Conclusion
Now that you know how to reset your check engine light after changing spark plugs, you’re better prepared to keep your vehicle running smoothly.
Remember, patience and a bit of detective work are your allies, much like a wise old alchemist seeking balance.
If the light stays on or other issues come up, don’t hesitate to seek professional help.
Maintaining your engine in top shape with these steps ensures many more miles of worry-free driving—no sorcery needed.