7 Steps to Test Spark Plugs With a Multimeter
If you’re like many car owners, dealing with engine misfires or poor performance can be frustrating. You’re not alone—testing your spark plugs is a common step to keep your engine running smoothly. But figuring out if they’re working properly can seem tricky if you don’t have the right tools or know-how.
To test your spark plugs with a multimeter, start by gathering your tools and preparing a clean workspace. Remove the spark plug from your engine and inspect it for visible damage or wear.
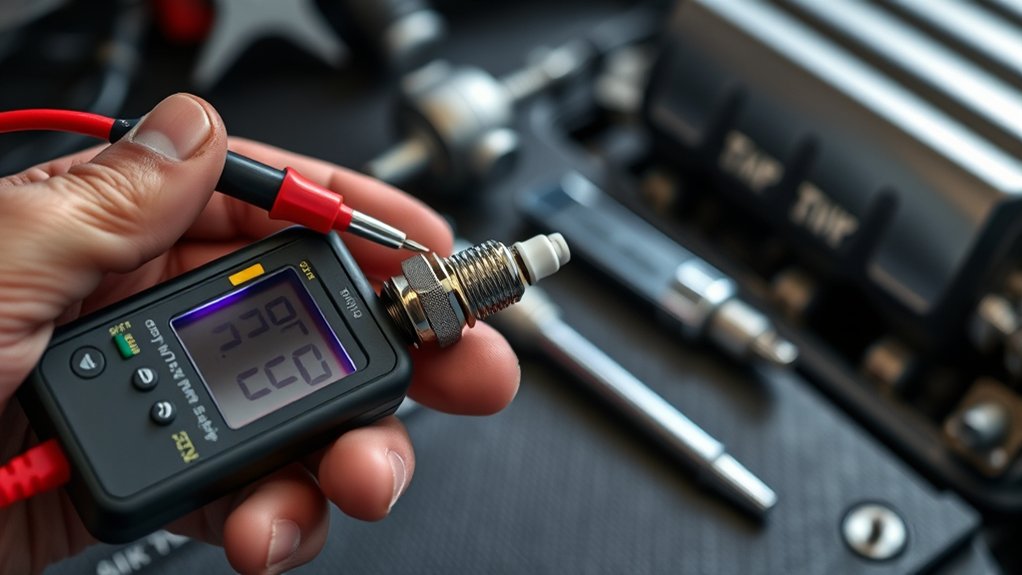
Set your multimeter to the resistance range (20KΩ), then connect the probes to the terminal and metal shell. Check the resistance—healthy plugs should have low resistance (5-15 ohms).
If you want to learn the detailed steps and what the results mean, keep going.
Key Takeaways
- Grab a multimeter set to the 20KΩ resistance range. Make sure your workspace is clean and safe before you start.
- Disconnect the spark plug from the engine and let it cool down completely. You don’t want to burn yourself or damage the plug.
- Turn your multimeter to resistance mode. Test it on a known resistor to make sure it’s giving accurate readings.
- Place one multimeter lead on the spark plug’s terminal. Then, put the other lead on the metal shell or electrode.
- Check the resistance reading and compare it to the manufacturer’s specs. Usually, 5 to 15 ohms means the plug is good.
- If you see zero or infinite resistance, that’s a sign the spark plug might be faulty.
Gather Your Tools and Prepare Your Workspace
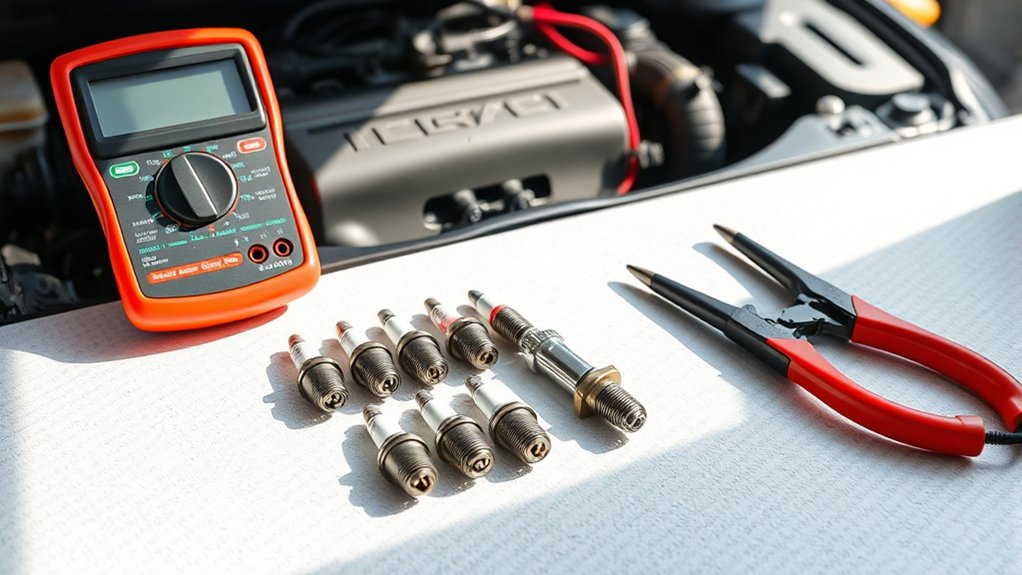
Before testing your spark plugs, gather the right tools and set up a safe workspace. Start by collecting a high-quality multimeter and set it to the 20K ohms resistance range. You’ll also need insulated pliers and a spark plug socket wrench for safe removal and handling of the spark.
Make sure your workspace is clean, well-lit, and free of debris to avoid accidents and ensure accurate testing. Disconnect the spark plug from the engine and let it cool down completely to prevent burns or damage.
Prepare a dry, clutter-free surface or workbench to place the spark plug and multimeter. Proper preparation helps you handle the spark safely and efficiently, setting the foundation for a successful testing process.
Learn the Main Parts of a Spark Plug
Understanding the main parts of a spark plug is key to diagnosing and maintaining your vehicle’s ignition system. A spark plug has several important components that work together to create a spark.
The metal shell secures the spark plug in the engine cylinder. It’s durable and threaded on the outside to hold everything in place.
The metal shell holds the spark plug securely in the engine cylinder with durable, threaded exterior.
The central electrode conducts electricity to produce the spark. It sticks out from the porcelain insulator and connects to the ignition system.
The porcelain insulator electrically isolates the central electrode from the metal shell. It surrounds and insulates the electrode to prevent unwanted sparks.
The side electrode sits above the central one and creates the spark gap needed for ignition. It’s positioned just right to allow a spark to jump across.
Visually Inspect Your Spark Plug for Damage or Wear
Start by inspecting the electrode for excessive wear or erosion that could impact spark performance. Look for visible cracks, chips, or damage on the porcelain insulator and metal shell.
Also, check for heavy carbon buildup, corrosion, or rust that might indicate engine issues. These signs can help you determine if the spark plug needs replacement or cleaning.
Examine Electrode Condition
Inspect your spark plug carefully for any signs of damage or wear, as this can directly impact its performance. Focus on the electrode, which is vital for spark generation. Check for excessive wear, erosion, or rounded edges that can reduce spark efficiency.
Look for corrosion or rust on the metal shell and electrodes. Confirm the side and center electrodes are properly aligned and not bent or broken. Proper electrode condition ensures maximum spark performance and engine efficiency.
Check for Physical Damage
Before testing your spark plug with a multimeter, it’s important to do a quick visual check for any physical damage or wear. This helps catch issues that could affect how well it works.
Look for cracks, chips, or broken electrodes that might cause problems. Also, check for excessive carbon buildup, oil deposits, or fouling on the insulator and electrodes.
Next, inspect the metal shell and terminal connections for any signs of corrosion or rust. Worn or rounded electrodes indicate it might be time for a replacement.
Finally, make sure the porcelain insulator is intact and free from cracks or chips, as these could lead to misfires. Doing this visual check is a key step before using the multimeter.
Set Your Multimeter to the Correct Resistance Range
Make sure your multimeter is set to the correct resistance range, usually around 20KΩ, for accurate readings.
Using the right setting helps prevent incorrect results and makes your test more reliable.
Always check that your multimeter works properly before testing your spark plug.
Choose Appropriate Resistance Range
How do you guarantee your multimeter provides accurate spark plug readings? By choosing the right resistance range. To ensure precise measurements, follow these steps:
- Set your multimeter to a resistance range of 20K ohms, which is ideal for spark plug testing.
- Confirm the multimeter displays the correct resistance range before you start testing.
- Using the correct resistance setting prevents false readings caused by improper measurement.
- Remember, selecting the proper resistance range helps verify if your spark plug’s internal resistance matches manufacturer specifications.
Choosing the right resistance range is key for accurate resistance tests. It makes sure you get reliable data and can properly diagnose spark plug health, avoiding misleading results from an incorrect setting.
Verify Multimeter Settings
To ensure your resistance readings are accurate, start by checking that your multimeter is set correctly to measure resistance. Make sure it’s on the resistance (Ω) mode, usually indicated by the Greek letter omega (Ω).
Next, select a resistance range around 20,000 ohms (20KΩ) for testing spark plugs. Before connecting, test the multimeter on a known resistor or circuit to confirm it works properly.
Make sure the display is steady, showing reliable readings. Always double-check that the multimeter isn’t set to voltage or current mode. Here’s a quick reference:
| Step | Action |
|---|---|
| 1 | Set multimeter to resistance mode |
| 2 | Choose 20KΩ resistance range |
| 3 | Test on a known resistor |
| 4 | Confirm display stability |
| 5 | Double-check mode is resistance |
Test Your Spark Plug’s Resistance Step-by-Step
Before testing your spark plug’s resistance, make sure your multimeter is set to the 20K ohms or resistance mode. This will give you accurate readings when testing your spark plugs.
Next, follow these steps:
Follow these steps carefully to accurately test your spark plug’s resistance.
- Place one multimeter lead on the terminal end of the spark plug.
- Touch the other lead to the metal shell or central electrode of the spark plug.
- Press firmly and ensure full contact between the probes and the spark plug parts.
- Read the resistance value displayed on the multimeter.
A healthy spark plug usually shows a resistance between 5 and 15 ohms. If your reading is outside this range or shows no reading at all, it’s time to think about replacing the spark plug. Always compare your results with the manufacturer’s specifications.
Interpret Resistance Results: Is Your Spark Plug Good or Faulty?
Once you’ve measured the resistance of your spark plug, interpreting the results helps determine its condition. A resistance between 5 and 15 ohms usually indicates a good spark plug.
If your reading is zero ohms, it may be normal when measuring from the top terminal to the center electrode, but it doesn’t confirm overall health. Infinite resistance or no continuity suggests an open circuit, meaning the internal wiring or electrode is broken or damaged.
Slight variations in resistance readings can happen depending on your multimeter’s scale, but large deviations signal potential faults. Remember, resistance alone doesn’t guarantee proper spark plug function.
Observing the spark during testing offers a more complete assessment. Use resistance results as a guideline, but consider additional testing for accuracy.
Decide When to Replace Your Spark Plug
Deciding when to replace your spark plug depends on resistance readings, visual condition, and performance. If your resistance is outside the manufacturer’s range (usually 3,000–5,000 ohms), it’s time for a new spark plug.
Also, if your multimeter shows no continuity or infinite resistance, the electrode is broken. Even low resistance readings near zero ohms can mean a faulty spark plug if it doesn’t produce a spark.
Check for cracks, chips, carbon buildup, or oil contamination—these signs mean it’s time to replace. Remember, a damaged or worn spark plug wire can also affect performance.
Regular testing helps you find the right interval for replacement, so your engine runs smoothly and efficiently.
Frequently Asked Questions
How to Test if Spark Plugs Are Bad With a Multimeter?
To test if your spark plugs are bad with a multimeter, set it to 20K ohms. Touch the probes to the terminal and the central electrode.
A reading between 5 and 15 ohms means your spark plug is good. If you get no reading or an infinite resistance, the plug might be damaged.
Always give the spark plug a visual inspection. For a more accurate diagnosis, consider testing for a spark while the plug’s installed.
What Spark Plug Does a Tecumseh Engine Take?
A Tecumseh engine typically uses a Champion RC12YC spark plug, which has a 14mm thread size and a 0.030-inch electrode gap.
For example, if you’re replacing a worn spark plug on your lawnmower, make sure you select this model or an equivalent with a nickel or platinum tip for durability.
Always double-check your engine’s manual or part number to confirm compatibility and peak performance.
How Long Do Spark Plugs Last in a Subaru Crosstrek?
Spark plugs in your Subaru Crosstrek usually last between 60,000 and 100,000 miles.
It’s a good idea to check them regularly for signs of wear, like misfires or rough idling.
Using the right type and gap specified by Subaru can help extend their life.
Replacing them at the recommended intervals keeps your engine running smoothly, boosts fuel efficiency, and prevents potential damage.
This way, your vehicle stays in top shape over time.
What Spark Plugs Are Best for Lexus?
If you own a Lexus, you’ll want to choose OEM brands like Denso or NGK, which are tailored for your engine.
Imagine your engine running smoothly, thanks to platinum or iridium spark plugs that last longer and improve efficiency.
Always verify the correct thread size and heat range from your owner’s manual.
Upgrading to these high-quality plugs can boost performance, fuel economy, and reduce misfires.
Conclusion
Testing your spark plugs with a multimeter is like tuning a musical instrument—you need to check each string to guarantee harmony. I once ignored a faulty plug, only to find my engine sputtering like a tired singer. Regular testing keeps your engine singing smoothly, saving you from costly repairs and unexpected breakdowns.
Just a few steps with your multimeter can keep your vehicle running reliably. Think of it as giving your engine a quick health check to stay in perfect tune.
Using a multimeter to test your spark plugs is a simple way to catch problems early. It’s like giving your engine a quick checkup to keep everything running smoothly.