How to Install a Tonneau Cover With a Toolbox in 8 Easy Steps
Struggling to find the perfect way to keep your truck bed secure while adding extra storage? You’re not alone—many truck owners want a reliable, easy-to-install solution that combines a tonneau cover with a toolbox.
Start by measuring your truck bed and toolbox to guarantee a proper fit, then thoroughly clean and dry all surfaces.
Secure the toolbox with corrosion-resistant hardware, avoiding interference with the cover.
Next, position and align the tonneau frame over the toolbox, making adjustments for a flush fit and to prevent leaks.
Install the cover panels, test the waterproof seal, and tighten all fasteners.
For detailed tips on troubleshooting and finishing touches, keep going to get everything just right.
Key Takeaways
- Measure and prepare the truck bed and toolbox for a proper fit. Make sure surfaces are clean and dry before you start.
- Secure the toolbox with the right hardware. Check that it’s stable and that nothing gets in the way of installing the cover.
- Align the tonneau cover frame over the toolbox. Adjust the brackets so everything fits flush and stays leak-free.
- Install and tighten the cover panels, locks, and clamps. Afterward, check for any gaps, leaks, or drainage issues to make sure everything’s tight and secure.
- For regular maintenance, re-tighten fasteners when needed. Seal the edges if they start to wear, and keep an eye on the drainage paths to prevent any issues over time.
Measure Your Truck Bed and Toolbox for a Perfect Fit
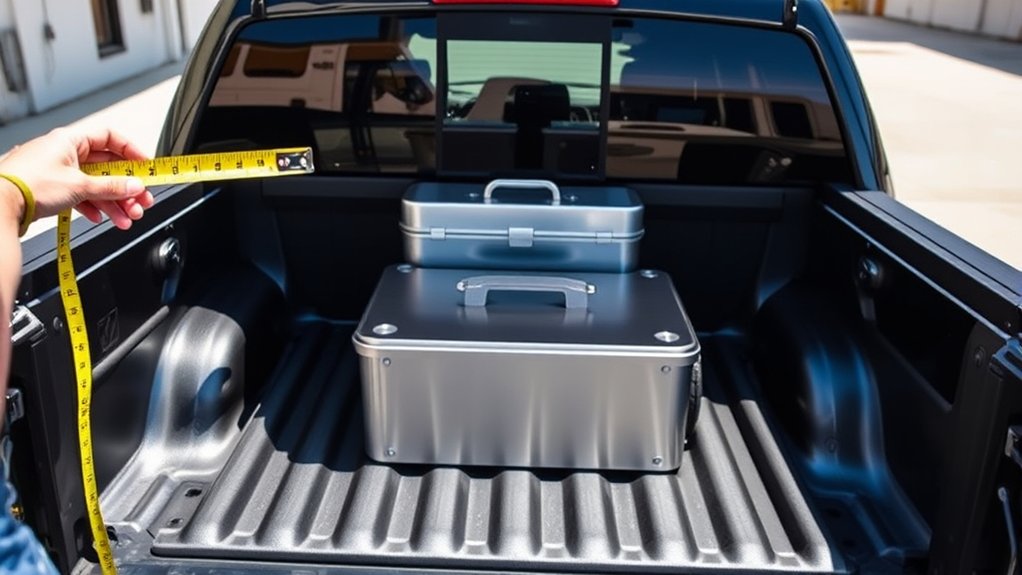
Before installing a tonneau cover with a toolbox, you need to measure your truck bed and toolbox accurately. Use a tape measure to find the length of your truck bed from the bulkhead to the tailgate edge for a proper fit.
Measure the width at the widest point between the bed rails to ensure compatibility with both the cover and toolbox. For the toolbox, record its height, width, and length, accounting for any irregular shapes or overhangs that might affect fit.
Be precise—small measurement errors can cause improper fit or interfere with cover operation. Also, note the clearance needed for opening and closing the toolbox without restrictions.
Accurate measurements are essential for a secure, seamless fit when installing your tonneau cover.
Gather Your Tools and Prepare the Truck Bed and Toolbox Surface
Gather your tools and prepare the truck bed and toolbox surface.
Start by collecting all the essential tools you’ll need, like a measuring tape, screwdriver, and brackets.
Next, clear away any dirt, dust, or grease from the truck bed and toolbox surfaces using a brush or vacuum.
Finally, wipe everything down with a mild cleaner to ensure a clean, secure installation.
Gather Necessary Tools
Gather all the essential tools you’ll need for a smooth installation, like a measuring tape, screwdriver set, socket wrench, clamps, and mounting brackets. These are key for handling the hardware and making sure everything fits properly.
Before you start, measure the length, width, and height of both your truck bed and toolbox to check for compatibility. Getting exact measurements helps avoid issues later on.
Next, clean the truck bed and toolbox surfaces. Use a brush or vacuum to remove dirt and debris, then wipe everything down with a mild cleaner and cloth. A clean surface means a more secure and stable fit.
Having all your tools ready and the surfaces prepared makes the installation process quicker and easier. It sets a solid foundation for a trouble-free experience.
Clear Debris and Dust
Make sure the truck bed and toolbox surfaces are thoroughly cleaned before moving on. Removing debris and dust creates a clean base for your installation.
Use a brush or vacuum to clear away loose debris, leaves, and dirt from the truck bed and around the toolbox area.
Then, wipe down all surfaces with a mild cleaner and microfiber cloth to get rid of grease, dust, and residue.
Ensure the surfaces are completely dry and free of dust or debris before proceeding.
This step helps prevent obstacles that could interfere with hardware attachment or cause misalignment.
A clean surface promotes a secure fit and prepares your truck for the next phase of installation.
Clean for Proper Adhesion
Before you move forward, gather all the essential tools—such as a measuring tape, mild cleaner, microfiber cloth, and brushes—to prepare the truck bed and toolbox surfaces.
To guarantee proper adhesion, it’s vital to clean the surfaces thoroughly. Remove any remaining debris, dust, or grease that could interfere with the prep process.
Use a mild cleaner and a soft cloth to wipe down the truck bed edges and toolbox surfaces, making sure all dirt and oils are eliminated.
It’s important to dry everything completely before proceeding, as moisture can weaken adhesion.
Accurate cleaning and drying create a clean, smooth surface that helps the tonneau cover and toolbox install securely.
Proper prep now ensures a durable, long-lasting fit for your installation.
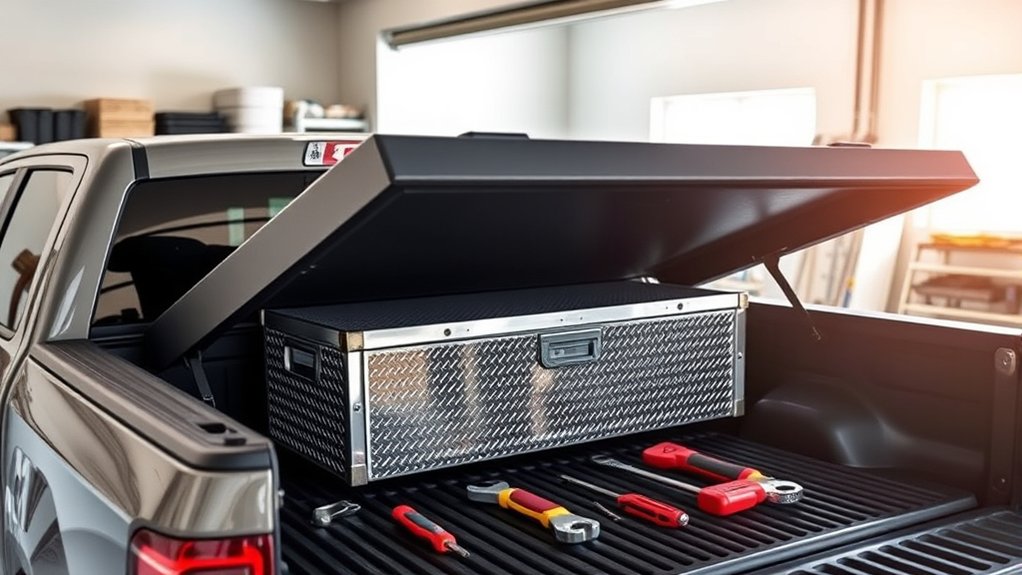
Secure the Toolbox to the Truck Bed With Proper Hardware
To secure your toolbox effectively, choose the right mounting brackets and clamps made for your truck bed.
Make sure to position it so it doesn’t block access or interfere with the tonneau cover. Tighten all the fasteners evenly.
Double-check the stability by applying gentle pressure to ensure it stays firmly in place during drives.
Selecting Appropriate Mounting Hardware
Choosing the right mounting hardware is essential for securely attaching your toolbox to the truck bed without causing damage. You want hardware that’s durable and corrosion-resistant to withstand weather exposure.
When selecting your mounting hardware, consider these key points:
- Use heavy-duty brackets and clamps designed specifically for truck beds to ensure a secure fit.
- Opt for corrosion-resistant materials like stainless steel or coated steel to prevent rust and deterioration.
- Confirm that the hardware matches your toolbox’s dimensions and shape for a snug, stable fit.
Before tightening, position your toolbox in an accessible spot that won’t interfere with the tonneau cover or bed access. Follow manufacturer instructions carefully to ensure proper torque and secure fastening, avoiding shifting during transit.
Ensuring Secure Fastening Techniques
Proper fastening techniques ensure your toolbox stays securely attached during transit. Use heavy-duty hardware, like mounting brackets and clamps made specifically for your toolbox, to keep everything in place.
Tighten all hardware evenly with a socket wrench, following the manufacturer’s recommended torque specs. This helps prevent the fasteners from loosening over time.
Placing rubber pads or anti-slip mats between the toolbox and truck bed reduces vibration and protects both surfaces. Before fully tightening all fasteners, make sure the toolbox is level and flush against the bed walls for a proper fit.
Remember to regularly inspect and retighten the hardware after the initial installation. Proper hardware application and correct torque are key to a safe, long-lasting fastening.
Position and Fit the Tonneau Cover Frame Over the Toolbox
As you slide the tonneau cover frame over the toolbox, make sure it lines up properly with the edges of the truck bed. You want the frame to sit flush against the toolbox, with no gaps or misalignment, to ensure a good seal during installation.
Check that the mounting brackets clear the corners of the toolbox so you can fasten everything securely. Gently adjust the frame if it feels too tight, but avoid applying too much pressure.
Finally, confirm that the frame stays at a consistent height across the bed. This helps the cover operate smoothly and keeps everything fitting nicely.
Getting the frame positioned and fitted right over the toolbox is key for a secure, leak-free install that keeps your tools safe.
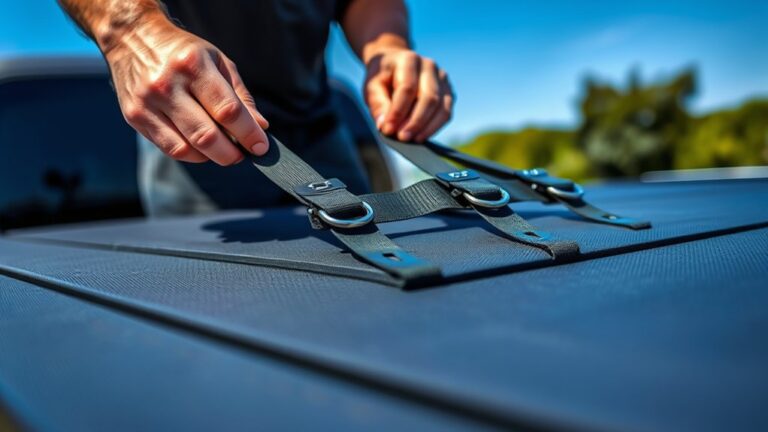
Install the Cover Panels and Lock Them in Place
Once you’ve positioned the frame correctly, it’s time to install the cover panels and lock them in place. Align each panel with the side rails, making sure they sit evenly without gaps along the edges for a secure fit.
Align panels evenly with side rails for a secure, gap-free fit.
Insert the locking bars or clamps into the designated slots on the panels, tightening them to prevent any movement. Engage the locking mechanism by flipping or sliding the locks fully into place, ensuring they are latched securely.
Check that each panel folds or rolls smoothly and stays locked when in the closed position. Gently pull on the panels to verify they are firmly locked and stable.
Properly locking the panels guarantees the cover stays in place during transportation and protects your cargo.
Test the Seal and Functionality of the Cover
Before using your tonneau cover, it’s important to test its seal and how well it works to make sure it offers proper protection. First, lower the cover onto the frame and press along the edges to look for gaps or misalignment that could weaken the seal.
Next, spray water evenly over the surface and edges to see if any leaks or gaps let water through, ensuring the cover stays waterproof. Make sure all clamps and fasteners are tightly secured to prevent shifting that might break the seal while driving.
Also, check that the cover fully closes and latches properly so it creates a tight seal against the truck bed and toolbox. Lastly, inspect the drainage system to confirm water is directed away from the bed and doesn’t pool along the edges.
Troubleshoot Common Installation Challenges and Make Adjustments
If you notice gaps, leaks, or shifting after testing the seal and functionality of your cover, it’s time to troubleshoot and make necessary adjustments. First, check the alignment of the tonneau cover and toolbox to make sure they sit flush and don’t interfere with each other.
If water gets in, verify that the seal is tight and properly positioned; adjust hardware if needed. Tighten all mounting brackets and clamps securely to keep everything in place and prevent shifting during use.
Use rubber pads or anti-slip mats beneath hardware to reduce vibrations and protect the truck bed. Regularly inspect and tighten bolts and clamps to maintain perfect alignment and a secure fit, helping to avoid future water leaks or shifting issues.
Finalize the Installation With Weatherproofing and Tighten All Fasteners
To make sure your tonneau cover stays weatherproof and secure, finish the installation by sealing and tightening all fasteners. Start by applying weatherproof sealant or gaskets along the edges of the cover to block water from getting in and ensure a tight seal.
Next, check all bolts, clamps, and fasteners, tightening them securely with a torque wrench if needed. This helps prevent anything from loosening during transit. Also, inspect the drainage tubes and channels to make sure they are clear and routed correctly, directing water away from your truck bed.
Once you’ve done that, test the cover’s sealing by spraying water over the edges. Remember to re-tighten fasteners and reseal the edges regularly to keep everything weatherproof over time.
Frequently Asked Questions
Can You Put a Tonneau Cover on With a Tool Box?
Yes, you can put a tonneau cover on with a toolbox, but it depends on your toolbox’s size and placement. Low-profile, flush-mounted toolboxes usually fit well without issues, especially with roll-up or retractable covers.
Before installing, measure your toolbox and check your cover’s clearance to ensure a proper fit and seal. If your toolbox sticks up above the bed rails, you might need a special solution to prevent interference.
What Is the Easiest Tonneau Cover to Install?
Think of installing a soft roll-up tonneau cover as a breeze, like a gentle summer wind. It’s the easiest to install, often taking just 15-30 minutes with minimal tools.
You’ll love the clamp-on system that secures directly to your truck bed rails, and no-drill options make setup even simpler.
Pre-assembled parts and clear instructions make it perfect for beginners, so you can protect your gear effortlessly and quickly.
How to Anchor Toolbox to Truck Bed?
You secure the toolbox to your truck bed using heavy-duty clamps or mounting brackets made for bed rails. Make sure to position it carefully so it doesn’t block the tonneau cover or bed access.
If needed, drill holes to bolt it down tightly with the right hardware. Adding rubber pads or anti-slip mats between the toolbox and bed helps prevent shifting and protects your truck.
Once everything is in place, tighten all the bolts evenly. Then, give it a good test to make sure it’s stable and secure.
How to Mount Toolbox in Truck Bed Without Drilling?
You can mount your toolbox without drilling by using clamp-on mounts or adjustable brackets. Carefully position the toolbox away from the bed’s side rails so it doesn’t interfere with your tonneau cover.
Secure the clamps tightly, and add rubber pads to prevent shifting or scratching. Regularly check and tighten the hardware to keep everything secure during drives.
This method keeps your truck bed protected and ready for any adventure, no damage required.
Conclusion
Now that you’ve installed your tonneau cover with the toolbox, enjoy the perfect mix of protection, easy access, and style. Your measurements are precise, your hardware is secure, and your seal is tight.
You’ve created a reliable barrier against the elements that keeps everything in place. Stay organized and maintain easy access to your gear whenever you need it.
Whether for work or adventure, your truck’s new setup is ready to go. It’s designed to shield your belongings, serve your needs, and impress everyone who sees it.