How to Use an Oil Filter Wrench in 8 Easy Steps
Many car owners find changing their oil to be a daunting task, especially when dealing with stubborn filters. If you’ve ever struggled with removing or installing an oil filter, you’re not alone. Using an oil filter wrench can make this job much easier and less messy.
To use an oil filter wrench, first gather your tools and prepare a clean workspace. Locate the oil filter, then attach the wrench securely around it—ensure it’s tight but not damaged.
Turn the wrench counterclockwise to loosen and remove the old filter, catching any spills in a catch pan. Install the new filter, tightening it snugly. Check for leaks after starting the engine.
Want to master each step smoothly? Keep going for more helpful tips.
Key Takeaways
- Wrap or position the wrench securely around the oil filter, making sure it’s aligned properly before you start turning.
- Use steady, controlled pressure to turn the wrench counterclockwise and loosen the filter.
- Before applying force, double-check that the wrench is tightly secured and correctly aligned.
- Turn the wrench gradually to prevent slipping or damaging the filter or nearby parts.
- Once the filter is loose, carefully remove it and inspect it for any damage.
- Prepare the area and get ready to install the new filter.
- Make sure the new filter is compatible and ready for installation.
- Follow the instructions to screw the new filter on securely, avoiding over-tightening.
Gather Your Tools and Prepare Your Workspace
Before you start, gather all the tools you’ll need and set up your workspace to make removing the oil filter easier. Choose the right oil filter wrench that fits your vehicle’s filter size and type. Using the correct tool helps prevent frustration and damage.
Clear the area around the oil filter so you have enough space to work and attach your wrench easily. Set up an oil catch pan and some old rags nearby to catch any spills and keep things tidy.
Wear safety gloves and eye protection to shield yourself from oil splashes and debris. Park your vehicle on a flat, even surface and turn off the engine to let it cool a bit.
Getting everything ready beforehand makes the oil filter removal safer and more efficient.
Locate and Access Your Oil Filter
Have you ever wondered where your vehicle’s oil filter is hiding? Usually, it’s on the engine block, often underneath or on the side of the engine.
To find it, check your vehicle’s owner manual for specific details. Once you have it, park your car on a flat, stable surface.
Make sure the engine is warm but not hot to avoid burns. Use a flashlight if needed to see clearly, especially in tight spots. Clear the workspace around the engine to make access easier and safer.
Your goal is to identify the cylindrical oil filter and the surrounding components. Taking these steps will help you access the oil filter confidently and accurately, setting a solid foundation for the next steps.
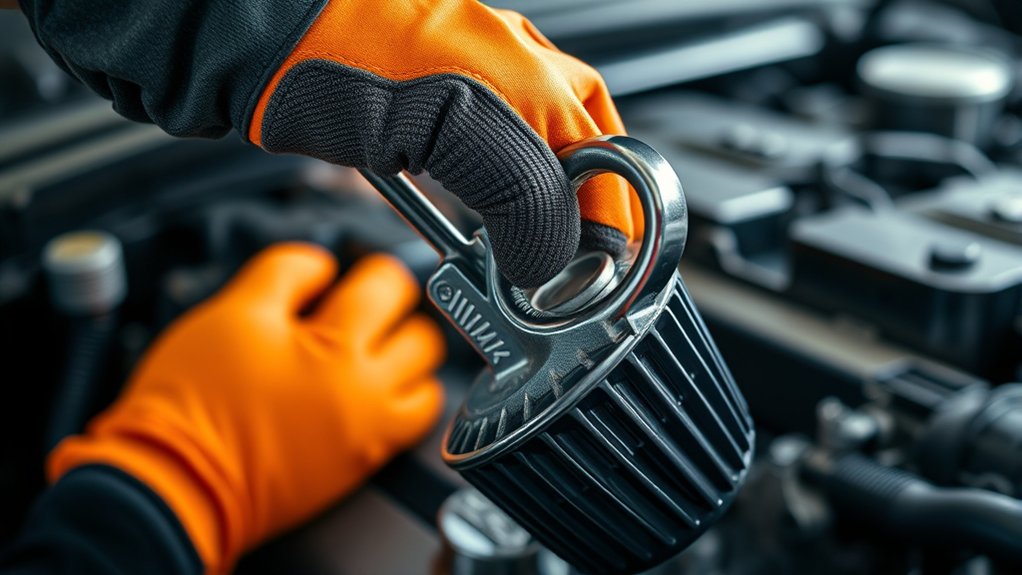
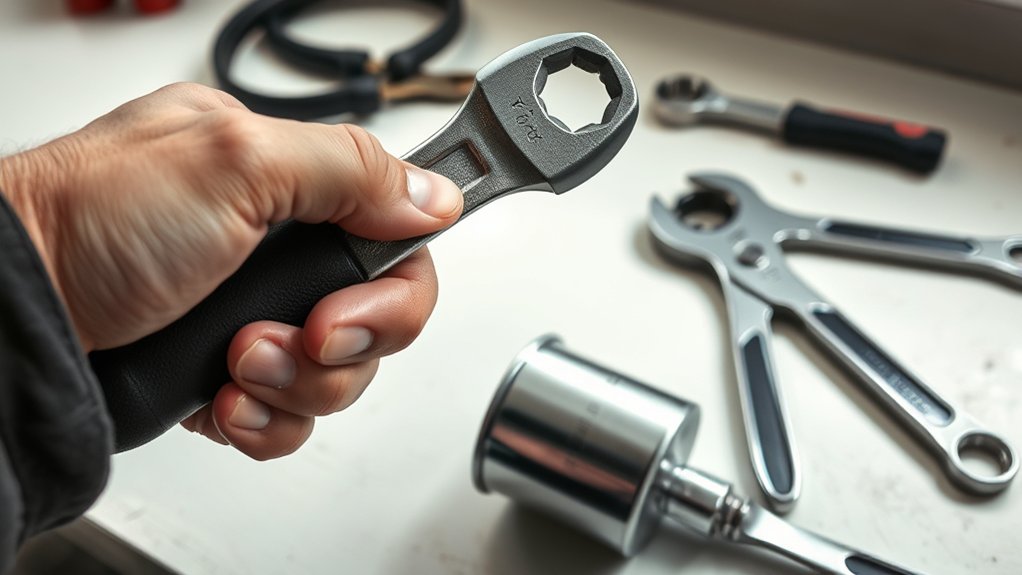
Attach Your Oil Filter Wrench Safely
Once you’ve chosen the right oil filter wrench for your filter, the next step is to attach it securely. You want to ensure a good grip before you try to loosen or tighten the filter.
Wrap the strap around the filter and pull tight to get a secure grip, but be careful not to damage the surface. If you’re using a cap-style wrench, place it over the end of the filter and turn clockwise until it’s snug.
Wrap the strap tightly around the filter without damaging it before turning the wrench clockwise to secure.
For a chain wrench, position it evenly around the filter and tighten it securely to prevent slipping. Once in place, gently apply pressure to confirm the wrench is firmly attached.
Always double-check that the wrench is properly aligned and tightly secured. This helps avoid slips or injuries and makes the removal process safer and more effective.
Loosen and Remove the Old Oil Filter
With the wrench securely attached around the old oil filter, turn it counterclockwise with steady, even pressure. Applying consistent force will help loosen the oil filter without damaging it.
As you turn, the filter should start to loosen and continue to do so, making removal easier. Carefully tilt or lift the oil filter away from the engine, taking care to minimize oil spills.
Place a drain pan beneath the filter to catch any residual oil that escapes during removal. Once the oil filter is free, carefully remove it from your workspace.
Dispose of the used oil filter properly, following environmental guidelines to prevent pollution. With the oil filter removed, you’re ready to move on to the next step in your oil change process.
Prepare and Install the New Oil Filter Correctly
Before installing the new oil filter, make sure the old gasket is completely removed to prevent leaks. This step helps ensure a proper seal and avoids future problems.
When installing the oil filter, follow these key points: Apply a thin layer of fresh oil to the gasket for a better seal. Use the correct size and type of oil filter wrench to avoid damage.
Install the filter by turning it clockwise until it’s snug. Give it an extra 1/4 to 1/2 turn for a secure fit. Afterward, start the engine and check for leaks around the filter.
Tighten the New Filter Properly (Not Too Tight)
Tightening the new filter properly is vital to prevent leaks and damage. Turn the wrench clockwise until it’s snug, but don’t overdo it—overtightening can harm the gasket or strip threads.
Use proper torque, and check for leaks after starting the engine to guarantee a secure, leak-free seal.
Avoid Overtightening Damage
Applying the right amount of force when tightening the new oil filter is essential to prevent damage. Overtightening can deform the gasket or bind the threads, causing leaks or making future removal difficult. Use your wrench to apply steady, even pressure, avoiding sudden or excessive force.
Always refer to your vehicle’s manual for the recommended torque to guarantee proper tightness. After tightening, start the engine and check for leaks, adjusting slightly if seepage occurs.
Remember these key points:
- Turn the wrench clockwise until snug, then stop
- Avoid applying excessive force
- Guarantee the gasket isn’t deformed or pinched
- Use the wrench for steady, even pressure
- Check for leaks after the engine starts
Proper tightening prevents damage and ensures a secure seal.
Use Proper Torque Settings
To guarantee a proper seal, it’s important to tighten the new oil filter to the correct torque setting rather than relying solely on hand-tightening. Hand-tightening alone usually isn’t enough to ensure a secure fit.
Use an oil filter wrench or a torque wrench to achieve the proper torque, which prevents leaks and damage. Refer to your vehicle’s service manual for the recommended specification, often listed in pound-feet (ft-lb) or Newton-meters (Nm).
Tighten the filter until it is snug—about 3/4 to 1 full turn after the gasket contacts the mounting surface. Avoid overtightening, as it can deform the gasket or damage threads.
Checking for leaks after installation confirms you’ve applied the correct torque without risking damage.
Check for Leaks and Finalize Your Oil Change
After installing the new oil filter, start your engine and let it run for a few minutes to circulate the oil. Then, turn off the engine and wait a few minutes for the oil to settle before checking for leaks.
Carefully inspect around the base of the oil filter for any signs of dripping or seepage. Use a clean rag to wipe away excess oil for a clear view.
If you spot leaks, gently tighten the filter further. Just be careful not to overtighten, as that can cause damage.
Once you confirm there are no leaks, you’ve successfully finished your oil change. Remember to dispose of the used oil and old filter responsibly.
Dispose of Old Oil and Filters Responsibly
Ever wonder how to handle used oil and filters responsibly after your oil change? Proper disposal of used oil filters is key to avoiding environmental harm.
Drain residual oil from the filters and recycle them at designated facilities or auto parts stores that accept used oil filters. Used motor oil should be stored in approved containers and taken to authorized recycling centers. Never throw it in the trash, storm drains, or on the ground.
Check local regulations, as they often specify proper disposal procedures for automotive waste. Recycling used oil filters helps recover valuable materials like steel and filters, which reduces landfill waste and conserves resources.
Frequently Asked Questions
How to Use an Oil Filter Wrench Correctly?
To use an oil filter wrench correctly, first make sure it fits snugly on the filter to prevent slipping. Apply steady, controlled pressure as you turn counterclockwise to loosen it.
Choose the right type of wrench based on your filter’s size and accessibility. Keep the wrench aligned properly and avoid applying excessive force.
Once loosened, carefully remove the wrench to prevent spills, then take off the filter smoothly.
What Size Oil Filter Wrench for Honda CRV?
Did you know that most Honda CRV models use a 64mm or 65mm oil filter? For your CRV, you’ll need a matching cap-style oil filter wrench.
Be sure to verify your vehicle’s year and engine type to pick the right size—usually a 14-flute or 15-flute wrench. Checking your owner’s manual or the old filter helps prevent damage and guarantees a proper seal during installation.
What Is the Highest Rated Oil Filter Brand?
The highest-rated oil filter brands are Mobil 1, Bosch, and Fram. Mobil 1 is praised for its synthetic media and dirt-holding capacity, making it a top choice.
Bosch is known for its durable construction and advanced filtration. Fram offers affordable yet high-quality options, especially with their Ultra Synthetic and Tough Guard series.
You’ll find that Mobil 1 and Bosch generally last longer and prevent leaks better, earning top reviews.
What Size Oil Filter Wrench for Toyota Corolla?
A stitch in time saves nine, so get the right tool for the job. For your Toyota Corolla, you’ll need a 64mm or 65mm oil filter wrench, usually a cap-style type.
Make sure to verify your specific model year to confirm the exact size, as it can vary slightly. Using the correct size prevents damage and makes your oil change hassle-free.
Conclusion
Now, with your oil filter wrench in hand, you’ve navigated the mechanical maze like a seasoned adventurer. Each step, from loosening to tightening, is a brushstroke on your automotive canvas, transforming a challenging task into a masterpiece of maintenance.
Remember, a proper seal keeps leaks at bay, like a fortress guarding your engine’s heart. With your workspace tidy and old oil responsibly disposed of, you’ve completed this journey.
Your car is now ready to roar back to life, fueled by your hands and savvy. Using an oil filter wrench correctly makes all the difference, ensuring your engine stays healthy and leaks stay out.