How to Fix Oil Contamination in Spark Plugs
Dealing with oil contamination in spark plugs is a common headache for many car owners. It can cause misfires, poor engine performance, and even damage your engine if left unchecked. You’re not alone in facing this issue—many people struggle with figuring out how to fix it effectively.
To fix oil contamination in spark plugs, start by inspecting the spark plugs and surrounding components for signs of oil leaks, such as oil residue or grease. Remove the spark plugs carefully and clean or replace any damaged gaskets or seals, like the valve cover gasket or O-rings.
Make sure all sealing surfaces are clean before reassembling with proper torque. Since leak sources can vary, exploring detailed steps will help you address the issue effectively.
Key Takeaways
- Inspect your spark plugs and the surrounding areas for any oil leaks, residue, or damaged seals. This will help you pinpoint where the contamination is coming from.
- If you notice worn valve cover gaskets, O-rings, or seals, replace them. Doing so can prevent oil from leaking into the spark plug wells from outside.
- Before reinstalling the spark plugs, clean them and the wells thoroughly using a degreaser. Follow up with compressed air to remove any leftover debris or oil.
- When replacing the gaskets or spark plugs, make sure they are torqued properly. This ensures a good seal and helps prevent future leaks.
- Keep an eye out for signs of oil leaks regularly. Maintaining your engine seals is key to avoiding recurring contamination issues.
Why Does Oil Sometimes Leak Onto Spark Plugs?
Oil can leak onto spark plugs when certain engine parts fail or wear out over time. One common reason is a worn valve cover gasket, which can let oil seep into the spark plug wells.
Oil leaks onto spark plugs often due to worn valve cover gaskets over time.
When the gasket wears thin, oil can escape and contaminate the plugs, causing misfires and performance problems. Worn or damaged O-ring seals around the spark plug wells can also create pathways for oil to get in.
Internal engine issues like worn piston rings or faulty valve stem seals can push oil into the combustion chamber and reach the spark plugs. Excessive oil consumption or overfilling the oil can increase pressure and force oil into the spark plug area.
Leaks from a damaged cylinder head gasket or cracked head can also contribute to oil leaks onto the spark plugs.
How Can You Tell if Oil Is Coming From Outside or Inside the Engine?
To figure out if oil is coming from outside or inside the engine, start by closely inspecting the spark plug and its surrounding area. Oil on the spark plug threads or around the base usually points to an external leak, often caused by a faulty valve cover gasket or spark plug tube seals.
On the other hand, if you notice oil on the tip of the spark plug while the top remains clean, it indicates internal engine oil seeping into the combustion chamber. External leaks tend to cause oil buildup in the spark plug well, making it easier to spot.
Internal engine oil contamination, however, shows up as oil fouling the electrode and insulator. This suggests more serious internal issues like worn piston rings or valve stem seals.
What Are the Common Causes of Oil on Spark Plug Threads?
Worn or damaged valve cover gaskets are among the most common causes of oil on spark plug threads. When these gaskets deteriorate, oil can seep into the spark plug wells and contaminate the threads.
Deteriorated spark plug seals or O-ring seals around the wells can also fail to prevent oil entry, leading to oil buildup. Oil leaks from the cylinder head gasket can let oil enter the combustion chamber and contaminate the spark plugs.
Worn piston rings or faulty valve stem seals might let engine oil seep into the combustion chamber, causing oil to accumulate around the spark plugs. Overfilled engine oil levels can increase pressure, pushing oil through seals and gaskets and contributing to oil on spark plug threads.
How to Inspect Spark Plugs and Surrounding Components for Oil Leaks
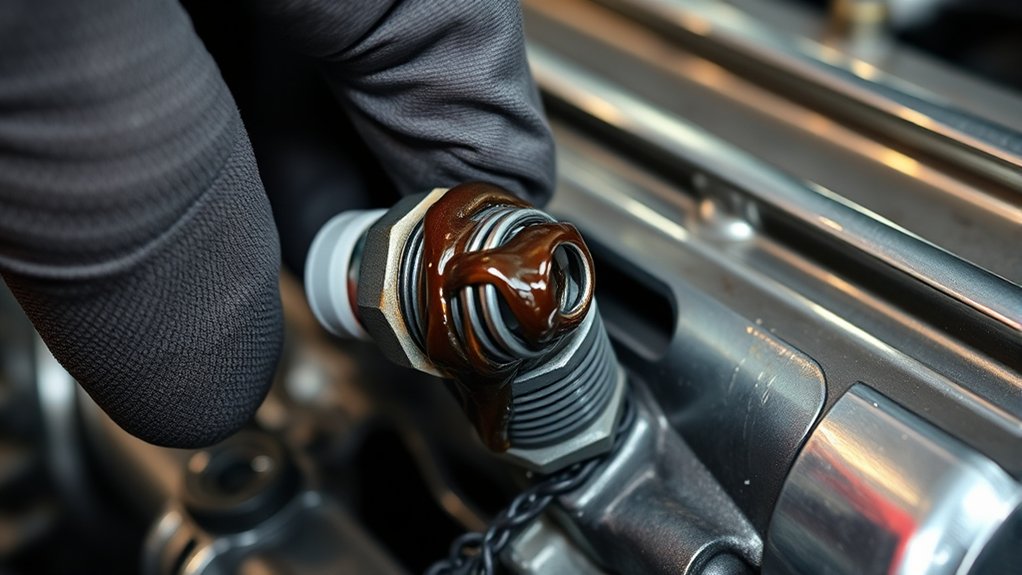
Start by carefully removing the spark plug and examining it closely. Look for oil residue, a greasy or blackened look, or oil pooling around the base or threads.
Use a flashlight to check inside the spark plug well for signs of oil leaks or pooling, especially near the valve cover gasket. Also, inspect the O-ring seals around the spark plug wells for cracks, wear, or damage, which can let oil seep in.
Check the ignition wire ends or boots for oil, as this can indicate external leaks from the valve cover gasket or tube seals. While removing the spark plug, also examine the valve cover gasket and surrounding gasket surfaces for oil seepage, corrosion, or deterioration.
Look for oil pooling or residue on the spark plugs and check for oil leaks around the valve cover gasket. Finally, inspect the O-rings and gasket surfaces for any damage or signs of wear.
Step-by-Step: Removing and Examining Spark Plugs
Before you start removing the spark plug, make sure the engine is cool. This helps prevent burns and damage.
Ensure the engine is cool before removing the spark plug to prevent burns and damage.
To remove the spark, grab a ratchet wrench and a spark plug socket. Carefully unscrew the plug from the engine.
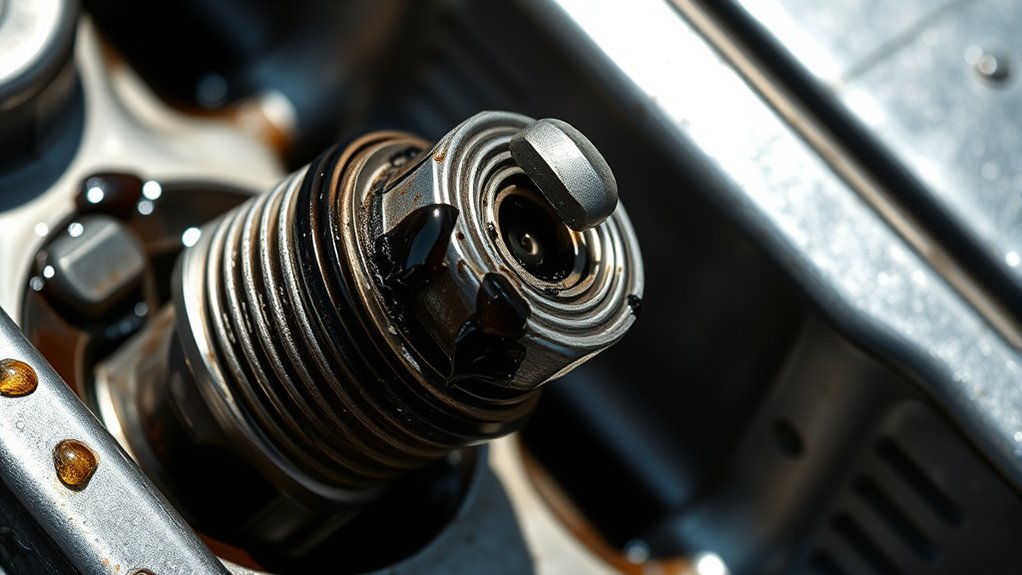
Once you have it out, take a close look at the spark plug for signs of oil contamination. Look for a black, greasy appearance on the threads and electrode.
Check the condition of the spark plug for damage, fouling, or excessive wear. These can point to internal engine issues.
Also, examine the spark plug well for oil pooling or residue. This could mean external leaks are happening.
Before you remove the plug, clean the area around it. This helps prevent debris from falling into the combustion chamber.
Proper removal and inspection are essential for diagnosing oil contamination issues effectively.
How to Diagnose the Root Cause of Oil Leaks in Your Engine
After removing the spark plug and inspecting it for oil contamination, the next step is to identify where the leak is coming from. Look for oily buildup on the spark plug tip or oil on the threads and insulator. This can indicate either an external or internal oil leak.
Next, check the valve cover gasket and spark plug tube seals for cracks, deterioration, or damage. These are common sources of oil leaks around the spark plug wells. Also, look for oil pooling in the well area.
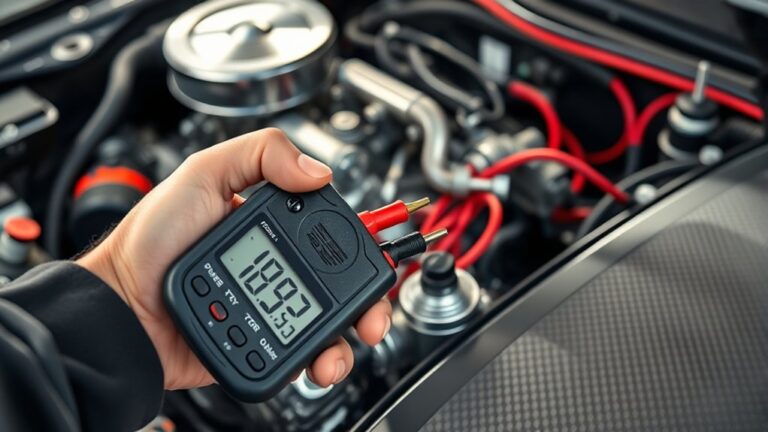
Use a flashlight to spot any external leaks around the cylinder head or valve cover. For internal leaks, you might need to conduct pressure or compression tests. Worn piston rings or a faulty head gasket could be allowing oil to seep into the combustion chamber.
How to Clean Spark Plug Wells and Prepare for Repair
Start by carefully removing any loose debris from the spark plug wells with a small brush or compressed air. Spray the area with engine degreaser and let it sit for a few minutes to loosen oil deposits.
Finally, wipe everything dry with shop towels, making sure the wells are clean and ready for the repair.
Remove Loose Debris
To effectively clean the spark plug wells, start by carefully removing loose dirt and debris with a small brush or shop towels.
Removing loose debris is important for proper cleaning and inspection, as it prevents dirt from interfering with sealing or reinstallation. Take your time to make sure all loose particles are cleared from the wells.
Use a small brush or shop towels to sweep out any debris. Then, inspect the wells for remaining dirt or buildup.
Keep the area dry during cleaning to avoid trapping moisture, which can cause issues later on. Removing loose debris creates a cleaner environment for the next steps and helps you spot any damage or buildup that could lead to oil contamination.
Thorough cleaning of the spark plug wells is a key step before applying degreaser or reinstalling components.
Apply Engine Degreaser
Spraying engine degreaser into the spark plug wells helps loosen stubborn oil and grime buildup, making it easier to clean and inspect the area. Apply a generous amount directly into each well, making sure to cover all affected spots.
Let the degreaser sit for 5-10 minutes so it can break down the oil residues and loosen the buildup. After that, use a small brush or a shop towel to scrub away any remaining oil and dirt.
Be thorough to ensure the spark plug wells are completely clean. Once done, wipe the wells dry with clean, lint-free towels to prevent moisture from causing issues during reassembly.
This process sets the stage for a successful spark plug repair by preparing the area properly.
Dry Thoroughly Before Repair
Once you’ve loosened and removed the oil residue with a degreaser and brush, it’s essential to dry the spark plug wells thoroughly before reassembling. A clean, dry area helps prevent oil from contaminating new seals or gaskets.
Use compressed air to blow out the well, making sure all moisture is removed. Then, wipe the area with a clean, lint-free cloth for thorough drying. Confirm the entire spark plug well and surrounding surface are dry and free of oil before installing new parts.
How to Replace Faulty Valve Cover Gaskets and Seal Components
To replace a faulty valve cover gasket, start by removing the engine cover and bolts. Then, carefully lift off the valve cover.
Next, inspect the old gasket for damage and thoroughly clean the sealing surfaces to guarantee a good seal.
Finally, install the new gasket with any recommended sealant, and tighten the bolts to the proper torque in the correct sequence.
Removing the Old Gasket
Before removing the old gasket, make sure the engine is cool and the vehicle is parked on a flat surface. Carefully unbolt the valve cover using a ratchet wrench, then gently remove it, taking care not to damage the gasket surface.
When removing the gasket, be thorough in scraping away any old sealant or debris for a clean mating surface. Inspect the gasket area for cracks, warping, or damage that could affect the new seal.
Use a gasket scraper and degreaser to clean the surfaces thoroughly. Check for damage that might compromise the new gasket. Handle the gasket gently to avoid tearing or breaking it.
Removing the old gasket properly guarantees a tight seal and helps prevent future oil leaks.
Applying Sealant Properly
Are you applying sealant correctly when replacing your valve cover gasket? Start by making sure the sealing surfaces are thoroughly cleaned and dry to help the sealant stick properly.
Apply a thin, even layer of gasket sealant to both sides of the gasket using the manufacturer-recommended type, like high-temperature silicone or RTV gasket maker. Be careful not to use too much—excess sealant can squeeze into engine components and cause problems.
Focus on spreading the sealant smoothly across the gasket to create an effective seal. Follow the manufacturer’s instructions for curing time and proper tightening sequences to ensure the sealant sets correctly.
Applying sealant properly helps create a tight, leak-free fit and prevents oil leaks and contamination issues.
Installing New Gasket Correctly
When installing a new valve cover gasket, handle the process carefully to ensure a proper seal and avoid future leaks. First, make sure the engine is cool, which makes removing the gasket easier and safer.
Carefully detach the valve cover bolts in a crisscross pattern. This helps evenly release tension and prevents warping. Then, clean the sealing surfaces thoroughly with a gasket scraper and solvent to remove old gasket material and oil residues.
When installing the new gasket, apply a thin, even layer of gasket sealant or adhesive if recommended by the manufacturer. This helps improve sealing and prevents leaks.
Tighten the valve cover bolts to the specified torque, following a sequential pattern from the center outward. This ensures a proper seal and prevents gasket damage.
Always use the correct gasket and sealant for your engine, and follow torque specifications precisely. Work in a clean, debris-free environment to get the best results.
How to Properly Reinstall Spark Plugs and Seal Components
To guarantee a proper seal and prevent future oil contamination, it’s essential to reinstall your spark plugs correctly. Begin by ensuring your spark plugs are clean and free of oil.
Ensure spark plugs are clean and oil-free for a proper seal and optimal engine performance.
Insert new gaskets or O-rings to maintain a secure seal and prevent oil leaks. If recommended, apply a small amount of gasket sealant to the gasket edges for added security.
Carefully thread the spark plugs by hand to avoid cross-threading. Then tighten them to the manufacturer’s specified torque with a torque wrench. Over-tightening can damage components, while under-tightening may cause leaks.
Reinstall the valve cover and other components in the correct sequence. Tighten bolts evenly to avoid warping or leaks.
Proper installation ensures a reliable seal and helps prevent oil contamination of your spark plugs.
How to Test Your Engine and Confirm the Leak Is Fixed
Start your engine and let it reach the normal operating temperature so you can watch for any leaks or misfires.
After that, check around the spark plugs and coil packs for fresh oil or residue. Use a flashlight if needed to get a good look.
Take a test drive and pay attention to how the engine runs. Make sure there are no signs of oil contamination coming back.
Perform Engine Startup Test
After completing the repairs, start your engine and let it warm up to its normal operating temperature.
During startup, keep an eye on the spark plugs and the area around them for any signs of oil or residue. Use a flashlight to check the spark plug wells and wires for dampness or oil.
Listen for misfires, rough idling, or unusual noises that could mean lingering issues. This step helps confirm whether the oil contamination has been effectively addressed.
Check for oil spots or dampness around the spark plugs once the engine warms up. Pay close attention to any signs of oil around the spark plugs during this process.
Listen carefully for misfires or rough idling as the engine runs. Also, observe engine performance and fuel efficiency in your subsequent drives.
Monitor for Leaks
Wondering if your oil leak is truly fixed? After repairs, start your engine and visually inspect the spark plug wells and valve cover area for any signs of oil leaks or pooling.
Use a flashlight to check around the spark plugs for fresh oil residue, making sure no oil is seeping into the wells. Run the engine at idle, then under load, to see if any oil leaks reappear around the spark plugs or valve cover.
After a test drive, check the engine oil level and condition to confirm no unexplained oil loss. If leaks persist, consider using a UV dye and leak detection kit for precise identification.
Monitoring these areas helps guarantee your oil leaks are fully resolved and your spark plugs stay clean.
Tips to Prevent Future Oil Leaks on Spark Plugs
Preventing oil leaks on your spark plugs starts with taking care of your engine’s seals and components before problems happen. Regularly replacing worn valve cover gaskets and spark plug seals helps ensure a good seal and keeps oil out of the spark plug wells.
Make sure to use the correct torque specifications when installing the valve covers and spark plugs. Over-tightening or under-tightening can cause gasket failure and lead to leaks.
Keeping your engine oil levels within the recommended range also helps reduce pressure that can push oil past seals.
It’s a good idea to inspect the valve cover area and spark plug wells regularly. Catching leaks early can prevent more serious damage later.
Routine engine maintenance, like oil changes and checking the PCV valve, also helps prevent internal oil leaks that could contaminate your spark plugs.
- Replace worn valve cover gaskets and spark plug seals promptly
- Always torque components to manufacturer specifications
- Regularly inspect for signs of oil leaks
When to Seek Professional Help for Complex Oil Leak Issues
While fixing simple oil leaks with gasket replacements and proper torque is usually something you can handle yourself, some problems need a pro’s touch. If you see oil on the spark plug or think you have a blown head gasket, it’s time to get expert help.
Persistent leaks after basic fixes or oil inside the combustion chamber suggest deeper engine issues. External repairs won’t fix internal problems like worn piston rings or engine seals. A qualified mechanic can run diagnostics and use special tools to identify and fix these complex issues.
Ignoring these signs can lead to serious engine damage. If you notice any of these symptoms, don’t delay—seek professional repair to protect your engine’s health.
Frequently Asked Questions
Can You Fix an Oil-Fouled Spark Plug?
Yes, you can fix an oil-fouled spark plug by first identifying and fixing the oil leak, like replacing valve cover gaskets or O-rings.
Clean the spark plug thoroughly, but keep in mind this is only a temporary fix if the leak continues. Replacing worn spark plugs is also important for keeping your engine running well.
If oil contamination keeps happening, check internal engine parts like piston rings or valve seals. Regular maintenance is key to preventing future issues.
How to Get the Oily Substance Out of Your Spark Plugs?
You can effectively remove the oily substance from your spark plugs by first inspecting them for oil residue. Then, scrub the plugs thoroughly with a wire brush or specialized cleaner to dissolve and lift away the oil deposits.
Use a degreaser or engine cleaner for stubborn buildup. Rinse well and dry completely with compressed air or a cloth. Reinstall the plugs, making sure they’re sealed tightly to prevent future contamination.
What Are Two Causes of Oil Fouling on a Spark Plug?
Two common causes of oil fouling on your spark plugs are worn valve cover gaskets and damaged O-ring seals around the spark plug wells. When these parts deteriorate, oil can leak into the spark plug wells and cause fouling.
Internal engine issues like worn piston rings or faulty valve stem seals can also let oil enter the combustion chamber. This contamination can lead to your spark plugs getting dirty and fouled.
Is WD-40 Good for Cleaning Spark Plugs?
Using WD-40 on spark plugs is like trying to clean a delicate paintbrush with motor oil. You might loosen grime, but you also leave behind a greasy mess that can cause misfires.
It’s not the best choice because residues can hinder ignition. Instead, go for a dedicated spark plug cleaner or degreaser.
Make sure to rinse and dry thoroughly before reinstalling, or you might create more problems than you started with.
Conclusion
By understanding the causes of oil contamination, inspecting your spark plugs thoroughly, and taking proper steps to clean and seal, you can effectively fix the issue.
Recognize the signs early, address the problems promptly, and prevent future leaks with regular maintenance. This way, you’ll keep your engine running smoothly.
Taking control of the situation, ensuring proper installation, and monitoring your engine’s health will help prevent oil contamination in your spark plugs.
Stay vigilant, act quickly when needed, and enjoy reliable performance and peace of mind. Proper care of your spark plugs is key to a healthy engine.