How to Change Back Shocks in 7 Simple Steps
Are your back shocks feeling worn out or causing a rough ride? You’re not alone—many people struggle with replacing shocks and keeping their vehicle smooth and safe.
If you’re ready to take matters into your own hands, changing your back shocks is a great DIY project that can save you time and money.
To change your back shocks in 7 simple steps, first match new shocks to your vehicle and guarantee you’re using quality brands.
Safely lift and support your car, then spray the old shocks with penetrating oil and remove the mounting bolts.
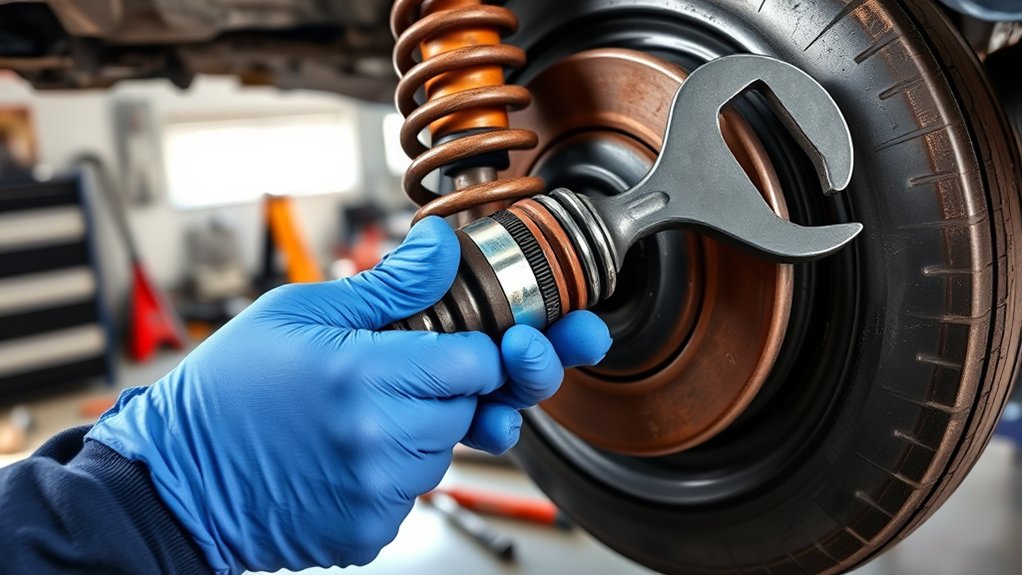
Position and secure the new shocks, tightening bolts to the manufacturer’s specifications with a torque wrench.
After lowering the vehicle, test drive and recheck everything.
If you want to master each step, continue with the detailed guide.
Key Takeaways
- Safely lift and support the vehicle using a jack and jack stands. Make sure it’s stable before you start removing anything.
- Spray the shock mountings with penetrating oil to loosen up any rust and debris. Once it’s soaked, remove the top and bottom bolts.
- Align the new shocks properly and position them in place. Hand-tighten the mounting bolts so they fit correctly.
- Use a torque wrench to tighten all the bolts to the manufacturer’s specifications. This ensures everything is securely installed.
- Take the vehicle for a test drive to check how it handles. If needed, re-tighten the bolts after the test to make sure everything’s still snug.
Choosing the Best Replacement Shocks for Your Vehicle

When selecting replacement shocks for your vehicle, it’s important to find ones that match your specific make, model, and year. Getting the right fit ensures your vehicle performs well and stays safe.
If you’re after better handling and a smoother ride, consider upgrading to high-performance shocks like Monroe Reflex or reservoir shocks. They can make a noticeable difference.
Determine whether your vehicle needs standalone shocks or those integrated with suspension struts, based on its design. Checking the manufacturer’s specs for shock travel, damping settings, and load capacity helps you find the best fit.
Prioritize quality brands and materials, such as monotube or twin-tube designs, for durability and effective suspension response. Picking the right shocks is key to maintaining your vehicle’s stability, comfort, and handling on the road.
Preparing Your Vehicle for Shock Replacement
Before starting the shock replacement, make sure your vehicle is properly prepared. Proper preparation keeps things safe and makes the job easier.
Begin by parking on a level surface, engaging the parking brake, and loosening the lug nuts on the rear wheels. Use a jack and jack stands or ramps to lift the rear of your vehicle securely, providing stability and preventing accidents.
Park on level ground, engage the parking brake, and loosen rear wheel lug nuts before lifting the vehicle securely.
Locate the rear shocks, which are mounted vertically between the suspension control arm and the vehicle frame or body. To make removal easier, spray the shock mountings with penetrating oil like WD-40 or PB Blaster to loosen rust and debris.
Finally, remove the wheels so you can access and prepare for removing the shocks. This setup will help you work more efficiently and safely.
Removing Old Rear Shocks Safely
To remove your old rear shocks safely, start by loosening the lug nuts on the rear wheels while the vehicle is still on the ground. Once they’re loose, lift the vehicle using a hydraulic jack and support it securely with jack stands rated for your vehicle’s weight.
Spray the shock mountings with penetrating oil like WD-40 to loosen rust and debris, which will make removal easier. Access the top mounting bolts from inside the trunk or rear compartment, then remove them.
Next, detach the lower bolts securing the shock to the suspension. Carefully wiggle and pull the old shock free from its mounting points. Make sure all bolts and nuts are fully removed and that the suspension is stable before moving on.
Installing New Rear Shocks Correctly
When installing new rear shocks, make sure to align the mounting holes properly with the brackets and hand-tighten the bolts first.
Use a torque wrench to tighten them to the manufacturer’s specifications, and push down on the vehicle to help seat the shocks properly.
Once the vehicle is on the ground, recheck and torque all bolts to ensure the shocks are securely installed.
Proper Mounting Techniques
Proper mounting is essential to guarantee your new rear shocks function safely and effectively. To do that, start by making sure the shock absorber lines up correctly with the mounting points before installing the bolts.
Load the suspension slightly by pushing down on the vehicle. This helps prevent bushing windup and makes sure everything fits properly. When tightening the bolts, use a torque wrench to meet the manufacturer’s specified torque settings. This ensures a secure mount without over-tightening.
After installing, check that the shock is seated firmly with no gaps or misalignment. Once you lower the vehicle, double-check all hardware to make sure everything is tight and secure, keeping everything safe and working well.
Correct Torque Application
Ensuring your rear shocks are tightened to the correct torque is essential for safety and ideal performance. Always refer to the vehicle manufacturer’s specifications in the service manual.
Use a torque wrench set to the recommended torque value, which is typically between 70-87 ft-lb for the lower shock bolt, to ensure proper installation. Tighten both the upper and lower mounting bolts to the correct torque, making sure they are snug and secure before lowering the vehicle.
Once the vehicle is back on the ground and weight is applied, re-torque the bolts to maintain proper tension. Proper torque application prevents premature shock failure, improves handling, and ensures your suspension functions safely and effectively.
Never skip the step of confirming correct torque during shock installation.
Suspension Alignment Checks
Have you checked your suspension alignment after installing new rear shocks? It’s really important to do this to ensure your vehicle handles properly and your tires wear evenly.
First, make sure your car is on a level surface with the suspension unloaded. This helps prevent any misalignment from skewing your results.
After installing the shocks, take your vehicle for a test drive. Pay attention to the ride height and listen for any unusual noises that might signal a misalignment.
Don’t forget to recheck the torque on the shock mounting bolts after driving. Settling can sometimes change the alignment, so it’s good to double-check.
Using a suspension alignment tool or visiting a professional can help verify your wheel angles and overall alignment. It’s worth the extra effort.
Properly seated and secured shocks are crucial because improper installation can cause handling problems and uneven tire wear.
Always prioritize suspension alignment checks to keep your vehicle performing at its best.
Setting the Proper Torque for Shock Mounts
Using a torque wrench is essential to tighten shock mount bolts accurately to the manufacturer’s recommended specifications. This ensures your shock is securely attached and prevents issues caused by over-tightening or under-tightening. Most vehicles need a torque between 70-87 ft-lb.
Always check the torque settings carefully before tightening. Over-tightening can damage mounts or shocks, leading to early failure. Under-tightening risks the shock shifting or coming loose, which can affect ride quality and safety.
After lowering the vehicle, double-check your torque to make sure the mounts stay securely fastened. Here’s a quick reference:
| Vehicle Type | Recommended Torque | Notes |
|---|---|---|
| Sedan | 75-80 ft-lb | Avoid over-tightening |
| Truck | 80-87 ft-lb | Ensure a secure fit |
| Sports Car | 70-75 ft-lb | Check after lowering |
| SUV | 78-85 ft-lb | Confirm torque consistency |
Final Checks and Taking a Test Drive
Once you’ve lowered the vehicle, double-check that all bolts and nuts are tightened to the manufacturer’s specifications.
Take the car for a test drive at different speeds to feel for any issues like bouncing or noise.
Afterward, inspect the shock mountings and suspension components to make sure everything is secure and functioning properly.
Tighten All Bolts
Before lowering the vehicle, make sure to tighten all shock mounting bolts to the manufacturer’s specified torque, usually between 70-87 ft-lb, using a torque wrench. This helps ensure the shocks are securely fastened and reduces the chance of loose components.
Double-check that both the top and bottom bolts are properly torqued and fully tightened before lowering the vehicle. After the vehicle is lowered, re-torque the bolts to account for any settling or movement.
Make sure to verify that torque settings match the manufacturer’s specifications. Confirm that no bolts are cross-threaded or stripped, and ensure all mounting points are free from debris.
Finally, check for even tightening to avoid putting stress on the components and to guarantee a secure fit.
Conduct Test Drive
After tightening all the mounting bolts and making sure everything is secure, it’s time to see how the new shocks perform on the road. Take your vehicle for a gentle test drive, paying attention to how it rides and handles.
Listen for any strange noises like knocking or squeaking, which could mean something’s not installed right. Watch how the vehicle responds during turns, braking, and acceleration to make sure the shocks are working properly.
Keep an eye out for excessive bouncing or instability, as that might mean they aren’t secured or adjusted correctly. After the test drive, recheck all the mounting bolts and nuts to ensure they’re still tight and secure.
This final check helps make sure your shocks are working well and your vehicle is safe to drive.
Tips for Maintaining Your Shocks and Suspension System
Maintaining your shocks and suspension system is key for a smooth, safe ride. Regular inspections help catch issues early, especially with shocks, like leaks, rust, or physical damage.
Replacing shocks in pairs ensures balanced handling and the best ride quality. Avoid applying grease or lubricants to coil springs, as it can attract dirt and cause premature wear.
Keep suspension components clean and free of debris to prevent rust and make future maintenance easier. Following manufacturer-recommended intervals, usually around 75,000 miles, helps extend your shocks’ lifespan.
Staying proactive preserves suspension integrity, improves ride quality, and prolongs the life of your shocks. Regular maintenance keeps your vehicle performing well and ensures safety on every trip.
Frequently Asked Questions
Can I Replace My Rear Shocks Myself?
Yes, you can replace your rear shocks yourself if you have basic mechanical skills and the right tools.
You’ll need to lift the vehicle securely, remove the wheels, and unbolt the old shocks from the suspension.
Take your time, follow safety precautions, and use the manufacturer’s torque specs.
With patience, it’s a straightforward job that should take about 20-30 minutes per side for an experienced DIYer.
What’s the Average Cost to Replace Rear Shocks?
Replacing rear shocks typically costs between $200 and $400, including parts and labor.
If you go for premium or performance shocks, expect to pay over $500. Labor usually runs $50 to $150 per shock.
Doing both shocks at once can save you money and improve handling. Keep in mind, quality shocks last longer, so spending a bit more upfront could save you money in the long run.
How Long Does It Take to Replace Back Shocks?
Replacing back shocks usually takes about 20 to 30 minutes if you’re experienced. If the shocks are rusted or hard to access, it might take closer to an hour.
The time also depends on your vehicle’s design and how worn out the components are. Using the right tools and following the manufacturer’s instructions can help speed things up.
Be patient and prepared to ensure a smooth, efficient replacement.
What Psi Should I Set My Rear Shock To?
You should set your rear shock’s PSI according to your vehicle and shock type, usually between 30-100 PSI for air shocks.
Check your manufacturer’s guidelines for the exact pressure. Adjust the PSI based on your load and driving conditions to guarantee a smooth ride and good handling.
Avoid overinflating or underinflating, as it can cause poor performance or damage. Always follow the specific recommendations for your shocks.
Conclusion
Now, as you drive away, notice how your vehicle responds smoother and steadier—like a well-rehearsed dance. Changing your shocks isn’t just about fixing a part; it’s about restoring that quiet confidence behind the wheel.
Sometimes, a simple upgrade can make every turn feel more controlled and every bump less jarring. Remember, with a little care, your suspension system can keep your journey steady no matter where the road takes you.
By replacing your shocks, you’re ensuring better handling and comfort. It’s a small step that pays off in a big way for your driving experience.