How to Repair Tonneau Cover in 8 Easy Steps
Many truck owners know the frustration of a damaged tonneau cover. It’s not just about looks; a torn or leaking cover can compromise your vehicle’s protection and your peace of mind. If you’re tired of costly repairs or replacement, don’t worry—you’re not alone. Fixing your tonneau cover can be simple and affordable if you know the right steps.
To repair your tonneau cover in 8 simple steps, start by inspecting for leaks, tears, or hardware issues. Gather the necessary tools like adhesive, patches, and cleaning supplies.
Clean and dry the cover thoroughly, then measure and mark damaged areas. Patch tears, seal leaks, or replace faulty hardware, ensuring proper adhesion and fit.
Afterward, check your repairs and troubleshoot any problems. Regular maintenance and inspections will help extend your cover’s lifespan.
If you want detailed guidance, keep going for more tips.
Key Takeaways
- Start by inspecting your tonneau cover for any damage, leaks, or misalignment. Take a good look at the seals, hardware, and support components to spot any issues.
- Next, gather all the tools you’ll need and give the cover a thorough cleaning. A clean surface makes it much easier to spot problems and carry out effective repairs.
- Then, assess the damage. Decide whether you need to patch holes, replace seals, or repair hardware parts.
- Follow the manufacturer’s instructions to apply patches, adhesives, or replace any damaged seals and hardware. Take your time to do it right.
- Finally, make it a habit to perform routine maintenance. Regular cleaning and inspections can help prevent future problems and keep your tonneau cover in good shape.
How to Diagnose Leaks, Warping, and Latch Problems
To effectively diagnose leaks, warping, and latch problems in your tonneau cover, start by visually inspecting the seals around the edges for cracks, tears, or hardening. These damage points can often lead to leaks.
Check if the seals fit snugly against the bed or if there are gaps. You can test for leaks by spraying water at low pressure along the edges and inside drainage channels, watching for water entry or bubble formation.
Next, inspect the latch and hinge mechanisms for misalignment or corrosion. These issues can cause warping and prevent the cover from sealing properly.
Also, examine the support bars and frame for warping or bending. Such problems can create gaps, leading to leaks or a misfitting cover.
Regularly checking these components helps you catch problems early and ensures a tight, secure fit.
Gather the Right Tools and Materials for Repair
Before you start repairing your tonneau cover, gather all the necessary tools and materials. Proper preparation guarantees a smooth repair process.
Gather all essential tools and materials beforehand for a smooth, professional tonneau cover repair.
You’ll need essential items like a vinyl repair kit, waterproof adhesive, scissors, rubbing alcohol, and a clean cloth. Having these ready makes the job easier.
A measuring tape or ruler is important for sizing the tear or hole accurately. You’ll also want a durable, weather-resistant patch material that matches your cover’s color and texture.
Additional supplies such as painter’s tape, fine-grit sandpaper, and masking tape are useful for securing and prepping the area. Being well-prepared helps you work efficiently.
Having everything on hand ensures a seamless repair and a professional-looking finish. Carefully follow the adhesive instructions to guarantee proper bonding.
With the right tools and materials, you’ll be set for a durable fix that looks great and lasts.
Clean and Prepare Your Tonneau Cover for Fixing
Cleaning and preparing your tonneau cover thoroughly is essential for a successful repair. Start by rinsing the cover with water to remove loose dirt and debris.
Next, gently wash the surface with a soft microfiber cloth and mild soap or car shampoo, avoiding harsh chemicals that could damage the material. Once cleaned, dry the cover completely with a clean microfiber towel to prevent moisture from interfering with adhesion.
Carefully inspect the cover for tears, holes, or other damage, marking areas that need repair. Making sure the entire surface is clean, dry, and free of dirt or grease promotes proper adhesion of patches or sealants.
Proper preparation helps ensure your repair will hold and last longer, giving your tonneau cover a fresh, secure fit.
Identify and Measure Damage to Plan Your Repair
Carefully examining your tonneau cover shows you the full extent of any damage. This helps you plan an effective repair. Start by looking for tears, holes, or worn spots, especially near edges and seams.
Use a ruler or tape measure to get accurate measurements of the damaged area. Make sure to leave at least a 1-inch overlap for patching. To clarify your plan, outline the damage with a marker or chalk, marking measurement points for accuracy.
Decide whether the damage is minor or extensive. Small tears or holes can usually be fixed with patches. Larger or multiple damages might mean you need to replace the cover entirely.
Check if the damage affects the cover’s ability to seal properly. This is important because it helps you decide if patching will work or if more extensive repairs are necessary.
Patch Tears, Seal Leaks, or Fix Hardware : What to Do First
Start by assessing how serious the damage is to figure out what needs your immediate attention.
Next, check the seal to make sure it’s intact so you can prevent any more leaks and keep the cover watertight.
Finally, look at the hardware for rust or misalignment, and fix or replace parts as needed before you patch or seal everything up.
Prioritize Damage Severity
When repairing a tonneau cover, start by assessing which damage is most severe and could impact its function or durability the most. Look for tears, leaks, and hardware issues to determine what needs immediate attention.
Prioritize repairs that prevent further damage and maintain the cover’s protective role. Focus first on fixing seals to stop water from getting in and protect the truck bed.
Next, replace any hardware that’s broken or missing to keep the cover structurally sound and safe to use. After that, repair tears to prevent them from getting worse and causing more damage.
Finally, address any other issues based on how serious they are. This way, you’ll ensure the cover stays durable and protects your truck effectively.
Check Seal Integrity
Check the seal integrity of your tonneau cover before trying any repairs. Damaged seals can cause leaks and lead to bigger problems.
Look over the rubber seals for cracks, tears, or hard spots. These issues can reduce water resistance. You can also spray water around the edges and inside the bed to see if any leaks or gaps appear.
If you notice damaged seals, replace them with manufacturer-approved adhesive or pre-adhesive seal strips for a snug fit. Before attaching new seals, clean the surfaces thoroughly with rubbing alcohol to help them stick better.
Regularly inspect and maintain the rubber seals, especially after bad weather or long use. This helps keep your tonneau cover watertight and working properly.
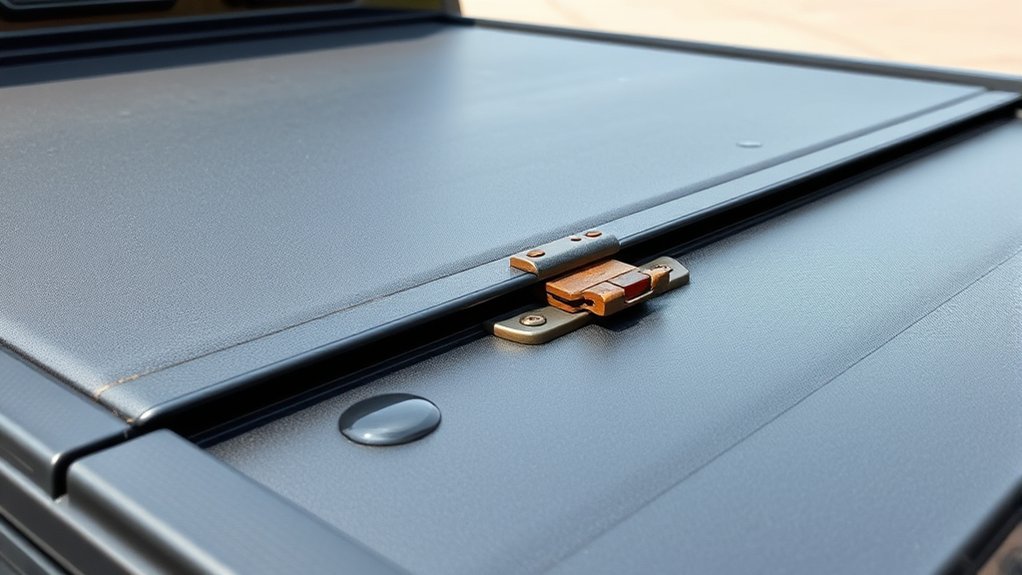
Assess Hardware Condition
Before addressing tears or leaks on your tonneau cover, you should evaluate the condition of its hardware components, such as latches, hinges, and clamps. Damaged or loose hardware can cause misalignment and compromise the cover’s seal, leading to leaks or further tears.
Check the hardware for signs of corrosion, wear, or damage, and replace any faulty parts. Also, inspect the seals around the cover for cracks or compression, as compromised seals often cause leaks.
Make sure support bars and frame components are properly aligned and secure. To improve the cover’s fit and prevent future issues, focus on tightening or replacing damaged hardware first.
Apply Adhesives and Secure the Repair for a Long-Lasting Fix
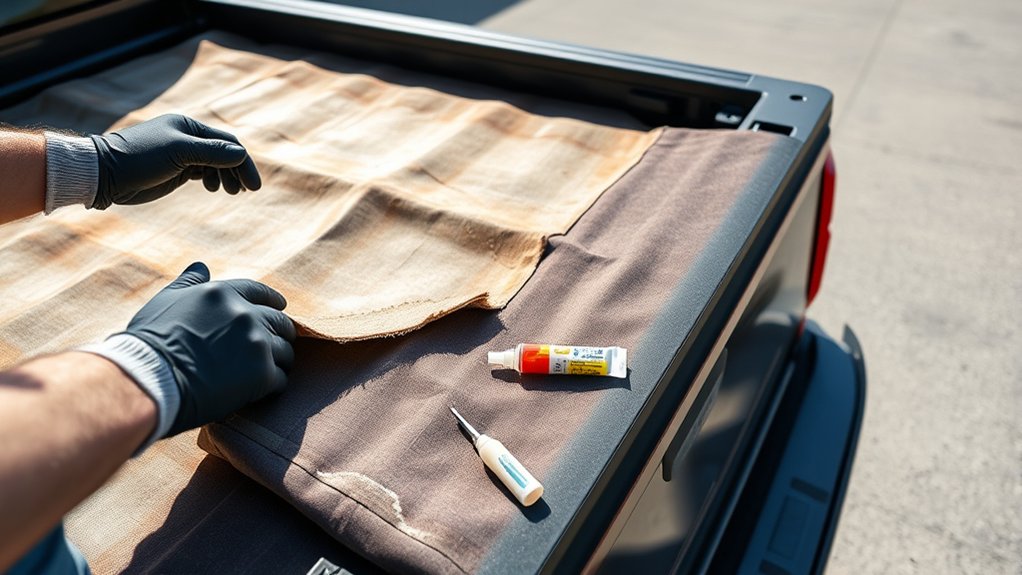
To guarantee a durable repair, start by applying a thin, even layer of marine-grade vinyl or heavy-duty adhesive around the entire edge of the patch. Carefully align the patch over the damaged area, pressing down firmly to eliminate air bubbles and ensure full contact.
Use your fingers or a roller to smooth out the patch, focusing on the edges to prevent lifting and create a waterproof seal. Check the adhesive’s curing time instructions, which typically require at least 24 hours before exposure to water or stress.
Once cured, inspect the repair for secure adhesion. If needed, reinforce the edges with additional adhesive or sealant for extra durability. Properly applied, this process ensures a long-lasting, waterproof fix.
Check Your Repair and Troubleshoot Common Problems
After completing your repair, it’s important to check your work for any remaining issues or potential problems. Inspect the seals for cracks or compression to make sure they seal properly against water intrusion.
Make sure drainage channels are clear of debris to prevent leaks. Examine the hardware for looseness or misalignment, tightening or adjusting as needed to keep everything secure.
Ensure drainage channels are clear and hardware is secure for a leak-free, properly functioning tonneau cover.
Look for signs of damage like tears or warping and address these issues right away. Cleaning hinges, latches, and tracks helps keep everything operating smoothly.
If you notice sticking or jamming, try lubricating the parts with a silicone-based product. By carefully reviewing these elements, you can spot and fix common problems.
This way, your tonneau cover stays functional and leak-free for a long time.
Maintain Your Tonneau Cover to Prevent Future Damage
To prevent future damage, make sure to regularly check your tonneau cover for signs of wear and tear.
Keeping it clean and conditioned every few months helps maintain its flexibility and UV protection.
Also, ensure that drainage channels are clear and the hardware stays tight to avoid costly repairs down the road.
Regular Cleaning Practices
Regular cleaning is essential for keeping your tonneau cover in top shape and preventing damage over time. Washing it every 1-2 weeks with mild soap and water helps prevent dirt buildup that can cause deterioration.
Use a soft microfiber cloth to dry the cover thoroughly after cleaning. This helps prevent mold, mildew, and water spots. To keep the cover’s look and flexibility, apply a vinyl or plastic restorer every few months for UV protection.
Regularly remove debris like leaves and dirt from drainage channels and seams. This prevents blockages that could lead to leaks or mold growth. Also, check and clean hinges, latches, and seals to ensure smooth operation and avoid damage.
Proper maintenance is key to preventing future issues and extending the lifespan of your tonneau cover.
Routine Inspection and Maintenance
Routine inspection and maintenance are essential to keep your tonneau cover working properly and avoid costly repairs. Regularly check seals, latches, and hinges for signs of wear, damage, or misalignment. Catch problems early to prevent bigger issues later.
Clean drainage channels once a month and remove debris to prevent water buildup, leaks, or rust. Applying a suitable protective coating or UV protectant every few months helps keep the cover’s material in good shape.
Tighten loose hardware and realign the cover as needed to ensure a proper fit and reduce unnecessary stress on parts. Schedule routine maintenance checks at least every 3 to 6 months to catch minor issues before they turn into bigger problems.
Consistent inspection and upkeep are key to extending your tonneau cover’s life and keeping it functioning smoothly.
Frequently Asked Questions
Can Tonneau Covers Be Repaired?
Yes, you can repair your tonneau cover, especially if the damage is small like tears, holes, or worn spots.
Start by cleaning the area thoroughly. Then, use a vinyl repair kit or adhesive to patch and seal the damage.
For bigger issues, it’s best to consider professional repair or replacing the cover.
Small repairs can save you money and be quite effective.
However, if the damage is extensive, more costly solutions might be necessary.
How to Patch a Hole in a Tonneau Cover?
To patch a hole in your tonneau cover, start by measuring the size of the hole. Cut a patch that extends at least an inch beyond the damaged area on all sides.
Make sure to clean and dry the area thoroughly before applying anything. Then, spread waterproof adhesive or vinyl glue around the edges of the patch.
Press the patch firmly onto the damaged spot and use painter’s tape to hold it in place. Let it cure for 24 hours before exposing it to weather.
Check the bond to ensure it’s secure before using your cover again.
What Is the Lifespan of a Tonneau Cover?
A soft tonneau cover usually lasts around 5 to 7 years if you take good care of it. Hard covers tend to last over 10 years because they’re built sturdier.
Harsh weather like strong sun or snow can shorten their lifespan. You can help them last longer by regularly inspecting, cleaning, and lubricating the cover.
Your maintenance habits, the quality of the cover, and how well it’s installed all play a big role in how long it will serve you well.
How to Disassemble a Tonneau Cover?
Disassembling your tonneau cover is like peeling an onion—layer by layer. Start by removing clamps, bolts, or screws that hold it to the truck bed.
Carefully lift and detach the cover panels or fabric, noting their order so it’s easier to reassemble later. Disconnect any hardware like latches or support bars with the right tools.
Gently peel away weatherstripping to avoid damage. Keep all parts organized so everything is ready when you want to put it back together.
Conclusion
Now that you’ve mastered these eight steps, your tonneau cover will be as resilient as a knight’s armor.
With regular upkeep, you’ll prevent future mishaps and keep it looking sharp longer.
Remember, even the most seasoned adventurers of yore knew the value of maintenance — don’t wait until the next storm to act.
By staying proactive, you’ll ensure your tonneau cover remains a trusty shield on your journey, just like a trusty steed in a tale of old.