How Do You Prime a Fuel Pump in 10 Easy Steps?
Many vehicle owners find themselves frustrated when their engine just won’t start, especially if they’re unsure how to prime a fuel pump. You’re not alone—this is a common issue, and knowing how to do it can save you time and money.
To prime a fuel pump in 10 steps, first gather your tools and safety gear. Locate the fuel pump and identify the priming components, like a bleed screw or primer bulb, based on your pump type.
Make certain there’s enough fuel and check all connections for leaks. Manually activate the pump or turn on the ignition to start the electric pump, watching for proper fuel flow and pressure.
If issues arise, troubleshoot blockages, and continue to investigate how to guarantee a smooth engine start.
Key Takeaways
- Gather necessary tools, safety gear, and make sure your work area is well-ventilated before you begin.
- Next, locate the fuel pump and identify the priming components, like test ports or primer bulbs.
- Check that the fuel tank has enough fuel and inspect all connections to ensure they’re tight and leak-free.
- Turn the ignition to the “on” position but don’t start the engine yet. This will activate the pump.
- Watch for fuel flow and pressure. You can disconnect the fuel line to see if the fuel is steady and bubble-free.
- If the fuel isn’t flowing properly, double-check your connections and try again.
- Once you see a good flow, you can start the engine to finish the priming process.
- Keep an eye on the fuel pressure and look out for leaks as the engine runs.
- If everything looks good, your fuel pump is now primed and ready to go.
- Always remember to turn off the ignition and clean up your work area when you’re done.
Why Proper Fuel Pump Priming Is Critical for Engine Start
Proper fuel pump priming is essential because it guarantees your engine gets the right fuel pressure for a smooth start. When you prime the fuel pump, you’re removing air pockets in the fuel system, which helps prevent starting problems and engine misfires.
Adequate priming ensures a steady fuel flow, reducing the chances of stalls or damage from dry running. It also stops the pump from running dry, which can cause premature wear or even failure.
By priming correctly, you support overall engine performance and reliability. It makes sure the fuel supply is steady from the moment you turn the key.
Without proper priming, your engine might struggle to start or run inefficiently. This can lead to costly repairs and shorten your vehicle’s lifespan.
Gather Tools and Safety Gear for Priming
Before you start priming your fuel pump, make sure you’ve gathered the right tools and safety gear for your fuel system. You’ll need wrenches, screwdrivers, and a clean rag to handle fuel lines and clean up spills.
Safety glasses and protective gloves are essential to prevent fuel contact and eye injuries during the process. Also, ensure your work area is well-ventilated to disperse fuel fumes and reduce fire risks.
Wearing safety glasses and gloves protects you from fuel contact and eye injuries during fuel pump work.
Keep a fire extinguisher nearby just in case of sparks or spills. Using proper personal protective equipment keeps you safe from skin irritation and inhaling harmful fumes.
Getting these tools and safety gear ready helps you work safely and efficiently. Proper preparation is key to making the process smooth and safe.
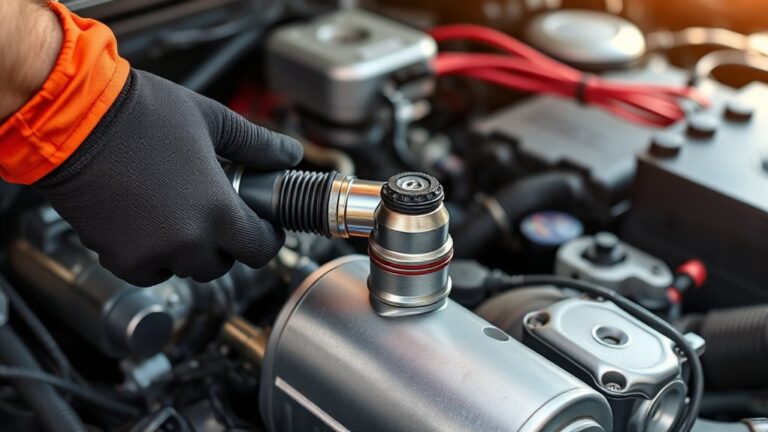
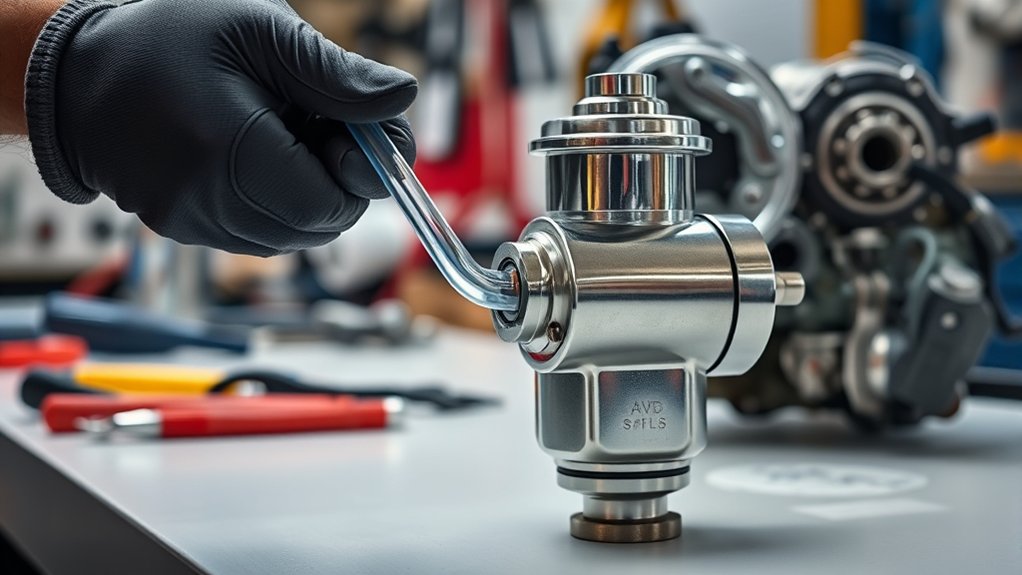
Locate Your Fuel Pump and Identify Priming Components
Where is your fuel pump located, and how can you identify the components needed for priming? Your fuel pump is usually near or inside the fuel tank, often accessible through an inspection panel or behind the rear seat. To find it, check your vehicle or equipment manual for diagrams that show its exact location.
Look for fuel lines connected to the pump, which may have a bleed screw or test port used during priming. Priming components include manual primer bulbs, electrical relay switches, or dedicated priming ports on the fuel line.
Properly identifying your fuel pump and these priming parts helps you use the correct techniques, preventing damage or leaks. Take your time to locate these parts accurately before proceeding.
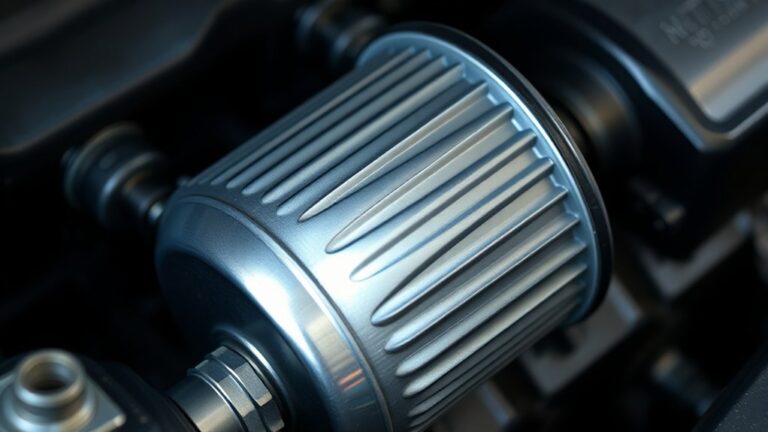
Identify Your Fuel Pump Type to Determine Priming Method
Determining whether your fuel pump is electric or mechanical is important because each type needs a different priming method. To figure out your pump type, check its features and look at the manufacturer’s specs.
Look for a primer bulb or electrical connectors—these clues help identify the pump. Electric pumps usually self-prime when powered, while mechanical pumps often require manual priming.
Also, verify how the pump is installed. The orientation and mounting position can affect how well priming works. Proper installation is key to ensuring your pump primes correctly.
Ensure Fuel Availability and Check Connections
Ensuring fuel availability and checking connections are key steps before priming your fuel pump. First, make sure your fuel tank has enough fuel to avoid air entering the system during priming.
Next, inspect all fuel line connections to ensure they’re tight, secure, and free of leaks. Check that the fuel filter is clean and properly installed for smooth fuel flow.
Also, confirm the primer or fuel pump is correctly connected to the fuel line and working properly. Take a moment to examine the fuel lines for any obstructions or blockages that could slow down fuel movement.
Open the Bleed Screw to Release Air From the Fuel System
To remove trapped air from the fuel system, start by locating the bleed screw, which is usually a small valve with a hex head near the fuel filter or injection pump. Carefully loosen the bleed screw using an appropriate wrench or screwdriver, being careful not to damage the fitting.
As you open the bleed screw, fuel and air may escape, so have a container or rag ready to catch any spills. Keep an eye on the flow; once fuel starts flowing steadily without bubbles, it means the air has been purged.
Tighten the bleed screw securely to prevent leaks and ensure the system maintains proper pressure. Opening the bleed screw correctly is essential to confirm that only fuel flows through the system, completing this important step in priming your fuel pump.
Prime the Pump Manually or Activate the Electric Pump
You can prime the fuel pump manually by filling the system with fuel using a funnel or squeeze bulb. Alternatively, you can activate the electric pump by turning the ignition to “on.”
Make sure the pump is connected properly and powered before doing either. Listen for sounds like humming to confirm it’s working.
Once the pump runs, check for fuel flow to ensure the system is primed correctly.
Manual Priming Techniques
Manual priming involves filling the fuel pump and lines with fuel before starting the engine, which helps eliminate air pockets that can hinder proper operation. To prime the pump, first check that the fuel line is connected properly and that there’s enough fuel in the tank.
If your pump has a priming lever or switch, engage it to manually start the fuel flow. Alternatively, if it has a manual primer bulb, pump it repeatedly until you see steady, bubble-free fuel flow. This indicates successful priming.
For electric pumps, turn the ignition key to the “on” position and listen for the pump’s hum. Keep priming until you’re confident the fuel system is filled with fuel and air has been expelled, ensuring the pump will operate smoothly when you start the engine.
Electric Pump Activation
When activating an electric fuel pump, make sure the fuel tank is full and turn the key to the “on” position without starting the engine. This step helps prime the pump and gets fuel flowing.
To check if it’s working properly, listen for a humming sound, which means the pump is running. If your vehicle has a “run” position, turn the key there to build pressure with the built-in priming feature.
Next, look for fuel flowing at the fuel line or pressure port to confirm the pump is functioning. If you don’t hear the pump or see fuel flowing smoothly, check electrical connections, fuses, and relays.
Making sure the pump activates correctly helps it prime effectively and ensures fuel flows smoothly to the engine.
Confirm Fuel Flow
To confirm that the fuel pump is primed and working correctly, activate the pump manually or turn on the electric one to start the fuel flow.
Listen for a humming sound or feel for vibration, which shows the pump is active. Check the fuel line or outlet for steady, bubble-free fuel flow—this confirms proper priming.
If you have a pressure gauge, use it to verify the pump is producing the right fuel pressure.
If fuel doesn’t flow, recheck all connections and repeat the priming process until you see consistent fuel flow.
Ensuring a steady, bubble-free flow confirms the pump is working as it should be and is ready for the next steps.
Proper verification helps prevent issues during engine startup or operation.
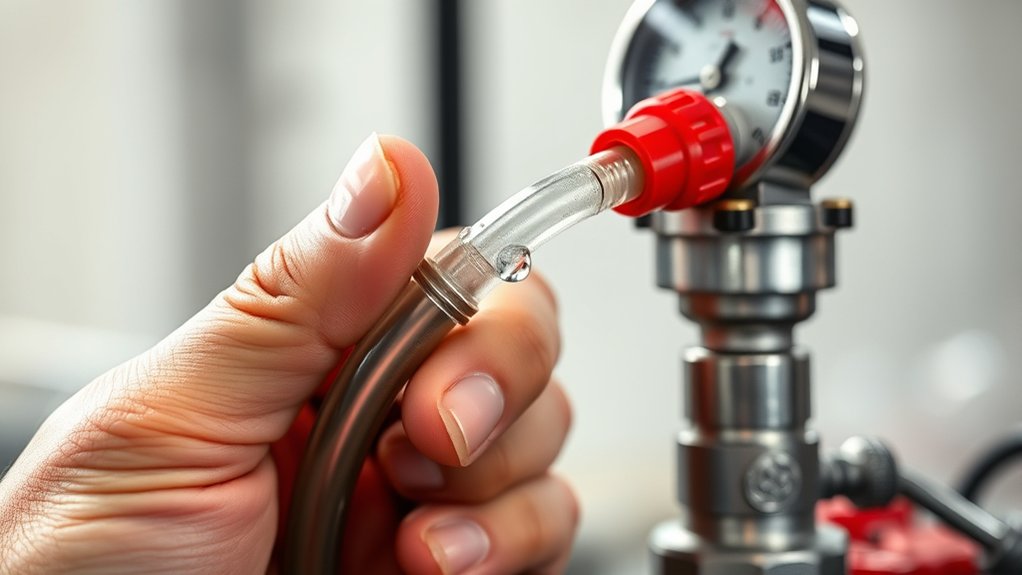
Verify Fuel Flow and Pressure to Confirm Proper Priming
You need to check the fuel pressure with a gauge to make sure it matches the manufacturer’s specs.
Next, disconnect the fuel line to verify a steady, bubble-free flow into a clean container.
Keep an eye out for any pressure drops that could indicate an issue with your priming process.
Checking Fuel Pressure Levels
How can you confirm that your fuel pump has primed correctly? The key is checking the fuel pressure. Attach a fuel pressure gauge to the test port or fuel line, then turn the ignition to the “on” position without starting the engine. Watch the gauge to see if the pressure reaches the manufacturer’s specified range.
To ensure proper priming, follow these steps:
- Verify that the fuel pressure reading matches the recommended specs.
- Disconnect the fuel line and check for a steady, bubble-free flow of fuel.
- Confirm that the fuel flow stays consistent over time, which means your pump maintains proper pressure.
If all these conditions are met, your fuel pump is properly primed and ready to go.
Confirming Steady Fuel Flow
Once you’ve checked the fuel pressure with a gauge, the next step is to verify that fuel is flowing steadily from the line. Attach a clean container to the fuel line outlet and open it to observe the flow.
You want to see a consistent, bubble-free stream that maintains steady pressure. Any sputtering, irregular flow, or air bubbles indicate incomplete priming or trapped air pockets.
Keep an eye on the fuel pressure gauge; it should stay within the manufacturer’s specified range and remain steady for a few seconds. Steady fuel pressure, combined with a smooth, continuous flow, confirms that the pump is providing proper pressure and that the priming process has been successful.
This ensures your fuel system is ready for reliable engine startup.
Identifying Pressure Drop
Monitoring for a pressure drop during priming is key to making sure your fuel system is set up correctly. A sudden drop in pressure can mean leaks or not enough fuel getting through.
To spot a pressure drop, start by using a fuel pressure gauge to check the outlet pressure. Make sure it matches what the manufacturer recommends.
Next, watch the fuel flow rate. It should be steady and free of air bubbles. Any irregularities could indicate a problem.
Finally, check the pressure regularly while you’re cranking the engine. If the pressure stays steady, your fuel delivery is likely fine. If it drops, that’s a sign there’s trouble.
Troubleshoot Common Priming Problems and Fix Blockages
When troubleshooting priming issues, start by inspecting the fuel system for common blockages and leaks. Air leaks in fuel lines and connections can prevent proper priming by letting air enter the system, which disrupts fuel flow. Check for loose or cracked fittings, and tighten or replace them as needed.
Next, inspect and replace clogged or dirty fuel filters, as they restrict fuel flow during priming. Make sure the fuel pump is working correctly by listening for a humming sound when you turn on the ignition. If you don’t hear anything, there might be a problem with the pump.
Also, verify that the pump is mounted at the right angle and position. Improper mounting can cause air pockets or blockages in the system. Lastly, clear any debris or obstructions in the tank or lines to keep fuel flowing smoothly.
Test the Engine and Finalize Priming for Smooth Operation
After addressing any blockages and making sure the fuel system is properly primed, it’s time to test the engine and confirm that fuel delivery is smooth. Start by turning the ignition to the “on” position and listen for the fuel pump’s sound to verify it’s working correctly.
Ensure the fuel pump sounds正常 before starting the engine to confirm proper fuel delivery.
Next, try to start the engine. If it hesitates or stalls, recheck the fuel lines and re-prime if needed. To finish priming and ensure smooth operation, observe the engine’s idling for steadiness.
Gradually accelerate to check responsiveness and watch for normal exhaust emissions and consistent performance. If the engine runs smoothly during these steps, you’ve successfully finalized priming.
Finally, turn off the engine and restart it to confirm reliable fuel delivery and smooth operation.
Frequently Asked Questions
How to Force a Fuel Pump to Prime?
To force a fuel pump to prime, turn the ignition to “on” and listen for a humming or clicking sound, which signals that it’s activating. If you don’t hear anything, it might not be working automatically.
You can manually prime the system by opening the bleed screw and using a priming bulb or pump to push fuel through. Just make sure your fuel tank is full and the lines are connected correctly.
If the pump still doesn’t prime, check electrical components like fuses and relays to ensure everything’s in good shape. That should help get your fuel system working again.
How to Remove Airlock in Fuel Pump?
Removing an airlock from your fuel pump is like clearing a clogged artery. First, make sure your fuel tank’s full to keep things flowing smoothly.
Next, manually prime the pump by squeezing it like a sponge, or simply activate the electric pump if you have one.
Loosen the bleed screw just enough to release trapped air. Once fuel starts flowing steadily, tighten it back up.
Keep the fuel lines elevated to let gravity work in your favor. Repeat this process until the fuel flow is steady and free of bubbles.
Does a Fuel Pump Prime Without Fuel?
No, a fuel pump generally doesn’t prime without fuel. Electric pumps need fuel in the system to build pressure and start flowing properly. Without fuel, they can’t generate the necessary pressure.
Mechanical pumps also rely on fuel to move it through the system. Trying to operate a pump dry can cause damage or wear to its components. Always make sure fuel is present before starting the priming process.
How Long Does It Take for a New Fuel Pump to Prime?
A new fuel pump usually primes in about 10 to 30 seconds, like a burst of energy waking up your engine’s heart.
Electric pumps often prime within seconds once you turn the ignition, while manual methods might take longer, needing multiple pumps.
Things like check valves and fuel line size can speed things up or slow them down.
Patience pays off—your engine will be ready to roar soon enough.
Conclusion
Priming your fuel pump is like giving your engine a fresh breath of air—it’s key for smooth starts and reliable running.
By following these simple steps, you’ll make sure your engine runs smoothly, just like a well-oiled machine.
Think of priming as watering a plant; a little effort now helps everything stay healthy later.
With patience and care, you’ll keep your engine humming happily, ready to hit the road whenever you are.
Remember, proper priming of your fuel pump is crucial for ensuring your vehicle runs smoothly and efficiently.