How Do Fuel Gauges Work Step by Step
Many drivers find themselves wondering how fuel gauges actually work, especially when their readings seem off. You’re not alone—understanding this small but vital component can really help you better manage your fuel.
Fuel gauges work by using a float attached to a variable resistor inside the tank, which changes resistance as fuel levels vary. This resistance signals your vehicle’s system, causing the gauge to move accordingly—higher resistance means less fuel, and lower resistance means more.
Wiring and electronic components transmit the signals, while modern gauges rely on sensors and control units for accuracy. Keep exploring if you want to understand the detailed process behind these essential systems.
Key Takeaways
- A float on the fuel surface moves up and down with the changing fuel level. This movement shifts the connected sensor arm.
- Inside the sensor, there’s a variable resistor. As the float moves, the resistance of this component changes, which indicates how much fuel is left.
- That resistance is then turned into an electrical signal. This signal is sent to the vehicle’s gauge or ECU.
- The ECU processes this signal and translates it into a reading, either digital or analog, on the fuel gauge.
- Finally, the gauge needle or digital display updates in real-time based on the resistance data it receives.
How Does a Fuel Gauge Detect Fuel Levels?

A fuel gauge detects fuel levels through a simple but effective setup involving a float and a resistor. Inside your tank, the float sits on the surface of the fuel and moves up or down depending on how much fuel is present.
Attached to the float is a fuel level sensor with a variable resistor, also called a sending unit. When the fuel level changes, the float shifts position, which causes the resistance in the sensor to go up or down.
This change in resistance affects the electrical current flowing through the circuit. The gauge or digital display then interprets this signal, giving you a clear visual or numerical indication of how much fuel is left in your tank.
What Is the Fuel Sending Unit and How Does It Work?
The fuel sending unit is a key part inside your fuel tank that measures how much fuel is left. It has a float attached to a metal arm that moves up and down with the fuel surface.
As the fuel level changes, the float’s position alters the resistance in a variable resistor, or potentiometer. When the tank is full, the resistance is about 15 ohms; when empty, it’s around 107 ohms.
As fuel levels change, the float adjusts resistance from 15 to 107 ohms, signaling the gauge.
This resistance change sends an electrical signal through wiring to your fuel gauge or vehicle’s electronic system. The system then interprets this signal to figure out how much fuel is left.
Basically, the fuel sending unit provides real-time data about your fuel tank’s contents, helping you know when it’s time to refuel.
How Does Resistance Signal Your Fuel Level?
As your fuel level changes, the float inside the sending unit moves up or down. This movement alters the resistance in the circuit. When the tank is full, the float rises, decreasing resistance. As fuel decreases, the float drops, increasing resistance.
This change in resistance sends an electrical signal through wires to the gauge. Usually, higher resistance means a lower fuel level, making the needle move toward empty. Conversely, lower resistance indicates a full tank, pushing the needle toward full.
| Fuel Level | Resistance | Gauge Response |
|---|---|---|
| Full | Low | Needle points to full |
| Empty | High | Needle points to empty |
| Medium | Moderate | Needle points midway |
| Low | High | Needle near empty |
| High | Low | Needle near full |
What Role Do Wiring and Electrical Signals Play in Fuel Measurement?
Wiring and electrical signals are crucial for accurately sending fuel level information from the sending unit to the gauge. The wiring connects the fuel sending unit inside the tank to the dashboard, carrying signals that show how much fuel is left.
These signals change based on resistance within the sending unit’s variable resistor, which moves with the float. Proper wiring ensures voltage and current flow correctly, so the gauge can interpret the data accurately.
Changes in resistance within the sending unit’s resistor, affected by the float’s position, are accurately interpreted through proper wiring.
If the wiring gets damaged or corroded, it can cause faulty signals. That may lead to inaccurate readings or even gauge failure. The vehicle’s system processes these electrical signals, translating resistance changes into a visual fuel level.
In short, wiring and signal integrity are key for reliable fuel measurement. They make sure you always see an accurate fuel level on your dashboard.
How Do Modern Fuel Gauges Use Sensors and Electronic Control Units?
Modern fuel gauges rely on sensors, like floats attached to variable resistors, to measure fuel levels directly. These sensors send electrical signals to the vehicle’s Electronic Control Unit (ECU).
The ECU processes and converts the data into a digital display. This system ensures you get accurate, real-time fuel readings on your dashboard.
Sensor Functionality and Types
Fuel gauges use sensors that detect how much fuel is in the tank by turning the float’s movement into an electrical signal. Inside the tank, a float rides on the fuel surface and connects to a variable resistor or potentiometer.
As the float moves with the fuel level, it changes the resistance in the sensor circuit. Usually, this resistance ranges from about 15 ohms when full to 107 ohms when empty.
This change in resistance affects the electrical current flowing through the circuit. The sensor is designed so that the resistance accurately indicates the fuel level.
Different types of sensors exist, but the float and variable resistor combo is the most common. This simple setup provides the basic data the electronic control unit needs to know how much fuel is left.
Electronic Signal Processing
Once the float sensor detects the fuel level by changing its resistance, this information is converted into an electrical resistance signal that the vehicle’s electronic control unit (ECU) can interpret. The resistance signal is sent as a voltage or current, which the ECU processes to determine fuel quantity.
Inside the ECU, this analog resistance data is converted into a digital signal, allowing precise calculations. The digital data represents the current fuel level, which the system uses to update the gauge display accurately.
To ensure reliable readings, calibration features adjust for factors like fuel sloshing and sensor variations. This calibration helps maintain measurement accuracy over time, providing you with consistent, trustworthy fuel level data displayed on your dashboard.
Data Transmission and Display
When you turn on your vehicle, the sensor’s resistance changes with the fuel level, and this electrical signal is sent to the Electronic Control Unit (ECU) for interpretation.
The sensor transmits a data signal that reflects the resistance, which the ECU then interprets and converts into a digital signal.
This digital signal contains precise information about the fuel level and other data, like fuel consumption.
The ECU processes this information almost instantly and transmits it to the dashboard display.
The display updates in real-time, showing you an accurate fuel level.
This electronic communication ensures quick, consistent updates, so you can rely on the gauge for accurate readings.
Modern fuel gauges use sensors, data transmission, and the ECU to keep you informed effortlessly.
What Are Common Signs of Fuel Gauge Problems?
If your fuel gauge acts up or stays on full or empty no matter how much fuel you actually have, that’s a warning sign something’s off. You might see the needle jumping around or not moving at all after you refuel, which could mean there’s a problem.
Also, if your low fuel warning light comes on too early or doesn’t turn on when it should, it’s a good idea to get the system checked out. These signs can help you catch issues before they get worse.
Erratic Fuel Readings
Erratic fuel readings can be a clear sign that your vehicle’s fuel gauge is having trouble. If you notice the needle jumping unexpectedly or fluctuating while driving, it might be a problem with the fuel gauge sending unit or wiring.
Sometimes, the gauge shows full when the tank is nearly empty, or vice versa. This signals inconsistent readings. Wiring issues, like poor connections or corrosion in the wiring harness, can cause intermittent or stuck readings.
Sudden drops or spikes in the fuel level could mean a failing fuel sending unit or a faulty grounding connection. Damaged float mechanisms or resistive elements inside the sending unit can also lead to unpredictable readings, making it harder to trust your fuel gauge.
Stuck or Inaccurate Gauge
A stuck or inaccurate fuel gauge often becomes noticeable when it consistently shows full or empty despite your actual fuel level. This usually means there’s a problem with the fuel gauge itself or the sending units that relay fuel level changes to the display.
Sudden or irregular needle movements can point to wiring issues or a failing sending unit. If the gauge shows full when the tank is nearly empty or vice versa, it’s often due to a faulty resistor or float inside the sender.
Inconsistent readings or fluctuations while driving also suggest poor wiring connections or a malfunctioning fuel sending unit. When the gauge stays on empty after refueling or gets stuck at a certain point, it’s likely an electrical circuit or sensor problem.
Low Fuel Warning Issues
Low fuel warning issues often become noticeable when your fuel gauge isn’t working properly.
You might see the low fuel warning light turn on too early or not at all, which could mean a problem with the gauge itself.
Fluctuating or inconsistent readings, like the needle jumping around or sticking on full or empty, are common signs of an issue with the fuel sending unit or electrical connection.
When the gauge shows full even though the tank is empty, or vice versa, it points to a malfunction in the fuel level system.
These problems can come from wiring issues, a faulty sensor, or a failing fuel sending unit.
Paying attention to these signs can help you know when your fuel gauge needs inspection or repair to keep your readings accurate.
How Can You Diagnose and Fix Fuel Gauge Issues?
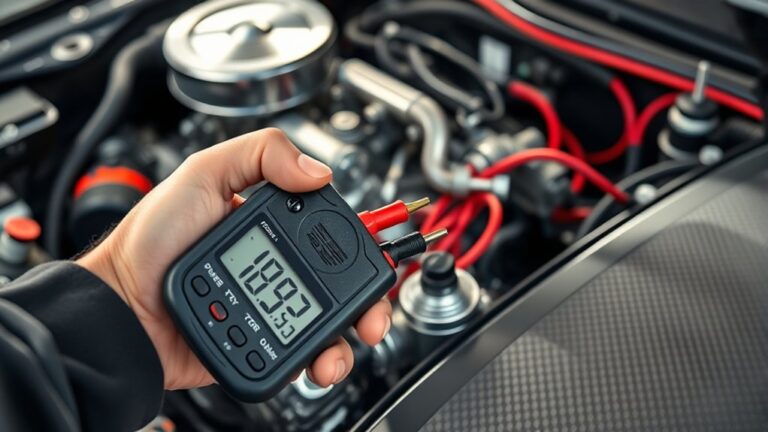
Diagnosing fuel gauge issues usually starts with inspecting the wiring and connections to make sure signals are reaching the gauge properly. Use a multimeter to check the resistance across the sending unit wires; proper operation shows variable resistance, while a constant or out-of-range reading points to a fault.
Next, examine the wiring harness and connectors for corrosion, damage, or loose connections that could disrupt the signal. Test the fuel sending unit directly by disconnecting it and measuring its resistance at different fuel levels. If it doesn’t respond correctly, the unit might be faulty.
Also, check the fuse related to the fuel gauge circuit for continuity. A blown fuse can stop the gauge from working. If problems still occur, consider replacing either the sending unit or the gauge itself.
How Do You Reset or Calibrate Your Fuel Gauge?
Resetting or calibrating your fuel gauge ensures it gives accurate readings, so you know when to refuel. To do this, start by disconnecting the vehicle’s negative battery terminal.
For some vehicles, turn the ignition to the “on” position before disconnecting to help with proper calibration. Ground the wire to the fuel sending unit for a few seconds to reset the system.
If you have a digital gauge, use the onboard menu or a diagnostic tool to set the full and empty points. In certain models, manually adjusting the float arm or replacing the fuel sending unit will recalibrate the gauge.
Always check your vehicle’s manual for specific steps to follow. Here’s a quick overview based on the type of fuel gauge you have:
| Fuel Gauge Type | Calibration Method |
|---|---|
| Analog | Disconnect battery, ground sending wire |
| Digital | Use onboard menu or diagnostic tool |
| Manual | Adjust float arm or replace sending unit |
| Automatic | Follow manufacturer’s reset procedure |
Tips for Keeping Your Fuel Readings Accurate Over Time
To keep your fuel readings accurate over time, regular calibration is essential if your vehicle allows it. Proper calibration helps the fuel gauge reflect the true fuel level by adjusting the sending unit’s signals.
Regular calibration ensures your fuel gauge stays accurate by fine-tuning the sending unit’s signals.
Also, keep the fuel tank and sending unit clean and free of debris to prevent false readings. Avoid running the tank completely empty often, as sediment can settle and impact accuracy.
Regularly inspect and repair wiring connections to the sending unit to prevent corrosion or loose contacts. Using high-quality fuel and additives when necessary can also help improve sensor performance.
Tips for maintaining accuracy:
- Calibrate your fuel gauge periodically.
- Keep the tank and sending unit clean.
- Avoid frequently running on empty.
- Inspect wiring and connections regularly.
Frequently Asked Questions
How Does a Fuel Gauge Operate?
A fuel gauge works by measuring the resistance from a float-based sending unit inside your tank. As fuel levels change, the float moves, adjusting a resistor that changes the electrical resistance.
This change affects the current or voltage sent to the gauge, which then moves the needle or updates the display. Modern systems might use a microcontroller for more precise readings, so you always know exactly how much fuel you have.
What Is Between 1/2 and 3/4 on a Fuel Gauge?
Think of the space between 1/2 and 3/4 on your fuel gauge as a bridge from halfway to nearly full. You’re moving through a zone where the tank’s level rises from about 50% to 75%.
As you fill or drain your tank, the needle glides smoothly across this range, guided by resistance changes in the sending unit. It’s your visual cue of a journey from half to three-quarters full.
How to Read a Gas Gauge for Dummies?
To read a gas gauge for dummies, look at the needle or digital display. If it points near “E,” your tank’s almost empty. Near “F,” it’s full.
If it’s somewhere in between, estimate the fuel level based on its position. Closer to “E” means less fuel, closer to “F” means more.
Keep an eye on it regularly so you don’t run out of gas unexpectedly.
How Do Cars Tell How Much Gas Is Left?
You might think your car just “knows” how much gas is left, but it actually measures resistance in a sensor inside the tank.
As fuel drops, the float moves down, changing the resistance. This signal travels to your dashboard, where it’s interpreted to show a level from full to empty.
It’s a clever system that keeps you informed so you never unexpectedly run out of gas.
Conclusion
Understanding how your fuel gauge works is like unraveling a clock’s intricate gears—you’ll appreciate each part’s role in keeping your fuel reading accurate.
By knowing how the sensor, wiring, and electronic signals work together, you can better diagnose issues and keep your gauge running smoothly. Think of it as tending to a delicate garden. Regular care and attention guarantee your fuel level stays in perfect harmony, never letting you run unexpectedly dry.