How to Install a Tonneau Cover Lock Assembly
Many truck owners struggle with keeping their cargo secure and weatherproof. Installing a tonneau cover lock assembly might seem tricky, but you’re not alone in feeling this way.
Fortunately, with a little guidance, you can do it yourself and enjoy added security.
To install a tonneau cover lock assembly, start by gathering your tools and verifying compatibility. Remove the old lock if needed, then mark the new lock’s position on the cover with a pencil or marker.
Drill pilot holes carefully, aligning the lock properly. Secure the lock with fasteners, connect the latch and rods, and guarantee smooth operation.
Finish by sealing around the lock with silicone to prevent water leaks. Keep going to learn detailed steps for a secure installation.
Key Takeaways
- Gather the necessary tools and check that the lock matches your truck bed and cover model.
- Remove or prepare the existing lock. Then, mark the exact spots for drilling.
- Carefully drill pilot holes, making sure everything lines up properly for the new lock parts.
- Install the lock assembly, connecting rods and latches, and tighten all fasteners securely.
- Test the lock to see if it opens and closes smoothly. Seal any gaps with silicone sealant.
- Make sure everything is water-resistant before you finish up.
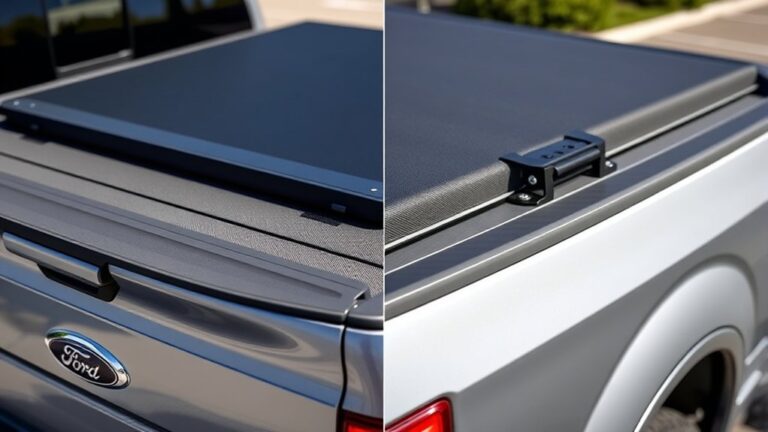
Why a Tonneau Cover Lock Is Essential for Your Truck
Ever wondered why installing a tonneau cover lock is such a smart move? It’s all about boosting your truck bed security and keeping your tools, equipment, and valuables safe.
Installing a tonneau cover lock enhances security and protects your valuables from the elements.
Without a lock, your cargo is vulnerable during quick stops or overnight stays. A reliable lock also helps protect your items from rain, snow, dirt, and debris.
Upgrading to a lock assembly not only makes your cover more secure but also adds to its durability. With a good lock, you can relax knowing your stuff stays safe no matter how long you’re away.
It’s a simple upgrade that really makes a difference in safeguarding everything in your truck bed.
Gather Your Tools and Materials
Start by gathering all the essential tools, including a drill, screwdriver, measuring tape, marker, and wrench or socket set. Make sure they’re in good condition before you begin.
Prepare any additional materials you might need, like weatherproof sealant or lock components for the installation.
Keep everything organized in a clean, accessible workspace. This will make the process smoother and safer.
Essential Tools Checklist
Before you start installing the tonneau cover lock assembly, make sure you gather all the necessary tools and materials. Having everything ready makes the process much smoother.
You’ll need a drill with the right size bits, a Phillips screwdriver, a measuring tape or ruler, a marker or pencil, and a wrench or socket set. It’s also important to organize all the lock components, including the lock cylinder, latch mechanism, and fasteners.
Wearing safety glasses is a good idea to protect your eyes during drilling or handling tools. Check the lock manufacturer’s instructions for any specific tools your model might require.
Keep everything within easy reach in a clean, well-lit workspace. This setup helps you work efficiently and safely during the installation.
| Tools | Lock Assembly Components |
|---|---|
| Drill & Bits | Lock cylinder |
| Phillips screwdriver | Latch mechanism |
| Measuring tape/ruler | Fasteners |
| Marker or pencil | Safety glasses |
| Wrench or socket set | Workspace essentials |
Material Preparation Steps
Gathering your tools and materials upfront guarantees a smooth installation process. Start by collecting essential tools like a drill, screwdriver, wrench, measuring tape, and marker.
Next, gather the lock assembly components—lock cylinder, rods, fasteners, and mounting brackets—specific to your tonneau cover model. Check that these parts are compatible with your truck bed to avoid issues later.
Organize everything neatly, placing frequently used tools and parts within easy reach to save time. Ensuring you have the right tools and compatible components before you begin helps prevent interruptions and mistakes.
Keep your workspace clean and well-lit for precise measurements and handling small parts. Proper preparation sets a solid foundation for a seamless and efficient installation.
Remove or Prepare Your Existing Lock (If Replacing)
Before installing your new lock, start by removing the existing one and unscrewing any mounting hardware.
Check the old lock for damage or corrosion, and carefully detach any weatherstripping or seals.
Finally, clean the area thoroughly to ensure a secure fit for the new lock.
Remove Old Lock Components
To remove the old lock components, start by locating the existing lock assembly on your tonneau cover. Use a screwdriver or wrench to remove any screws or bolts holding the lock in place. Carefully disconnect any connecting rods, cables, or fasteners attached to the lock mechanism to free it from the cover.
Check for rust, wear, or damage on the lock components to ensure a smooth installation process. Clean the mounting area thoroughly to remove dirt, debris, or residue that could interfere with the new lock.
Keep all parts and fasteners in a safe place for potential reuse or reference. Inspect the old lock to make sure it’s compatible with your new lock assembly before proceeding.
This step prepares your tonneau cover for a seamless installation process.
Assess Lock Compatibility
Is your existing lock compatible with the new tonneau cover lock assembly? First, check the lock mechanism to make sure it matches the size and mounting points of the new lock.
Remove the old lock by unscrewing the mounting screws or bolts, making sure the cover stays secure. Then, inspect the lock cylinder to see if it fits properly into the designated hole and aligns with the cover’s latch system.
Look for any damage or wear that might require repair or replacement before installing the new lock. Also, verify that any wiring or linkage is compatible or disconnected to avoid issues during installation.
Confirming lock compatibility helps prevent complications and ensures a smooth, secure fit for your tonneau cover lock assembly.
Clean and Prepare Area
When replacing an existing lock, start by carefully unscrewing and gently pulling the lock assembly away from the tonneau cover or truck bed. Next, remove all leftover parts or debris from the old hardware.
Thoroughly clean the area with a cloth and mild detergent to remove dirt, grease, and debris around the mounting site. Check for rust or corrosion and treat it if needed.
Make sure the surface is completely dry before proceeding. Guarantee the surface is free of moisture to ensure proper adhesion and a secure installation of the new lock.
Proper cleaning and preparation are essential for a smooth installation and long-lasting performance. Prepare the mounting surface for a perfect fit.
Mark Your Lock’s Position on the Cover
Before marking your lock’s position, it’s important to carefully measure where it will sit for easy access and security. Use a measuring tape or ruler to find the best spot, usually near the tailgate or center of the cover.
Mark the exact points where the lock will be installed with a marker or pencil. Make sure they line up with any existing holes or brackets.
Check that the lock’s position allows the key to operate smoothly without interfering with the cover’s movement or seals.
It’s essential that the marked location provides a secure connection with the latch mechanism to prevent unauthorized access.
Double-check your measurements and markings before drilling to ensure proper placement and lock functionality.
Drill Pilot Holes for Secure Mounting
Use your measuring tape and template to mark the exact spots for drilling pilot holes, making sure everything is accurately placed. Pick a drill bit that’s just a bit smaller than your screws or bolts so they fit tightly and stay secure.
Drill slowly and steadily, checking the alignment as you go. After drilling, clean out any debris to keep everything working smoothly and ensure a secure mount.
Mark Precise Drill Points
To guarantee your lock assembly fits securely and works properly, start by carefully measuring and marking the drill points. Use a measuring tape or ruler to find the exact locations based on the lock’s mounting template or instructions.
Mark each drill point clearly with a pencil or marker, making sure they line up with the lock’s holes. Double-check your measurements and markings to confirm proper spacing and alignment before you start drilling.
This helps prevent misalignment and makes sure everything fits flush. Remember to clean the truck bed surface where you’ll drill for precise hole placement.
Properly marked drill points are essential for a secure, professional-looking installation. Accurate measurement ensures a proper fit, and clear markings help prevent errors. Alignment is key for smooth operation, so double-check everything before drilling.
Use Correct Drill Bits
Choosing the right drill bit is essential for a secure and professional installation of your lock assembly. Use drill bits that match the size of your mounting screws to guarantee a tight fit.
Drill pilot holes slightly smaller than the screws to prevent splitting and make screw insertion easier. Always mark your drill points with a pencil or marker for precise alignment.
Select high-quality, sharp drill bits designed for your truck bed’s material to avoid slipping or creating uneven holes. Drill slowly and steadily, applying consistent pressure to produce clean, accurate pilot holes.
Using the correct material-specific drill bits helps prevent damage and ensures your lock assembly stays securely mounted over time. Proper drill bit choice is key to a successful, durable installation.
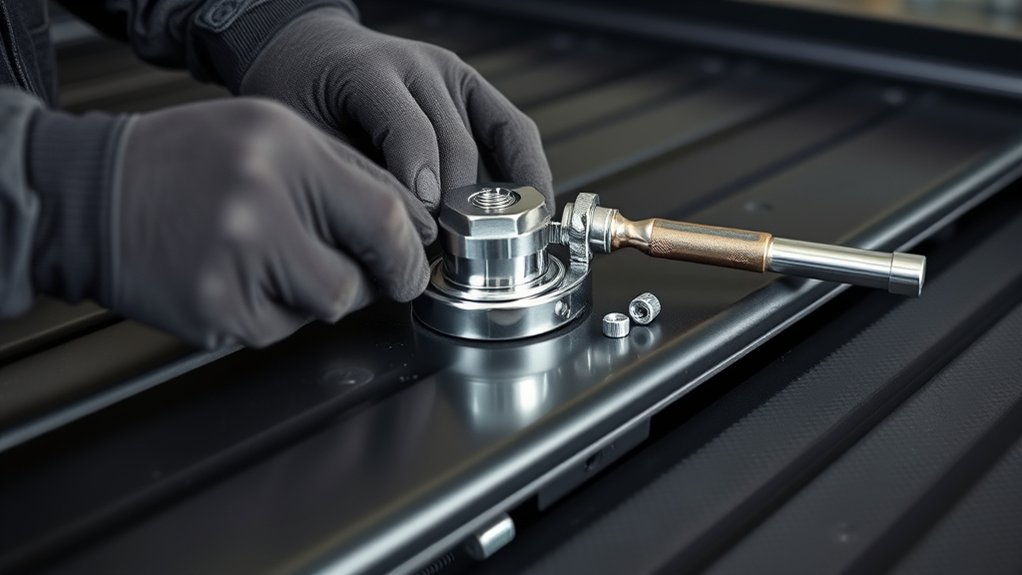
Install and Secure the Lock Cylinder
Begin by aligning the lock cylinder with the pre-drilled holes in the tonneau cover, making sure it fits snugly and is straight. Insert the lock from outside, with the key slot facing outward for easy access.
From inside the cover, secure the lock by tightening the retaining nut onto the threaded shaft until it’s flush against the surface. This ensures the lock is properly secured during installation.
Before moving on, double-check that the lock operates smoothly by turning the key, without wobbling or resistance. Confirm that the lock cylinder is firmly secured and properly aligned.
Proper installation ensures maximum security and functionality. Make sure the lock is straight, tighten the nut firmly, and verify smooth key operation.
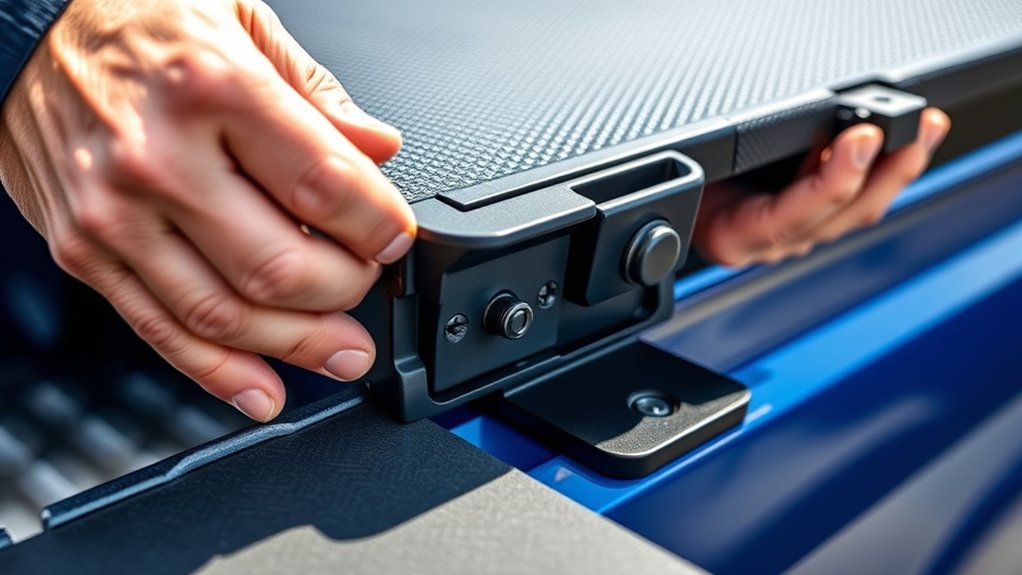
Connect and Adjust the Lock Mechanism
After securing the lock cylinder in place, the next step is to connect the lock mechanism to the latch.
Align the lock rod with the latch mechanism, making sure it fits smoothly without forcing to prevent damage.
Attach the lock rod to the lock lever using the provided clips or fasteners, ensuring it snaps securely.
Use the adjustable rods to fine-tune the connection so that the latch fully engages when you turn the lock.
Check that the lock mechanism operates freely and that the latch opens and closes smoothly without binding.
Test the lock’s engagement several times, making small adjustments as needed to ensure reliable, smooth operation.
Proper connection and adjustment are key to a secure, functional tonneau cover lock.
Test Your Lock and Make Necessary Adjustments
Once you’ve installed the lock, it’s important to test how well it works to make sure everything is functioning properly. Turn the key or handle multiple times to check for smooth operation and look out for any resistance or misalignment.
After installation, test the lock’s smooth operation and check for proper alignment and functionality.
Engage the lock and see if the latch lines up correctly with the mechanism before tightening the fasteners. Open and close the tonneau cover several times to confirm the lock holds securely and works consistently.
If you notice wobbling or trouble engaging the lock, make adjustments to the lock assembly or latch position. Also, gently press around the lock area to check for water leaks, ensuring a good seal.
Proper testing helps confirm reliable lock operation, correct alignment, and effective water sealing, which can prevent future problems.
- Check for smooth lock operation
- Verify proper latch alignment
- Make sure locking and unlocking are consistent
- Adjust for wobbling or misalignment
- Test for water leaks around the lock
Seal Around the Lock to Prevent Water Leaks
Ever wonder how to keep water out of your tonneau cover lock area? The trick is sealing around the lock housing with a good waterproof sealant.
Apply the silicone evenly along the edges where the lock housing touches the tonneau cover, making sure to cover all gaps and seams. This creates a watertight barrier that stops water from getting in during rain or washing.
Be careful not to overdo it, since too much sealant can squeeze into the lock mechanism and mess up how it works.
Once you’ve applied it, let the sealant cure completely for at least 24 hours before exposing the lock to moisture.
It’s a good idea to regularly check the sealant for cracks or wear and reapply as needed. This way, you’ll keep a reliable, waterproof seal around the lock housing.
Maintain and Troubleshoot Your Tonneau Cover Lock
Maintaining and troubleshooting your tonneau cover lock is key to keeping it working smoothly and in good shape. Regular cleaning with a soft cloth helps prevent dirt buildup, and avoid harsh chemicals that could damage the lock.
Every few months, apply a lubricant like silicone spray or graphite powder to keep the keyhole and moving parts operating smoothly. This simple step can prevent sticking and make unlocking easier.
Periodically check the lock for rust, corrosion, or signs of wear. If you notice any issues, address them early to avoid more serious damage later on. Keeping the lock and surrounding area dry also helps reduce water buildup and corrosion.
Make sure to test the lock after lubrication to ensure everything’s working correctly. Keeping the area dry and clean will go a long way in maintaining your lock’s function over time.
Frequently Asked Questions
How to Install a Clamp on a Tonneau Cover?
You position the clamp over the designated area on the tonneau cover rail, making sure it lines up with the holes. Then, you insert the bolts or screws through the clamp into the pre-drilled holes.
Using a wrench or screwdriver, you tighten the bolts gradually and evenly. Check that the clamp holds firmly without moving or interfering with the cover’s operation.
Repeat as needed for additional clamps.
How Does a Roll-N-Lock Bed Cover Work?
A Roll-N-Lock bed cover slides open and closed along your truck bed rails. It’s supported by aluminum slats that provide both strength and flexibility.
You can lock it in any position using a key-operated mechanism. This engages an internal latch that secures the cover and keeps out unauthorized access.
When locked, it protects your cargo from theft and the elements. Plus, it gives you customizable access to your truck bed whenever you need it.
Can I Go Through a Car Wash With a Tonneau Cover on My Truck?
Yes, you can go through a car wash with your tonneau cover on, but it’s a good idea to check your manufacturer’s guidelines first. This helps ensure you’re not risking any damage.
Securing or locking the cover is important because it keeps it from opening or getting damaged during the wash cycle. It’s a simple step that can save you from bigger issues later on.
Hand washing or using touchless car washes are safer options, especially if your cover is soft or vulnerable to high-pressure water. These methods help protect your cover while still getting your truck clean.
Always make sure your cover is properly secured to avoid any mishaps. Better safe than sorry when it comes to protecting your truck and cover.
Do Tonneau Covers Have Locks?
Yes, many tonneau covers do have locks. These locks help secure your cargo and prevent theft. Some covers come with built-in keyed cylinders, while others use latch or combination locks.
Keep in mind, not all models have locking features, especially budget or simpler covers. If your cover doesn’t have a lock or you want extra security, you can install an additional lock assembly to better protect your belongings.
Conclusion
Now that your lock’s in place, you’ll feel like a highway hero, protecting your gear from bandits.
It’s funny how a tiny lock can turn your truck bed into Fort Knox with just a simple twist of a key.
Remember, a well-installed tonneau cover lock assembly not only keeps your possessions safe but also prevents water from getting in.
Because nothing says ‘secure’ like a dry, protected cargo.
Who knew such a small addition could make your truck feel invincible?