How Do You Unclog Fuel Injectors in 7 Easy Steps
Dealing with a rough-running engine or poor acceleration can be frustrating, and you’re not alone in facing this issue. Many car owners struggle with clogged fuel injectors, which can cause your vehicle to perform poorly or even stall.
Luckily, unclogging your fuel injectors doesn’t have to be complicated.
To unclog your fuel injectors in 7 easy steps, start by identifying signs like rough idling or poor acceleration.
Next, gather tools like a cleaning kit and safety gear.
Safely relieve fuel pressure, then inspect and remove the injectors.
Clean them with a suitable cleaner, replace O-rings, and reassemble carefully, checking for leaks.
Finally, start your engine and test drive to confirm performance.
If you want detailed instructions, keep exploring to learn more.
Key Takeaways
- Relieve fuel system pressure safely before removing or working on injectors. This step is really important to prevent any fuel spray or accidents.
- Carefully remove the fuel injectors. Take a close look at them and clean them using an appropriate cleaner or ultrasonic cleaning method.
- When reinstalling, replace any damaged O-rings. Make sure everything seals properly so there are no leaks.
- After everything is back in place, check for leaks around the injectors and connections. Tighten all connections securely to avoid any fuel leaks.
- Finally, take the vehicle for a test drive. This helps you verify if the engine runs smoother and if fuel efficiency has improved.
Signs of a Clogged Fuel Injector You Should Know
Clogged fuel injectors can cause a range of noticeable engine problems, so it’s important to recognize the signs early. One common sign is engine misfires or rough running during acceleration, which indicates inconsistent fuel delivery.
Clogged fuel injectors cause engine misfires and rough acceleration, signaling inconsistent fuel delivery.
You might also notice a drop in fuel efficiency and increased emissions, signaling that fuel isn’t spraying properly. Difficulty starting the engine or stalling soon after ignition can point to fuel delivery issues caused by clogged fuel injectors.
Unusual engine noises or a loss of power while driving often suggest restricted fuel flow. Additionally, black smoke from the exhaust indicates incomplete combustion from uneven or insufficient fuel spray.
Recognizing these signs early can help prevent further engine damage and ensure smoother performance.
Tools and Materials Needed for Fuel Injector Cleaning
Before you start cleaning your fuel injectors, gather the essential tools and materials to make the process smooth.
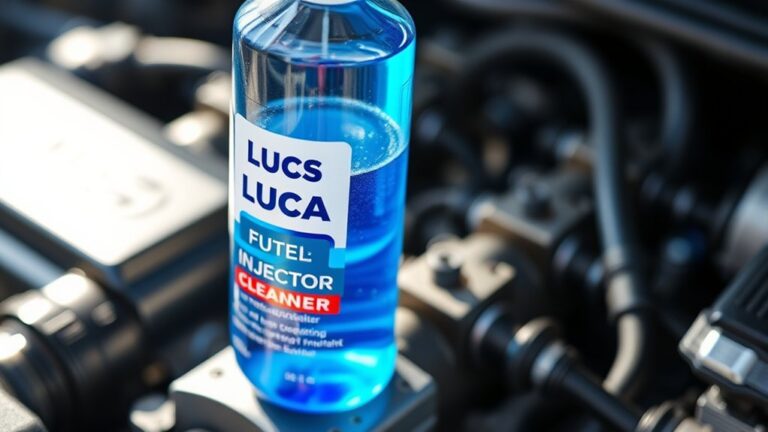
First, you’ll need a fuel injector cleaning kit, which usually includes a pressurized canister, adapters, and hoses designed to attach directly to the fuel rail and fuel line.
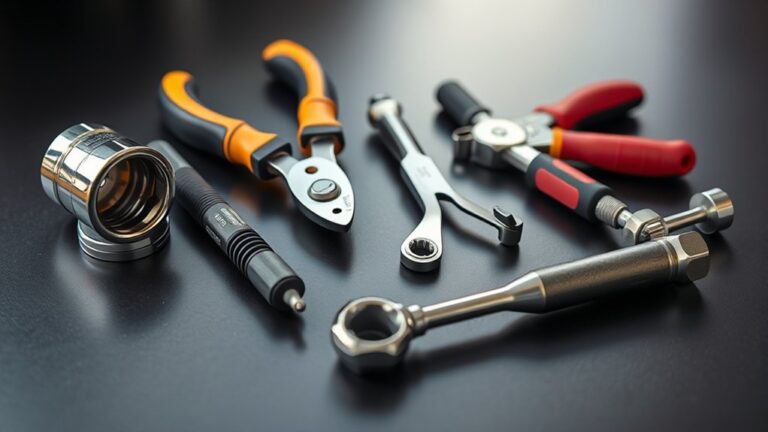
Second, have basic hand tools like wrenches, screwdrivers, and pliers ready to remove and reinstall the injectors safely.
Third, a fuel injector tester or multimeter is helpful to check the injectors’ performance before and after cleaning.
Don’t forget safety gear like gloves and eye protection to guard against fuel sprays or chemical cleaners.
Rags or paper towels are handy for catching drips and keeping your work area clean throughout the process.
Safely Relieve Fuel System Pressure Before Starting
Relieving the fuel system pressure is a crucial safety step before removing any components. To do this, start by disconnecting the negative terminal of the battery to prevent electrical sparks.
Relieve fuel pressure by disconnecting the battery’s negative terminal to ensure safety before servicing.
Next, remove the fuel pump relay or fuse from the fuse box to cut power to the fuel system. Start the engine and let it run until it stalls—that indicates the fuel pressure has been relieved.
Turn off the ignition and open the fuel filler cap to release any residual pressure in the tank. To guarantee safety, use a fuel pressure gauge to verify that the fuel pressure has dropped to zero.
Only once you confirm the pressure is gone should you proceed with removing or working on the fuel injectors.
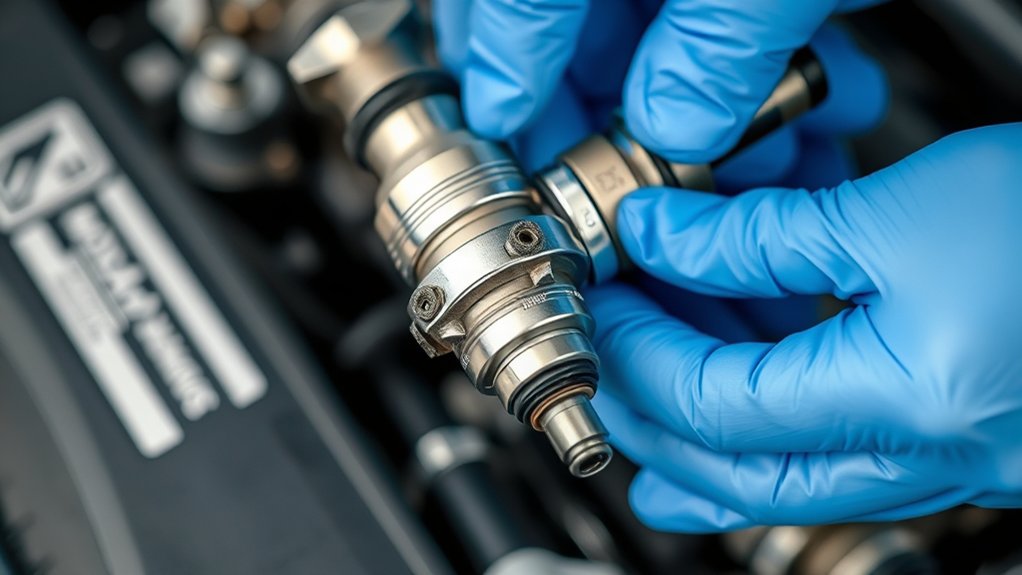
How to Inspect and Prepare Your Fuel Injectors
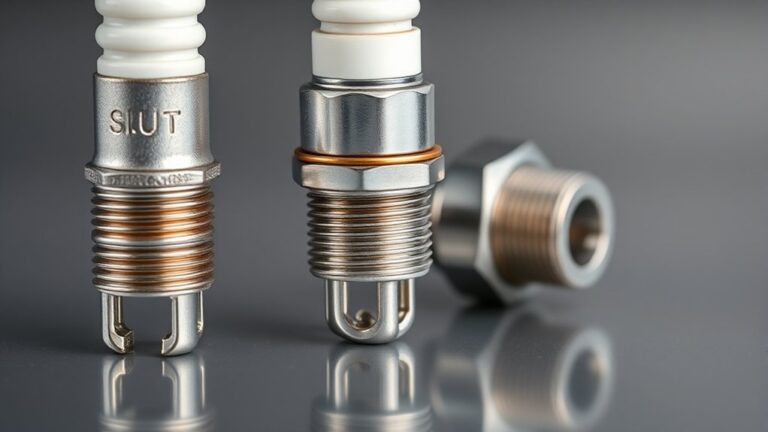
Inspecting and preparing your fuel injectors is an important step to make sure they work properly and deliver the right amount of fuel. First, visually check each fuel injector for clogs, cracks, or damage to the O-rings and filter strainers.
Next, carefully remove the O-rings and inspect them for cracks or deformation. Replace them if needed. Then, examine the filter strainers for dirt or damage, cleaning or replacing them as necessary.
Make sure all injector holes are open and free of obstructions by gently blowing compressed air or using a fine wire. Finally, check that electrical connectors and wiring are intact and working correctly.
Using a cleaning kit during this process can help ensure your fuel injectors are fully prepared for proper cleaning and peak performance.
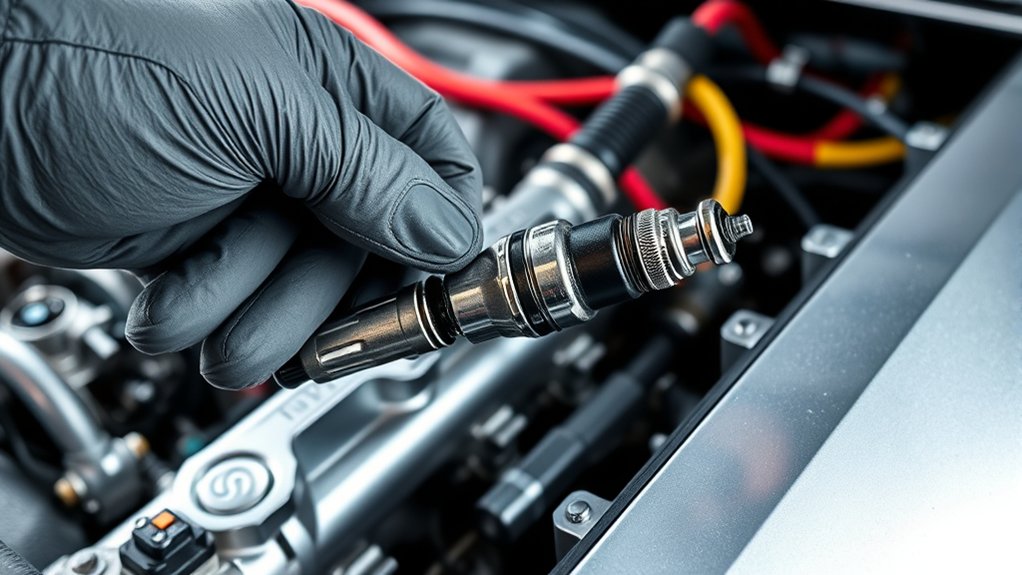
Step-by-Step Guide to Removing and Cleaning Fuel Injectors
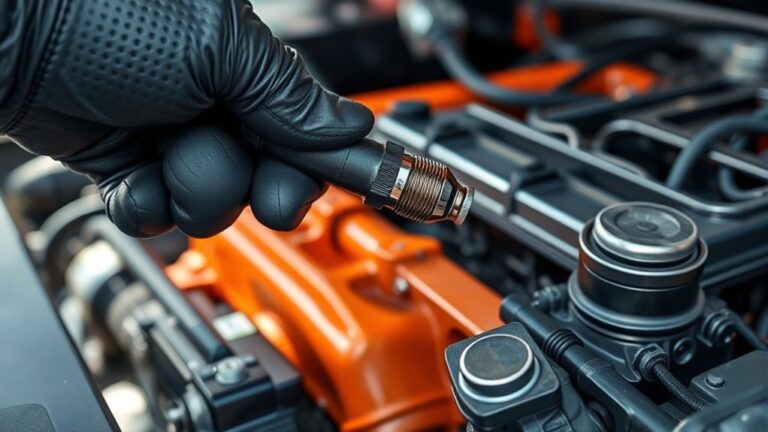
To remove your fuel injectors, start by disconnecting the fuel rail. Carefully pull the injectors out after unplugging the electrical connectors.
Next, check the injectors for clogs, damage, or debris. Replace O-rings and strainers if needed.
Finally, clean the injectors with a hose and carburetor cleaner before reinstalling. Then, check for leaks to make sure everything is sealed properly.
Accessing the Fuel Injectors
Accessing the fuel injectors is pretty straightforward but requires some care to avoid damage. First, remove the engine cover if needed so you can see the fuel rail clearly.
Next, follow these steps:
- Carefully disconnect the electrical connectors from each fuel injector to prevent any damage.
- Loosen and remove the bolts holding the fuel rail, then gently lift it to expose the injectors underneath.
- Carefully twist and pull each fuel injector out of its socket, checking the O-rings for cracks or damage.
Keep track of all components and handle everything carefully to avoid any damage during removal. Proper access makes it easier to clean and inspect your fuel injectors properly.
Removing and Inspecting
Before removing the fuel injectors, make sure all fuel system pressure is relieved to prevent leaks or spray. Disconnect the negative battery terminal for safety.
Start by disconnecting the electrical connectors from each fuel injector. Then, loosen the fuel rail mounting bolts carefully and lift the rail without damaging the injectors.
Gently twist and pull each fuel injector out of its port. Check the O-rings for cracks or deformation and replace them if needed. Remove the filter strainers from the injectors with a screwdriver, and look for blockages or damage.
As you take out the injectors, be sure to document their placement and orientation. This will help you reinstall them correctly later.
This process prepares your fuel injectors for cleaning. You’ll use a cleaning kit to restore their maximum function.
Cleaning and Reinstalling
Wondering how to effectively clean your fuel injectors? First, carefully remove the intake manifold and disconnect the fuel rail and electrical connectors.
Then, gently twist and pull out each injector after loosening the mounting bolts, inspecting O-rings and seals for damage. To clean the fuel injectors:
- Use a hose, carburetor cleaner, and a 12V power source to flush out deposits inside the injectors.
- Check for clogs, damage, or oil residue, replacing O-rings if cracked or deformed.
- Reinstall the injectors with new O-rings and reassemble the fuel rail, making sure all connections are secure.
This process helps guarantee your fuel injectors are thoroughly cleaned and properly reinstalled, restoring peak performance and efficiency.
Reinstall Injectors and Check for Leaks Carefully
When reinstalling your fuel injectors, make sure the O-rings are seated correctly and lubricated with engine oil to prevent leaks.
Secure the fuel rail and injectors tightly using the correct clips or bolts, following the manufacturer’s specs. Then, pressurize the fuel system and carefully inspect all connections for leaks before starting the engine.
Proper Seal Installation
Reinstalling the fuel injectors requires careful attention to guarantee a proper seal and prevent leaks. First, verify the O-rings are properly seated and lubricated with engine oil to maintain a good seal.
Next, confirm all electrical connectors are securely attached and that the fuel rail is tightly reinstalled. Finally, carefully tighten the fuel rail bolts to manufacturer specifications, avoiding over-compression that could damage the O-rings.
Before starting the engine, use a fuel pressure gauge to check for leaks at the injectors and connections. Inspect the area around the injectors for signs of fuel leaks or drips.
Ensuring these steps helps maintain a proper seal and prevents future fuel leaks, keeping your engine running smoothly.
Leak Inspection Techniques
After securing the fuel injectors and making sure the O-rings are properly seated, it’s important to carefully check all connections for leaks before starting the engine. Use a flashlight to look at the fuel rail, injectors, and fittings for any signs of fuel or wetness.
Pressurize the fuel system with the engine off, then apply a soapy water solution to the connections. Bubbles will show you if there are any leaks. Tighten all fuel rail mounting bolts and electrical connectors to the manufacturer’s torque specs to ensure a proper seal.
Once everything is back together, start the engine and watch the fuel injectors and connections for several minutes. Look for slow drips or leaks, and tighten or reseal as needed to prevent fuel leaks and keep everything safe.
Test Drive and Observe Engine Performance After Cleaning
Have you started the engine and listened carefully to its idle? You should hear a smooth, steady engine performance without misfires or hesitation.
Next, take your vehicle for a short test drive to see how well the engine responds during acceleration and to ensure everything runs smoothly.
During this test drive, focus on:
- Noticing any strange noises or stalling that might mean the cleaning isn’t complete or there are still clogs.
- Checking if your fuel efficiency has improved compared to before cleaning.
- Watching how smoothly the engine runs over several miles.
Repeat this process a few times, especially on different drives, to make sure the engine keeps performing well.
This helps confirm that your fuel injectors are cleaned properly and your vehicle is running at its best.
Frequently Asked Questions
What Is the Best Way to Unclog a Fuel Injector?
The best way to unclog a fuel injector is by using a high-quality injector cleaning kit with pressurized cleaning. This method thoroughly removes deposits and helps restore proper flow.
You can also add a fuel injector cleaner additive to your tank and run the engine. This is an easy way to help break down buildup without removing the injectors.
For more stubborn clogs, consider removing the injectors and cleaning them manually with cleaner and DIY tools. Connecting a pressurized cleaning system directly to the fuel rail can give a deep clean. Regular maintenance like this keeps your injectors functioning smoothly.
Can You Unblock Fuel Injectors?
Yes, you can unblock fuel injectors. Start by using a specialized injector cleaner additive or a pressurized cleaning kit to remove deposits.
If needed, remove the injectors for inspection and targeted cleaning. While doing this, replace any damaged O-rings and filter strainers to prevent future clogs.
Regular maintenance and cleaning help keep your injectors clear, which ensures your engine runs smoothly and efficiently.
Is It Possible to Clean Fuel Injectors Without Replacing Them?
Yes, you can clean fuel injectors without replacing them. Imagine removing stubborn carbon deposits that clog the tiny nozzles—specialized injector cleaners or manual cleaning tools can do this effectively.
If your injectors aren’t damaged internally, this process restores performance and extends their lifespan. Professional cleaning services also deep-clean your injectors, saving you money and preventing costly replacements.
Regular maintenance keeps your engine running smoothly.
What Are the Signs That a Fuel Injector Is Clogged?
You’ll notice your engine misfiring, running roughly, or hesitating during acceleration.
A sudden drop in fuel efficiency and increased emissions also point to clogged injectors.
If your car’s hard to start or stalls soon after ignition, fuel delivery might be compromised.
Unusual engine noises or a loss of power, along with black smoke from the exhaust, further indicate that your fuel injectors could be blocked or partially obstructed.
Conclusion
Now that you’ve learned how to clean your fuel injectors in just seven simple steps, you’re ready to improve your engine’s performance. Imagine smoother acceleration and better fuel efficiency—sounds great, right?
With the right tools and a little effort, you can keep your vehicle running smoothly without costly trips to the mechanic.
Are you ready to give your engine the clean boost it deserves? Unclogging fuel injectors is easier than you think and can make a big difference in how your car runs.