
How Long Does It Take to Replace Shocks – A Step-by-Step Guide
Replacing shocks is a common maintenance task that many vehicle owners find daunting. If you’ve ever wondered how long it takes or felt overwhelmed by the process, you’re not alone. Many people struggle with figuring out the right time and method for replacing shocks on their vehicle.
Replacing shocks typically takes around 2 to 4 hours, depending on your vehicle’s type and suspension setup. Smaller cars may take less time, while trucks or SUVs with rust-prone parts can need longer.
You’ll spend time preparing tools, safely lifting the vehicle, and removing old shocks with penetrating oil. Proper planning and following a step-by-step process can speed things up.
Keep going to find out more tips for a smooth, efficient shock replacement.
Key Takeaways
Replacing all four shocks usually takes about 2 to 4 hours. The exact time depends on your vehicle type and its current condition.
For the front shocks, plan for around 1 to 2 hours per side. Rear shocks tend to be quicker, taking roughly 20 to 30 minutes each.
Getting prepared beforehand can really help. Gathering your tools and supporting the vehicle properly can make the process smoother and save you time.
If your suspension system is rusty or complicated, it might take longer than the usual 2-4 hours.
After replacing the shocks, a wheel alignment is a good idea. It adds about 30 minutes to an hour to the process but ensures everything is set correctly.
How Long Does Shock Replacement Usually Take?
Replacing shocks usually takes about 2 to 4 hours for all four on a vehicle. The main part of the job is removing and installing new shock absorbers, which are key for a smooth ride.
Front shock replacement typically takes 1 to 2 hours per side, depending on how easy it is to access the shock. Rear shocks are usually quicker, often done within 20 to 30 minutes per side.
The total time can go up if bolts are rusted or hard to remove, adding extra hours. If you’re doing it yourself, having the right tools and some experience can help speed things up.
Preparing Your Vehicle: Tools, Safety Tips, and Setup
Before you start, make sure your vehicle is on a level surface and the parking brake is engaged.
Gather essential tools like a jack, jack stands, socket set, and safety glasses. Remember to wear protective gear for safety.
When lifting your vehicle, do it at the designated points to ensure safety and make the shock replacement process easier.
Essential Tools Needed
To guarantee a smooth and safe shock replacement, you’ll need to gather the right tools beforehand. Essential tools include a hydraulic jack, jack stands, socket set, and wrenches. These tools help you lift the vehicle securely and remove the shocks efficiently.
| Tools Needed | Purpose |
|---|---|
| Hydraulic Jack | Lifts the vehicle safely |
| Jack Stands | Supports the vehicle securely |
| Socket Set | Removes bolts and nuts |
| Wrenches | Loosens and tightens fasteners |
Make sure your vehicle is parked on a level surface and supported with wheel chocks. Wearing safety gloves and eye protection is also important to prevent injuries while working with tools and debris.
Safety Precautions
Ensuring safety is essential when working on your vehicle’s shocks, and proper preparation sets the foundation for a smooth process. Follow key safety precautions to protect yourself and prevent damage.
Park your vehicle on a level surface and engage the parking brake. Use a jack and jack stands rated for your vehicle’s weight, following the manufacturer’s instructions to securely lift and support the car.
Gather all necessary tools, including socket sets, wrenches, and possibly spring compressors, to avoid rushing during removal and installation. Wear safety glasses and gloves to shield yourself from debris, rust, or accidental contact with sharp or moving parts.
Before starting, spray shock mountings with penetrating oil like WD-40 to loosen rust and make bolt removal easier.
Vehicle Preparation Steps
Preparing your vehicle properly is key to working safely and efficiently on your shocks. Start by parking on a level surface and engaging the parking brake for stability.
Gather essential tools like a jack, jack stands, socket set, and wheel chocks. These will help you lift and support the vehicle safely.
Before lifting, loosen the lug nuts slightly. This makes wheel removal easier once the vehicle is raised.
Use wheel chocks on the opposite wheels to prevent rolling during suspension work. Always check your vehicle’s owner manual for specific lifting points and safety tips.
Proper vehicle preparation ensures a secure setup, reduces risks, and makes the shock replacement process smoother, saving you time and effort.
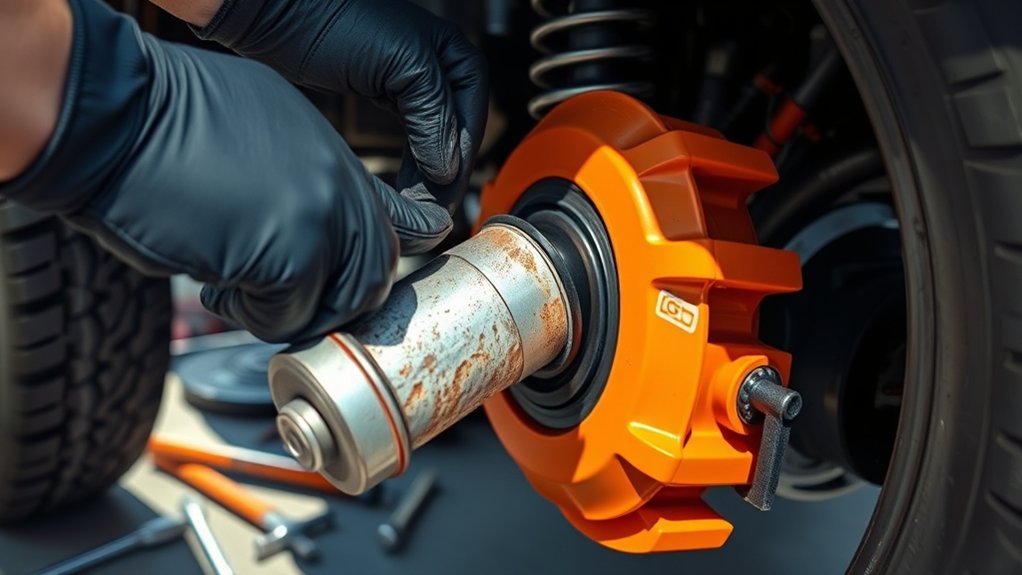
How to Remove Old Shocks and Struts: Step-by-Step Guide
To remove the old shocks and struts, start by loosening the lug nuts and lifting the vehicle securely. Spray the mountings with penetrating lubricant to loosen rust and debris before unfastening the top bolts and disconnecting the shocks.
Carefully remove all hardware and old shocks, keeping track of every piece for the installation of new parts. This will make putting everything back together much easier later on.
Prepare Vehicle and Tools
Before removing the old shocks and struts, you need to get your vehicle ready and gather the right tools. Park on a level surface, engage the parking brake, and loosen the lug nuts.
Then, lift the vehicle with a jack and secure it with jack stands. Remove the wheels to access the shocks, which are usually located in the wheel well or under the vehicle.
Spray the shock mountings and bolts with penetrating oil like WD-40 or PB Blaster to loosen rust and debris. This makes removal easier.
Use a ratchet and socket to unbolt the top and bottom mounting points of the shocks or struts. Support the suspension during removal to prevent sudden movement, ensuring a safe and efficient process.
Remove Suspension Components
Once the vehicle is securely lifted and the wheel is removed, you can start disconnecting the suspension components. Begin by spraying the shock or strut mounting bolts with penetrating oil, like WD-40, to loosen rust and debris.
Next, use a ratchet and socket set to unbolt the top mounting bolts, which are often located inside the trunk or engine bay. Be careful not to damage any surrounding parts.
Then, disconnect the lower mounting bolts, and carefully wiggle and remove the shock absorber or strut assembly from the suspension.
If you’re replacing coil springs separately, make sure to use a spring compressor and follow the manufacturer’s instructions for safety.
Here’s a quick overview of the key steps:
| Step | Action |
|---|---|
| 1 | Spray mounting bolts with penetrating oil |
| 2 | Unbolt top mounting bolts |
| 3 | Disconnect lower mounting bolts |
| 4 | Remove shock or strut assembly |
| 5 | Use spring compressor if needed |
Installing New Shocks and Struts: Time Estimates and Tips
Installing new shocks and struts can take anywhere from 2 to 4 hours, depending on your vehicle and the parts you’re using. Replacing all four shocks usually falls within that time frame.
If you’re also replacing struts, expect to add about an hour because of the extra disassembly involved, especially for the strut assembly. Using complete assembled units can make things faster.
A professional mechanic might finish in around 1 to 2 hours per side if they use ready-to-install units. Properly supporting the vehicle with a jack and jack stands is crucial for safety and making the job smoother.
Keep in mind, if bolts are rusted or some suspension parts are stubborn, it might take extra time. Staying organized and having the right tools on hand will definitely help speed up the process.
Is a Wheel Alignment Needed After Replacing Shocks?
After replacing your shocks, getting a wheel alignment is highly recommended to guarantee your vehicle handles properly and your tires wear evenly. Proper alignment helps maintain ideal vehicle handling, prevents uneven tire tread wear, and reduces suspension problems down the line.
Most mechanics verify and perform a wheel alignment before you drive away, ensuring everything is set correctly. If you skip this step, you risk poor handling, increased tire wear, and potential suspension damage.
Keep in mind that a wheel alignment typically takes about 30 minutes to an hour, depending on your vehicle and shop. To sum up, a wheel alignment isn’t just a good idea. It’s an essential part of the shock replacement process.
It ensures your vehicle performs safely and efficiently after the repair.
How Vehicle Type Affects Replacement Time and Cost
The type of vehicle you own really affects how long and how much it costs to replace shocks. Smaller cars like sedans usually take about 1 to 2 hours per axle, while bigger trucks might need 2 to 4 hours.
Cost-wise, luxury and heavy-duty models tend to be pricier because of more expensive parts and labor. Vehicles with independent suspensions or rust-prone parts can take longer due to complex procedures or stubborn bolts.
The design of your suspension system also matters. For example, integrated struts versus stand-alone shocks can influence the process. Here’s a quick comparison:
| Vehicle Type | Typical Replacement Time | Cost Factors |
|---|---|---|
| Small sedan | 1-2 hours | Lower parts and labor |
| Truck | 2-4 hours | Higher due to size and complexity |
| Luxury vehicle | 2-3 hours | Higher parts cost |
| SUV with rust-prone parts | 2-4 hours | Longer due to corrosion |
| Sports car with independent suspension | 2-3 hours | Complex removal process |
Tips to Speed Up Shock Replacement and Avoid Delays
To speed up shock replacement and prevent delays, preparing all necessary tools and replacement parts beforehand is essential. This way, you won’t waste time searching for equipment or making multiple trips to the auto parts store.
Make sure to have a hydraulic or spring compressor ready, especially for Front Struts, to make removing the old shocks quicker. Working with a partner can help lift and align components, saving you time on heavy or stubborn parts.
Following detailed, vehicle-specific repair guides or tutorials helps streamline each step and diagnose issues efficiently. Keep rusted or stubborn bolts lubricated with penetrating oil beforehand to prevent time-consuming struggles.
Knowing how long the job takes depends on your experience, but preparation will always cut down on unnecessary delays.
Frequently Asked Questions
How Long Should It Take to Change Shocks?
It usually takes about 1 to 2 hours per axle if you’re doing it yourself with the right tools.
If you’re a professional mechanic, expect 2 to 4 hours for all four shocks.
Keep in mind, rusted or stubborn bolts can slow you down, and replacing struts adds extra time.
How Much Should 4 Shocks Cost?
Think of shocks as the unsung heroes of your ride, quietly maintaining comfort and control.
Four shocks typically cost between $450 and $1,100, depending on your vehicle and quality. Premium or specialized shocks can go over $300 each.
Labor adds $200 to $400, but doing it yourself can save some cash.
Can I Still Drive With Bad Shocks?
You can technically drive with bad shocks, but it’s not safe. Worn shocks decrease your vehicle’s stability, increase stopping distances, and make your ride rough and unpredictable.
Continuing to drive this way can also damage other suspension parts, leading to costly repairs. To stay safe and maintain proper handling, it’s best to replace your shocks promptly.
Don’t ignore the warning signs—address the issue as soon as possible.
How Many Labor Hours Does It Take to Replace Struts?
Replacing struts usually takes about 2 to 4 hours for all four. It can be quicker if you’re experienced or working on a straightforward vehicle.
On a professional lift with the right tools, expect roughly 1 to 2 hours per side. If rusted parts or complex disassembly are involved, add an extra hour.
Keep in mind, full assembly and alignment can extend the process by 1 to 2 hours.
Conclusion
Think of replacing your shocks like tending to a delicate garden—patience and care lead to the best results. With the right tools and a steady hand, you’ll bring back your ride’s comfort and safety.
A little preparation can turn what seems like a lengthy task into a smooth process. It’s much like a seasoned gardener tending to each plant with attention and care.
Take your time, stay safe, and before you know it, you’ll be enjoying a ride as smooth as a well-tended landscape in full bloom. Remember, replacing shocks is a key part of maintaining your vehicle’s performance and safety.